Wednesday 30 October 2013

Pumpkin Cupcakes with Orange Cream

Posted by Lisa at 04:42 0 comments

Not everything in the kitchen goes according to plan. Take these cupcakes. Whilst this version of a pumpkin cupcake is awesome the previous attempt was not. They were heavy, doughy and looked like a rock cake crossed with an ugly muffin. Whilst the flavours were right, they were definitely not.

Kitchen mishaps can be fun (by mishaps I mean wonky food, not burns or knife injuries- they are definitely not fun). This mishap gave me chocolate-pumpkin truffles. I blended the hideous cupcakes, added a couple of spoonfuls of frosting and rolled out small balls which I dusted in cocoa. Wallah! No longer a waste of ingredients but an extra treat!

Not all mishaps can result in truffles; some become dog food. Poor puppies… you know it was a tragic day in the kitchen when even the dogs won't eat your cooking!

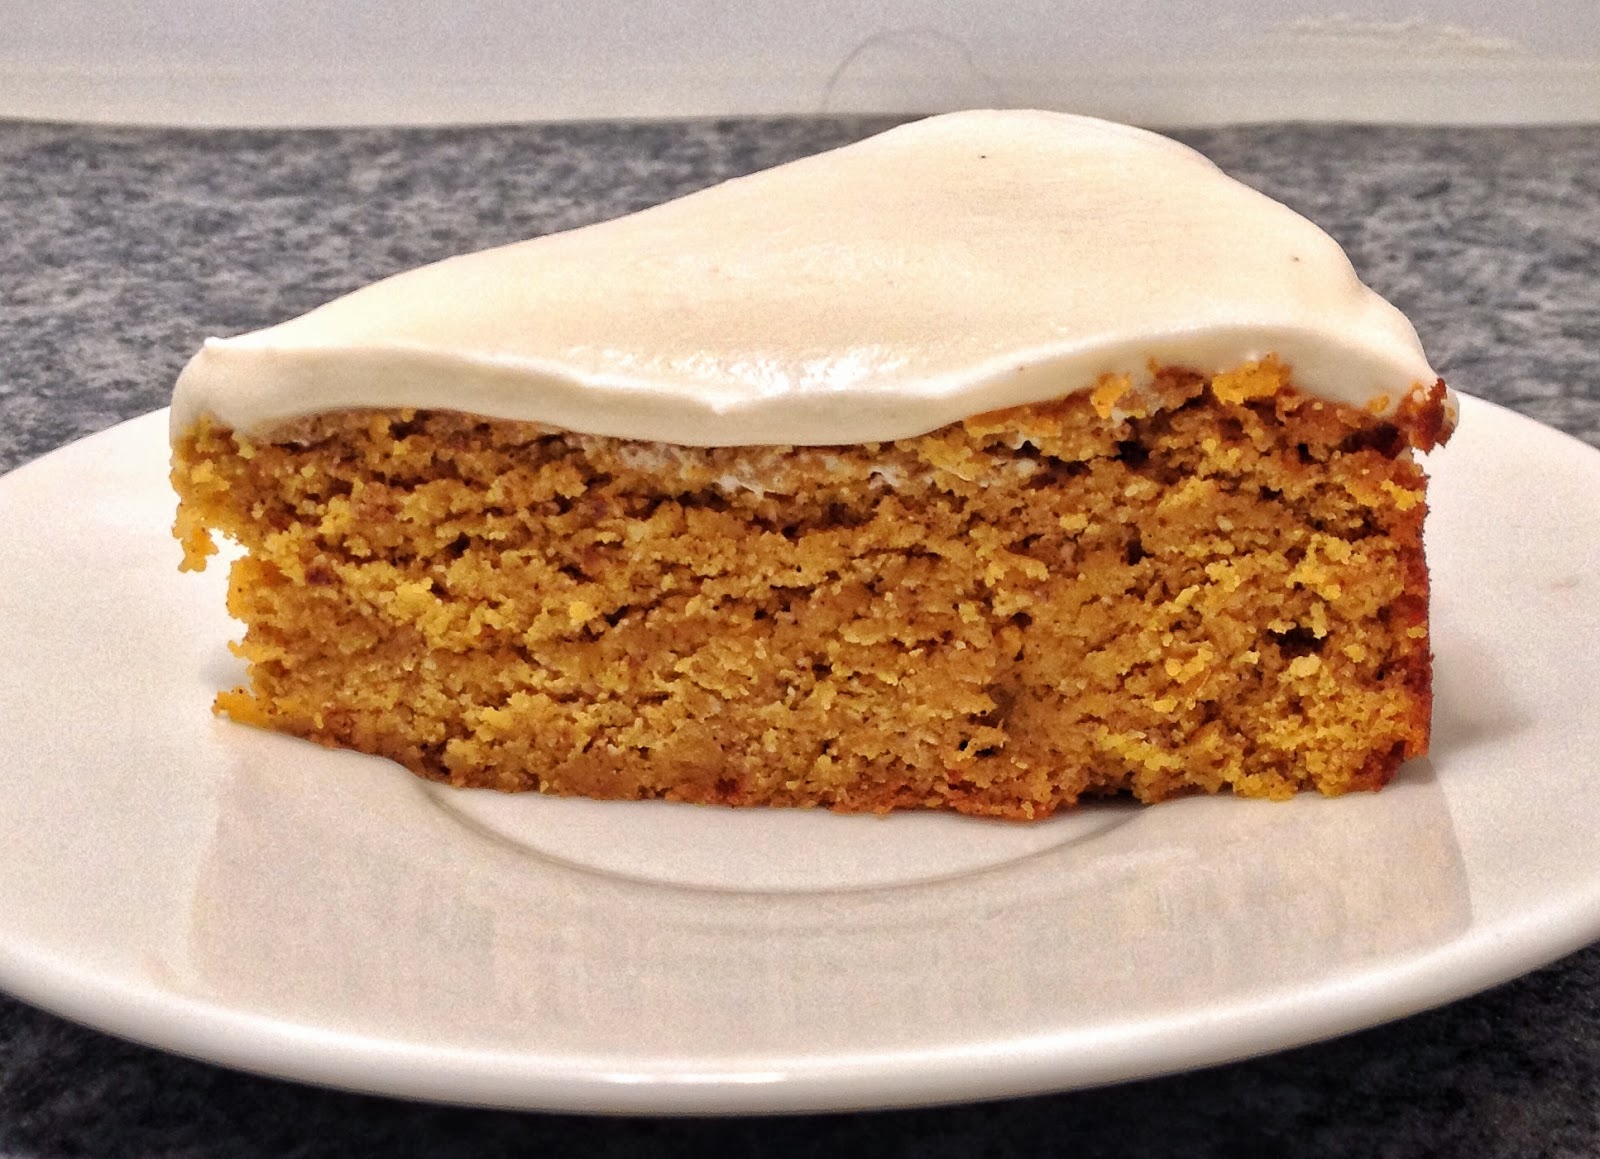
These cupcakes are surprisingly sweet and not at all rock cakey. The addition of orange zest in the cake helps to overcome any fears that pumpkin is not a dessert food, and the orange cream adds an extra oomph. I do like these… quite a lot. So much so that I might start celebrating Halloween more often!

PUMPKIN CUPCAKES WITH ORANGE CREAM
Makes 12 cupcakes with frosting

Cupcakes
INGREDIENTS
1/2 cup, packed, Dates
1/4 cup boiling water
3 eggs separated
2 Tablespoons Maple Syrup
1teaspoon Vanilla Extract
150 grams Pumpkin puree (I used butternut pumpkin, diced and roasted in moderate oven for 40 minutes)
100g Apple Sauce (see recipe below)
2/3 cup Coconut Flour
1 teaspoon baking powder
1/2 teaspoon bicarb soda
1 teaspoon Mixed spice
Zest of 1 orange
1/2 cup (- 1/2 Tablespoon) Milk of choice
1/2 Tablespoon vinegar

INSTRUCTIONS
Preheat oven to 175C/350F
Place dates and boiling water in a bowl (making sure dates a covered) and allow to sit and soften (approximately 20 minutes).
Place dates in blender and blend until a smooth date paste is formed (add an extra teaspoon of water if required).
Place egg whites in the bowl of a kitchen stand with a whisk attachment fitted.
Whisk on high until soft peaks form.
Add maple syrup 1 tablespoon at a time and continue to whisk on high.
Add purred dates and vanilla extract and whisk on high.
Add egg yolks and whisk until combined.
Place pumpkin puree and apple sauce in a blender and blend until combined
With mixer on low add pumpkin and apple mix.
Sift dry ingredients together.
Add orange juice, zest and vinegar to milk.
Add dry ingredients and milk mix alternately whilst whisking on low until combined.
Whisk on high for 1 minute.
Divide evenly amongst 12 greased cupcake liners.
Bake for 22-25 minutes, or until baked through.
Allow to cool in tin for 15 minutes then remove.
Allow to cool completely before frosting with Orange Cream.

Orange Cream
INGREDIENTS
1 cup of Coconut Cream, can placed in fridge overnight (minimum 5 hours)
2 teaspoons Vanilla Extract
1 teaspoon Maple Syrup
2 teaspoons Orange Juice
Zest of 1 Orange

INSTRUCTIONS
Remove cream can from the fridge and scoop out the thick cream into the bowl of a kitchen mixer with a whisk attachment. Discard watery component
Whisk on high until thick.
Add extract, maple syrup, juice and zest. Whisk on high until combined.
Store in fridge until required.
Frosted cupcakes will need to be stored in the fridge.

Apple Sauce
INGREDIENTS
4 apples, peeled and cut into small pieces
3/4 cup water

INSTRUCTIONS
Place apples and water in saucepan. Cover with lid.
Bring to boil, then simmer for 7-10 minutes, or until apple is soft.
Store in fridge.

Sunday 27 October 2013

Pumpkin Spice Cake with Honey Frosting

Posted by Lisa at 04:46 0 comments

I was in my local supermarket this week when I found myself in heaven;
NKOTB, Marteka, Backstreet Boys. I even got to get my aisle groove onto Right Said Fred... yes I was too sexy for the canned goods aisle! It was like a time machine; whisking me back to the nineties. A simpler time where song lyrics where about holding hands, singers wore clothes in their film clips and song beats consisted of more than 2 annoyingly repetitive beats.

At my gym they only play a cable music channel; not the good one which sees you curling to Love Shack or squatting to Richard Marx, but the channel that now has me singing along to the latest fad boy band and wondering what the hell happened to Hannah Montana. I know, I could wear headphones but then I couldn't hear how loud I was grunting! Embarrassingly, I think I now like 1D (even the fact that I have referred to them as 1D means that I am losing my nineties cool).

Not everything about the nineties was as cool as the Divinyls. One winter I wore overalls and a flannel shirt (sadly more than once). One summer I had a pair of tie dyed high cut bathers (don't even try to picture them because they are too wrong to ever be seen again). I even got a Rachel haircut (but so did most of the TV watching female population at the time). The nineties... slightly cooler than eighties but without the flare of the seventies!

I wonder what kids of this generation will look back on as dorky and regrettable? Fingers crossed it involves their bi-minute status updates and inability to use grammar respectfully! Gosh, I sound like an old, cranky woman with cats!

Now, without a clever segue...

Halloween isn't much of an occasion in Australia, so stereotypically all I can think of is Pumpkin! So predictably my Halloween posts will be pumpkin inspired... I promise next year to be more inventive. This Pumpkin Spice Cake with honey frosting is practically dinner and dessert combined, and it doesn't hurt that it's super delicious.  

Notes:
In Australia we don't have Pumpkin spice, so the spices listed below are the individual spices. Of you do have pumpkin spice substitute 3 teaspoons of it for the spices listed in the recipe.

I have been asked if it is OK to use canned pumpkin in the recipes I make. In Australia we don't have pumpkin purée, but from what I have read it may be moister than pureeing roasted pumpkin. The simple answer, I can't try it so I can't vouch for it. My suggestion would be to slightly warm the canned purée to remove some of the moisture.

PUMPKIN SPICE CAKE WITH HONEY FROSTING

Cake
INGREDIENTS
2/3 cup Coconut Flour
1/2 cup Almond meal
3 teaspoons baking powder
1/2 teaspoon salt
1 1/2 teaspoons Cinnamon
3/4 teaspoon ginger
1/2 teaspoon Nutmeg
Dash of Allspice
Dash of Cloves
360grams pumpkin purée (I used Butternut pumpkin- diced and roasted for 45 minutes in a moderate oven then puréed)- Measure purée not diced pumpkin.
1/2 cup apple sauce (see recipe below)
4 eggs, separated
3/4 cup Maple Syrup

INSTRUCTIONS
Pre-heat oven to 175C/350F
Grease and line a 20cm/8 inch round cake tin.
Shift the dry ingredients together.
Purée the apple and pumpkin together.
Add the egg whites to the bowl of a kitchen stand fitted with a whisk attachment.
Whisk the egg whites until soft peaks from.
Slowly, add the Maple Syrup whilst whisking on high.
Add the egg yolks and continue to whisk until combined.
Turn the mixer to low and add the pumpkin/apple purée.
Add the dry ingredients to the wet and whisk on low until combined.
Scrape down the sides of the bowl.
Whisk on high for 1 minute.
Pour cake into prepared tin.
Bake for 45 minutes, or until cooked through.

Honey Frosting
INGREDIENTS
1 can Coconut Cream, Refrigerated overnight with the thick part removed and the watery part discarded
2-4 Tablespoons Honey, slightly warmed to make pourable

INSTRUCTIONS
Place thickened cream into the bowl of a kitchen stand mixer fitted with a whisk attachment.
Whisk on high until thickened.
Add the honey, 1 tablespoon at a time, until the desired taste is reached.
Place cream in the the fridge to thicken before spreading over the cake. ,

Apple Sauce
INGREDIENTS
4 apples, peeled and cut into small pieces
3/4 cup water

INSTRUCTIONS
Place apples and water in saucepan. Cover with lid.
Bring to boil, then simmer for 7-10 minutes, or until apple is soft.
Store in fridge.

Wednesday 23 October 2013

Banoffee Pie

Posted by Lisa at 01:52 0 comments

This morning I listened to the ‘Ghost Busters’ theme song about 10 times. That’s 41 minutes of “who you gonna call” and “nah nah nahh-ing”, accompanied by crazy little boy dancing and ghosts being sucked into the vacuum. Don’t be alarmed… apparently these ghosts were harmless, and once sucked in to the Dyson they turned into baby ghosts who are not nasty at all (or so I was informed by 4yo H).

According to H, these ghosts are “as fast as a stinky shoe” (his latest favourite saying), so to catch them we need to be very sneaky and creep up on them (with the vacuum in tow). Once close enough the vacuum tube (sorry the Ghost catching tube device) can be unleashed and put into action. There is no escape for the ghosts now!

The dilemma became what to do with the ghosts once they were caught. The vacuum is only small, and if you are going to catch the marshmallow man then you’re going to need all the space you can get. I was told that the ghosts shrink into babies, leaving a lot more room, and some of them just disappear. I guess that’s a logical explanation from a 4yo on a not so logical subject!

The imagination of a child is amazing. At Kinder the other day H was telling his kinder teachers all about Italy; how lovely the weather is, how nice the people are. He was a budding travel agent, so much so that they believed that he had been there! (for the record he has not) Their ability to take in new information, conjure up new worlds and people is enviable… their ability to follow simple instruction relating to room tidying and basic hygiene is not.

Thankfully, the ghosts are temporarily gone and we can go back to eating pie.

This pie is AMAZING. Yes, I know I’ve said that before but it turns out this pie is the most amazing of all the amazeings. Until I googled what to do with over ripe bananas recently I had never heard of a Banoffee Pie. This is my interpretation… a slight bent on the classic.

Notes:
There are many steps in this recipe. My advice is to start a minimum of 24hours before you want to serve the dessert.
Make the biscuits/base at the same time as making the banana cream and the caramel and leave them overnight. The next morning, add the whipped cream to the banana cream and pour into the base, and make the caramel whipped cream.
A couple of hours before serving spread the caramel whipped cream on top and allow to sit in the fridge before serving.


BANOFFEE PIE
Serves 16, approximately 330 calories per slice

BUTTERNUT SNAP PIE CRUST
Makes 1 base for a 20cm/8inch tin

INGREDIENTS
2 tablespoons coconut oil
1/2 cup Maple Syrup
1 egg
1/2 teaspoon vanilla extract
2 tablespoons golden syrup
Pinch of salt
1/2 teaspoon cream of tartar
1 teaspoon bicarb soda
1 1/2 cups Almond Meal
1 cup desiccated, unsweetened coconut
3 tablespoons arrowroot (tapioca) flour
1 tablespoon milk (Coconut, almond etc)
1/3 cup melted Coconut Oil

INSTRUCTIONS
Combine all the wet ingredients (except the milk) in a blender and mix until combined.
Add the dry ingredients and blend until combined. Add the milk and pulse in.
Place mixture in the fridge for a minimum 30 minutes.
Preheat oven to 175C/350F.
Place heaped tablespoons of mixture on the lined tray, at least 3cm (just over 1 inch) apart (this allows for spreading). Gently press with a fork to flatten slightly and create round shapes.
Place tray in fridge for 15 minutes.
Bake in oven for 16-18 minutes. The biscuits will be slightly brown on top.
Cool on tray for 5 minutes then transfer to a wire cooling
When biscuits are cool place them in a blender.
Process until biscuits are just broken.
Add the coconut oil and process again until fine crumbs are formed and the oil has ‘binded’ the biscuits.
Press crumbs into a lined and greased 20cm/8inch spring form cake tin  (a pie dish can also be used). Make sure the crumbs extend up the sides of the tin.
Place pie crust in fridge to set (at least 5 hours)

BANANA CREAM

INGREDIENTS
2 very very ripe bananas1
/3 cup coconut cream (taken from the top of a can that's been in the fridge overnight)
1/4 cup milk (almond, coconut etc)
1/3 cup maple syrup
2 Tablespoons arrowroot
1/2 teaspoon salt
3 egg yolks
2 1/2 teaspoons gelatin
 tablespoons coconut oil, melted
3/4 cup whipped coconut cream- measure after whipping (see recipe below)

INSTRUCTIONS
Combine the very, very ripe bananas, coconut cream and milk in a blender and puree until totally smooth.
Add in the maple syrup, arrowroot, salt and egg yolks. Blend until no banana lumps remain.
Pour the mixture into a medium saucepan.
Before heating the banana mixture, evenly sprinkle the gelatin over 1/4 cup cold water. Allow it set for 4 minutes.
Whisk the banana mixture in the saucepan over medium-low heat.
Continue to whisk and stir as the mixture will thicken and has a tendency to stick to the bottom of the pan.
Bring to a boil and continue to whisk vigorously for 3-4 minutes.
The mixture will be quite thick. Pour the thickened banana mixture in a blender (make sure you have cleaned it from earlier use) and add the gelatin mixture and melted coconut oil.
Blend until smooth.
Transfer the mixture to a heatproof container and leave in the fridge for at least 1 hour.
Remove the banana cream from the fridge and place in a bowl of a stand mixer with a whisk attachment.
Add the whipped coconut cream and whisk on low until combined, and no cream streaks remain.
Pour the whipped coconut cream into the refrigerated pie crust.
Place the pie into the fridge to set for at least 5 hours, but preferably overnight.

CARAMEL WHIPPED CREAM

INGREDIENTS
1 can Coconut Cream, opened and refrigerated over night (minimum 2 hours) (should be ½ cups)
6 tablespoons Caramel Sauce – add more if tasting requires.  (LINK)

INSTRUCTIONS
Remove thickened cream from the can, discarding watery remains.
Place cream in a mixing bowl and whisk on high until thick.
Make sure the Caramel sauce is runny but not warm (if it has thickened in the fridge you may need to loosen it over low heat. If the caramel is added hot to the cream it will cause the cream to ruin).
Add the caramel and continue to whisk until incorporated.
Place Caramel Cream in fridge to thicken.

Spread thickened caramel cream over the Banana Cream. There may be too much cream… in which case eat it as quickly as you can before anyone gets it!

Top the Banoffee pie with slices of banana.
Keep refrigerated.

Sunday 20 October 2013

Rhu-berry Meringue Pie

Posted by Lisa at 02:44 1 comments

Everyone has one. Their shameful little secret. Some are big; others can fit into a kitchen drawer. Mine filled an entire garage. You hope your visitors don't notice; that they don't see parts poking out. You try hard to deny that there's a problem, even lying about its severity.

Then one day it hits you, literally, as everything starts to fall down around you. It's the junk room.

The place where you throw anything and everything; from old phone chargers to university notes, bill notices from last year to broken old furniture. It's where things go... never to be found again.

Ours used to be the 3rd bedroom, before we needed it for 4yo H. More recently it has been the garage; until this weekend. I wish I'd taken a before shot because no one will ever believe that the clean, ordered space that we have now was ever a crammed, dirty, eyesore. Believe me it was!

2 days, 2 trips to the tip and a few sales on Facebook later we have a miracle... aka the new Man Cave.

My children had never seen the walls of the garage before today!

Cleaning the junk room is not the time to the timid. I was ruthless! Gone were the university notes I slaved over for hours, gone were the broken outdoor chairs that might one day come in handy (for what? they're broken!) and gone was the wonky kids tent that we bought at a garage sale when someone else was probably cleaning up their junk room.

Some decisions about what to throw out are easy, others are not. Possessions, however old or new, hold memories or hopes for the future. Does getting rid of them mean you get rid of the memory? Does letting go mean you can move forward? Does a decision today mean it the end of one chapter and the start of another?

Cleaning a space can be cathartic, smelly and dirty work. It can also be exhausting (just ask my husband who I think will be asleep before this blog hits your inbox!).

A reward for such a big weekends work? A pie as messy as the junk room was to begin with; Rhu-berry Meringue Pie. A tart rhubarb and blueberry pie which is balanced by the soft, delicate meringue peaks. The filling collapses on your plate, so it can be scooped up in the fluffy meringue. It tastes gooood!

NOTES:

This is a messy pie, but I think that is part of its charm. It makes it more rustic than chic.

If you want a firmer filling these are some options:

1. Add an extra tablespoon of arrowroot. The consistency of the filling will remain the same but it will be thicker .

2. Use gelatin instead of Arrowroot. I have not done this, but in theory it will result in a firmer, jelly like consistency. Add 3-4 teaspoons of gelatin (not tested - only an idea in theory) to the 1/4 cup of liquid and allow to sit for 5 minutes. Instead of boiling the mixture, simmer for  5 minutes. The consistency will be very different. The cool mixture would need longer to set in the crust before adding the meringue topping.


RHU-BERRY MERINGUE PIE
Makes 16 slices, each 136 Calories

PIE CRUST (adapted from Against all Grain)

INGREDIENTS
1/4 cup almond flour
1/2 cup coconut flour + 2 tablespoons  (available from health food and specialty stores)
1/4 teaspoon salt
1/4 teaspoon baking soda
1/4 cup coconut oil, softened
1/4 cup maple syrup (you could substitute honey etc)
1 egg
1 teaspoon vanilla

INSTRUCTIONS
Preheat oven to 175C/350F
Grease/Spray a 20cm (8 inch) spring form cake tin or pie dish (a 22cm/9inch can also be used)
Mix the dry ingredients in a blender.
In a separate small bowl, whisk together the wet ingredients.
Pour the wet ingredients into the dry, and blend until combined. A dough ball will form.
Roll the doughnut between 2 sheets of baking paper and trace a plate/tin bigger than tart tin.
Gently place circle in tin. Use excess dough to ensure an even edge.
Alternatively, spread dough evenly in tin and up edges by hand.
Pierce bottom of pie crust with a knife 4 to 5 times to prevent the dough 'bubbling'.
Bake for 15 minutes. Cool completely.
If using a spring form tin, remove the crust and place on a serving tray. This may be more difficult if using a pie tin and you may choose to construct the pie and serve from the tin.

RHUBARB AND BLUEBERRY PIE FILLING

INGREDIENTS
350 grams Rhubarb (measured after cutting into 2cm pieces); approximately 5 stalks
1 cup orange juice, freshly squeezed
1 cup water
450 grams Blueberries (I used frozen ones)
3 Tablespoons Arrowroot/Tapioca (See recipe  notes above on tips to make filling firmer)
2-3 Tablespoons Maple Syrup (this will depend on the desired tartness of the filling)

INSTRUCTIONS
Place the cut rhubarb in a saucepan with the orange juice and water.
Bring to a slow boil over medium heat.
Simmer for 5 minutes, or until the Rhubarb is tender and breaking down.
Strain the liquid from the rhubarb using a sieve with a small weave (holes), retaining the liquid.
Place the rhubarb and blueberries back in the saucepan, along with 1/2 a cup of the retained liquid and the maple syrup.
Bring the mixture to a warm temperature over a medium heat.
Taste the mixture a this point and add more maple syrup if required.
Meanwhile, mix the arrowroot with 1/4 of a cup of the retained liquid. Whisk to ensure it is well combined.
Add the arrowroot liquid mixture to the saucepan and bring to the boil, stirring constantly.
Once boiling, continue to stir for another minute.
Place the mixture in the fridge to allow to cool and thicken.
Once completely cooled, pour into the cooled pie crust (there may be filling left over).
Place filled pie crust in the fridge for at least 2 hours.

MERINGUE TOPPING

INGREDIENTS
2 egg whites
Dash of salt
1/2 cup maple syrup
1/2-1 teaspoon Vanilla Extract

INSTRUCTIONS
Preheat oven to 220C/440F (not required of using a kitchen blow torch)
Place the egg whites and salt in the bowl of a kitchen stand with a whisk attachment.
Whisk on high until soft peaks form.
Whilst still whisking on high, slowly add the maple syrup.
Add the vanilla.
Stiff, form peaks of meringue will have formed.
Spread evenly over the pie filling.
Place pie on a oven proof tray and place on bottom shelf of oven for 2-3 minutes, turning halfway.
Alternatively, use a kitchen blowtorch until desired counting is reached.
Serve.

Keep refrigerated when not eating.


Wednesday 16 October 2013

Choc-Hazelnut Tart (Paleo Rocher Tart)

Posted by Lisa at 03:46 0 comments

This week I found out that someone in Germany made one of my recipes. Germany!

For a girl from a country town in Australia this is super exciting: and it shows how the Internet has completely changed the way we live our lives… including how we find recipes and cook.

I follow many blogs and love getting my regular emails. With many of the bloggers being on the other side of the world, this means I will receive my weekly update in the mornings... so its not unusual in our house to have the oven on by 6:30am and a kitchen full of baked goods by breakfast. I know I could wait until I am out of my pajamas, but they look so tasty and I get so excited by a new recipe.

It’s nice to think that there might be people out there who feel the same way about my blog and my recipes. So, if you try a recipe please leave feedback or suggestions. I am not a chef; just a Mum trying to create healthier options for her family and friends, so I appreciate the experiences of others. If you have a suggestion; something you would like to see ‘healthified' please let me know. I'm always up for a challenge.

I made this tart (pie?) for a friend at work. She loved the Paleo Rochers and I wanted to recreate the flavours for her birthday. I played around with frostings, nuts and cupcakes; until I made this... yummy!

The Chocolate hazelnut crust compliments the paleo rocher mousse by adding some crispness and enhancing the hazelnut flavour. The nutty caramel is just like the center of a paleo rocher - a hidden, gooey surprise!

It is AMAZING!

CHOC-HAZELNUT TART (PALEO ROCHER TART)

Choc-Hazelnut Crust

INGREDIENTS
1/4 cup hazelnut meal
1/2 cup coconut flour (available from health food and specialty stores)
2 tablespoons unsweetened cocoa
1/4 teaspoon salt
1/4 teaspoon baking soda
1/4 cup coconut oil, softened
1/4 cup maple syrup (you could substitute honey etc)
1 egg
1 teaspoon vanilla extract

INSTRUCTIONS
Preheat the oven to 175C (350F).
Grease/Spray a 20cm (8 inch) spring form cake tin or pie dish (a 22cm/9inch can also be used)
Mix the dry ingredients in a blender.
In a separate small bowl, whisk together the wet ingredients.
Pour the wet ingredients into the dry, and blend until combined. A dough ball will form.
Roll the doughnut between 2 sheets of baking paper and trace a plate/tin bigger than tart tin.
Gently place circle in tin. Use excess dough to ensure an even edge.
Alternatively, spread dough evenly in tin and up edges by hand
Bake for 15 minutes. Cool completely.
If using a spring form tin, remove the crust and place on a serving tray. This may be more difficult if using a pie tin and you may choose to construct the pie and serve from the tin.

Nutty Caramel

INGREDIENTS
1 can Coconut Cream (organic or low/free preservatives), opened and in fridge overnight or at least 2hours. Take the thick cream off the top, discarding the watery part. This should measure 1 1/2 cups.
1/2 Cup Maple Syrup
Dash of salt
2 teaspoons vanilla extract
6-10 roasted hazelnuts, chopped

INSTRUCTIONS
Place coconut cream, maple syrup and salt in a saucepan over medium/high heat.
Bring mixture to boil, then reduce to medium heat.
Allow the mixture to boil until quite thick and dark golden in colour. Stir regularly to prevent burning.
This will take approximately 20 minutes (may take longer)
Add vanilla and continue to cook on medium heat for another 5 minutes.
The caramel will be dark golden in colour and delicious.
Allow to cool, but still runny.
Pour into cooled pie crust and sprinkle the chopped nuts evenly.
Allow to set in fridge.

Choc-Hazelnut Mousse

INGREDIENTS
150 grams Nutella (See recipe below)
3 -4 tablespoons Cocoa
1 tablespoons coconut oil
3 tablespoons maple syrup
2 tablespoons whipped coconut cream
1 small, ripe avocado
Extra, 2 tablespoons whipped coconut cream

INSTRUCTIONS
In a saucepan add the nutella, cocoa, coconut oil, maple syrup and coconut cream.
Stir over low heat until mixed thoroughly.
Leave to cool and thicken slightly (this can be done by placing saucepan in the fridge).
Meanwhile, place the avocado in a blender and blend until broken down.
Add the mixture from the saucepan and place in the bender with the avocado.
Blend until smooth.
Place the blended mix into the bowl of a kitchen stand with a whisk attachment.
Add the whipped coconut cream and whip until a smooth consistency.
Pour and spread over the set caramel.
Refrigerate until set.
Keep refrigerated.

Nutella
(adapted from Chocolate Covered Katie)

INGREDIENTS
2 cups raw hazelnuts (240g)
1 1/2 tablespoon pure vanilla extract
1/4 cup cocoa powder
1/4 cup plus 3 tablespoon maple syrup
1/4 teaspoon salt
1/2 cup milk (almond, coconut)

INSTRUCTIONS
Roast hazelnuts for 8-10 minutes at 200C/ 400 F. Rub them together in a paper towel to get the skins off. (It’s OK if a few stubborn skins won’t come off.)
In a food processor, blend the nuts until they’ve turned to butter.
Add all other ingredients and blend a long time until smooth.
Keep refrigerated.

Sunday 13 October 2013

Caramel Tarts

Posted by Lisa at 02:51 0 comments

Sometimes I try to do nice things for my husband. This is one of them.

Whilst I am not an ogre, I don't allow certain foods or drinks in the house. Its too confusing for the kids if other people are allowed to have things that they are not (eg. soft drinks). Instead, I attempt to create healthier substitutes so no one feels that they are missing out. 

Instead of soft drinks we make fruit flavored soda streams.
Instead of lollies we eat raspberries and blueberries. 

Dessert is still an important part of our day (especially when you have it for breakfast!) and whilst there are few desserts that you could call 'healthy' I like to think we can create a 'healthier version' of the original. Like everything, It's about moderation and balance (that doesn't mean eating cake on 1 leg!).


These Caramel Tarts are an old favourite of my husband... and I will allow him to eat these ones!

In order to ensure the shape I have kept the muffin tray in place through out the process, but it can be done by removing the cups once they are cooled. 

INGREDIENTS
1 serve caramel
100 grams chocolate

INSTRUCTIONS

Preheat oven to 175C/350F
Grease a muffin tray and place a biscuit on top of each hole
When oven is at temperature, place tray in the oven for 2-3 minutes.
Remove the muffin tray.
The biscuits will have softened.
Gently mold each softened biscuit into the muffin hole, forming a cup.
Allow to cool.

When biscuit cups are cool, loosen them in the muffin moulds to ensue that they can be removed easily. It is easier to assemble the tarts if the cups remain in the muffin tray.
Spoon runny caramel (the caramel may need to be gently warmed to loosen it) into each cup.
Refrigerate for 30 minutes.

Melt chocolate in a heat proof bowl over a saucepan of simmering water (double boiler technique).
Once melted, remove from heat and allow to thicken and cool slightly. The chocolate should still be runny but not hot.
Spoon chocolate on top of the caramel, smoothing and spreading if required.
Refrigerate for At least 30 minutes.

Remove caramel tarts from muffin tray and serve.
Keep refrigerated. 

Butternut Snap Biscuits

Posted by Lisa at 02:19 0 comments

There are some things that make you feel your age more than others.

Saying "back in the old days" is a clear sign that you are heading to grandmaville. As is shaking your head at the young'uns and their low hung pants. Listening to talk back radio, indicating in a car park and buying pantyhose (as opposed to to the super cool stockings) also place you in the seniors meal queue.

At the 'not quite middle age' age of 34 I find myself in a much fitter and healthier state than my 20's, a couple of centimeters shorter then when I was in my teens and (sadly) with the same haircut that I had in primary school. Whilst I may sometimes start sentences with "I remember when" or "back in my day" I like to think I have vintage taste and nostalgic stories... rather than dementia and old man waffling. 

Another way to describe things that are from another era is to deem them a classic.
Richard Marx, Jason Donovan, Rick Astley; classic early 90's pop (no... this is not a joke - I own not one but two Jason Donovan CD's) The Brady Bunch, The Wonder Years, Press Gang; classic television drama (again... not a joke). The term 'classic' is much more flattering than 'old'.

The Butternut Snap Biscuit is an Arnott's classic. It's like an Anzac cookie, only a bit different and it's OK to eat them all year round. Whilst I know it's not really obeying the sugar free mantra, the addition of golden syrup is what gives these biscuits the taste and texture that makes them so... classic.

Butternut snaps can be used as a base for a tart, broken up as a crumble topping or simply dunked into a cup of hot tea. These butternut snaps are gluten and dairy free, and being full of almond meal they are high in protein. 

There's a bit of fridging the mixture and biscuits in this recipe. Whilst it may seem time consuming it will make a huge difference to the shape, size and consistency of the final product. Fridging initally makes the mixture easier to form into the right shape. I found when I did not place the tray in the fridge (with the formed biscuits) they spread too much in the oven and over cooked. The biscuits will need to be cooked in batches as only 6-8 cookies will fit on one tray at a time. 


BUTTERNUT SNAP BISCUITS
Makes 18 biscuits

INGREDIENTS
2 tablespoons coconut oil
1/2 cup Maple Syrup
1 egg
1/2 teaspoon vanilla extract
2 tablespoons golden syrup
Pinch of salt
1/2 teaspoon cream of tartar
1 teaspoon bicarb soda
1 1/2 cups Almond Meal
1 cup Desicated, unsweetened coconut
3 tablespoons arrowroot (tapioca) flour
1 tablespoon milk (Coconut, almond etc)


INSTRUCTIONS
Combine all the wet ingredients (except the milk) in a blemder and mix until combined.
Add the dry ingredients and blend until combined.
Add the milk and pulse in.
Place mixture in the fridge for a minimum 30 minutes.

Preheat oven to 175C/350F.
Place heaped tablespoons of mixture on the lined tray, at least 3cm (just over 1 inch) apart (this allows for spreading).
Gently press with a fork to flatten slightly and create round shapes.
Place tray in fridge for 15 minutes.
Bake in oven for 16-18 minutes. The biscuits will be slightly brown on top.
Cool on tray for 5 minutes then transfer to a wire cooling rack.

Biscuits will firm up a they cool.


Wednesday 9 October 2013

Banana Cream Pie

Posted by Lisa at 03:54 0 comments

This week we reached a new milestone in our house. Yesterday I found S, my 20 month old son, on the trampoline. That sounds like fun doesn't it? ...except he climbed up all by himself.

Later that night I heard S yelling for me from his room. I thought he wanted to play hide and seek... but no. He had climbed onto his change table and wanted me to get him down. I guess I should be glad that he didn't try to get down himself.

Today... today my cheeky little boy decided to try and use the kitchen drawer handles to climb onto the kitchen bench. 

Our new milestone this week (the 'I have no fear climbing phase') means that next time I can't find my little climbing monkey I should perhaps check the top of the lemon tree. 

Just like the hairy monkeys from the zoo, my little monkey loves bananas too; but what can you do with a bowl full of way too ripe bananas (when you don't want another loaf of banana bread)?

This Banana Cream Pie is based on this recipe from Life is Great. The banana cream is a smooth, soft custard pie filling that would be just as well suited to a bowl and a giant spoon as it is to the chocolate pie crust. 

Oh... did I mention it's gluten, dairy and sugar free?!?!


BANANA CREAM PIE
Adapted from Life is Great
Serves 16; approximately 163 calories per slice

INGREDIENTS

CHOCOLATE PIE CRUST
(adapted from Against all Grain)
1/4 cup almond flour
1/2 cup coconut flour (available from health food and specialty stores)
2 tablespoons unsweetened cocoa
1/4 teaspoon salt
1/4 teaspoon baking soda
1/4 cup coconut oil, softened
1/4 cup maple syrup (you could substitute honey etc)
1 egg
1 teaspoon vanilla

BANANA CREAM
2 very very ripe bananas
1/3 cup coconut cream (taken from the top of a can that's been in the fridge overnight)
1/4 cup milk (almond, coconut etc)
1/3 cup maple syrup
2 Tablespoons arrowroot
1/2 teaspoon salt
3 egg yolks
2 1/2 teaspoons gelatin
3 tablespoons coconut oil, melted
3/4 cup whipped coconut cream- measure after whipping (see recipe below)
1 ripe banana, sliced

INSTRUCTIONS

CHOCOLATE PIE CRUST

Preheat the oven to 175C (350F).
Grease/Spray an 20cm (8 inch) springform cake tin or pie dish.
Mix the dry ingredients in a mixer.
In a separate small bowl, whisk together the wet ingredients.
Pour the wet ingredients into the dry, and blend until combined.
Form a ball with the mixture, wrap it in plastic and place in the fridge for 20 minutes.
Place the mixture ball between 2 sheets of plastic/baking paper and roll until thin.
Using the base of a larger cake tin, cut out a circle and place in greased springform tin.
Trim the edges of the tart to make a nice clean edge.
Place the tin in the fridge for 10 minutes before baking for 13-15 minutes.
Remove from the oven and allow to cool completely.

BANANA CREAM

Combine the very, very ripe bananas, coconut cream and milk in a blender and puree until totally smooth.
Add in the maple syrup, arrowroot, salt and egg yolks. Blend until no banana lumps remain.
Pour the mixture into a medium saucepan.
Before heating the banana mixture, evenly sprinkle the gelatin over 1/4 cup cold water. Allow it set for 4 minutes
Whisk the banana mixture in the saucepan over medium-low heat.
Continue to whisk and stir as the mixture will thicken and has a tendency to stick to the bottom of the pan.
Bring to a boil and continue to whisk vigorously for 3-4 minutes.
The mixture will be quite thick.
Pour the thickened banana mixture in a blender (make sure you have cleaned it from earlier use) and add the gelatin mixture and melted coconut oil.
Blend until smooth.
Transfer the mixture to a heatproof container and leave in the fridge for at least 1 hour.

CONSTRUCTION
Remove the banana cream from the fridge and place in a bowl of a stand mixer with a whisk attachment.
Add the whipped coconut cream and whisk on low until combined, and no cream streaks remain.
Pour 1/2 the mixture in the cooled pie crust then place the sliced banana evenly around the pie.
Cover with rest of the mixture.
Optional, drizzle Chocolate over the top of the pie.
Allow pie to set in the fridge overnight.
Keep refrigerated.

COCONUT WHIPPED CREAM
INGREDIENTS

3/4 cup Coconut cream (see above notes on types of coconut creams), opened and in fridge for min 5 hours
1 teaspoons maple syrup
1 teaspoons vanilla extract

INSTRUCTIONS
Scoop the thickened cream from the tin, discarding the watery liquid at the bottom.
Place cream in mixing bowl and beat using whisk attachment.
Add maple syrup and vanilla to taste and continue whisking until thick.
Keep refrigerated.


Monday 7 October 2013

Sumbitches (Choc-Caramel Cookies)

Posted by Lisa at 02:43 0 comments


Last week I stayed up way too late watching a really terrible movie. When I say terrible I don't mean 'good terrible' (as in most Adam Sandler movies) but 'awful terrible'. A predictable, yet oddly twisted storyline, a cringeworthy script, acting to rival a dress store mannequin and bad, bad CGI. So when the movie ended with the most riciculous of endings I was angry; mainly at myself for stayng up so late when I knew I had to get up early the next day, but also at the movie. 

So why didn't I just go to bed? Because I HAD to know the ending. It would have eaten away at me all night. It's the same with books; it's gotten a bit mundane through the middle but you push though hoping for a miracle recovery at the end. Sadly, if something sucks in the middle, chances are the end does too!

TV series' are often the worst culprit of dragging out a story line and hoping their viewers remain with it out of loyalty rather than quality (anyone remember "Lost"?!). The latest offender; How I Met Your Mother (HIMYM). Now into its final series they have managed to draw out a single concept for almost 9 years, and so far this season looks to be painfully tedious. 

COME ON! Get on with it people! We've met the mother now... why can't Ted meet her too? 

What 'the mother' did bring us is the biscuit SUMBITCHES. Peanut butter biscuits with a Choc caramel centre. Straight after the airing of the episode the Internet was flooded with recipes for Sumbitches; unfortunately all contained loads of sugar and butter. I'm not saying these biscuits are healthy (each contains just over 300 calories) but they are a gluten and dairy free alternative with no processed sugars. They are a tasty, chewy cookie. Why not make some extra Choc-Caramel Bites for later... they are delicious. 

SUMBITCHES (CHOC-CARAMEL COOKIES)
Makes 9 cookies. Each cookie approximately 313 calories)
Adapted from Great Ideas

INGREDIENTS

1/2 cup dates
1/4 cup boiling water
1/2 cup chickpeas; canned, drained, rinsed and patted dried
1/2 cup peanut butter
1 egg
1/3 cup maples syrup
1/2 cup almond meal
1/4 cup coconut flour
Dash salt
1/2 teaspoon baking soda 

INSTRUCTIONS
Place the dates and boiling water in a small bowl and allow to sit for 20 minutes. 
Place softenyed dates (and liquid) and chickpeas into a blender and blend on high until the dates have broken down.
Add the peanut butter, egg and maple syrup and blend until smooth.
Add almond meal, coconut flour, salt and baking soda and blend until combined.

Place the cookie dough in the fridge for at least 30 minutes (I left mine overnight).
Preheat oven to 175C/350F
Line and grease a large baking tray.

Remove the Choc-caramels from the freezer and the cookie dough from the fridge.
Spoon 2 tablespoons of cookie dough and wrap it around a Choc-caramel.
Roll the mixture into a ball using the palms of your hands.
Place balls on the tray and flatten slightly (ensuring that the Choc-caramel is still hidden in the dough).
Bake in oven for 14 minutes.
Let cool on tray for 10-15 minutes then remove onto a cooling rack.

Cookies are best eaten on the day they are made, but can be kept in a container at room temperature.


Choc-Caramel Bites

Posted by Lisa at 02:42 0 comments

When I was little we would spend our holidays visiting my Grandparents. This meant Grandmas sponges for afternoon tea, playing 'crocodile' in the front yard with the neighboring kids and going to church on a Sunday.
Church with the grandparents was where I taught my younger cousins to poke out their tounges and developed knowledge of bribery. If we were well behaved Grandad would stop off at the shops on the way home and get us a chocolate frog or caremello koala. This was well worth the badly sung hymns!

Whilst not snapped Iike a koala, these Choc-caramel bites do taste like them. A Crisp Chocolate shell with a gooey caramel centre... so decadent! There's no reason you couldnt do these in shaped chocolate or Easter egg moulds; the process would simply be different.

CHOC-CARAMEL BITES

INGREDIENTS
Caramel 
1 can coconut cream
1/2 cup Maple Syrup 
dash of salt
2 teaspoons Vanilla Extract

Chocolate
1/4 Cup Coconut Oil
1/4 Cup Cocoa
1 Tablespoon Maple Syrup

INSTRUCTIONS
Caramel 
Pour coconut cream into a heavy based saucepan. Add maple syrup and salt.
Bring mixture to the boil over a medium/high heat.
When bubbling, reduce to a medium heat and simmer for approximatly 25 minutes.
Whisk very regularly.
Add the vanilla and whisk in.
The caramel will turn a dark golden.
Place caramel in fridge over night (or freezer for a shorter duration) to allow it to thicken (not required when using shaped chocolate moulds)

Chocolate
Place Coconut oil in a heavy based saucepan and melt over a very low heat.
Add the maple syrup and whisk til combined,
Add the cocoa and whisk til combined.
Pour into a lined tray/container and freeze until set (at least 1 hour).

CONSTRUCTION
Bites
Melt Chocolate in a heat proof bowl over a pot of simmering water (double boiler technique).
Allow Chcoclate to cool slightly (but not set).
Take 1-2 teaspoons of thickened,cold caramel and roll into a small ball.
Drop ball into melted chocolate and stir to coat.
Place ball on baking paper and set in freezer.
(if you like thick chocolate around your caramel then dip again once first layer is set).
Keep cold until serving.

Shapes 
Using chocolate moulds, silicone shapes etc coat the moulds with melted chocolate (using double boile technique) and freeze til set. Fill set mould with runny (but not hot) caramel (the caramel nay need to be plad over a low heat to thinnit out) and freeze again. Once caramel has set either coat the caramel with Chcoclate or join 2 moulds together using melted chocolate to create a 3D shape (eg Easter egg).

Wednesday 2 October 2013

Honey, Orange and Pistachio Cake

Posted by Lisa at 04:07 0 comments

I think I might start the Chickpea Appreciation Society.  There are groups that honor all types of odd things; orchids, shitzus, Spock. So why not Chickpeas?

I have been a bit obsessed about the humble legume of late. They are full of fibre, low in calories and cheap; and I LOVE weirding people out by using them in the most unusual of ways. But beware, when you have a diet high in chickpeas and Brussels sprouts it's a recipe for a very stinky household!

This is a cake I made for the lovely Judy. Judy is like a mother hen; she's always looking out for people, taking care of them and making sure they know they're special. It was Judys birthday, so I wanted to make her a cake to let her know we all think she's pretty special too.

This is a moist, tasty cake that would be ideal for an afternoon tea with a cuppa and a big bowl of coconut whipped cream... and no will ever know that it came from the Chickpea Appreciation Society. 

HONEY, ORANGE AND PISTACHIO CAKE

INGREDIENTS
110grams chickpeas; canned, drainedm rinsed and patted dried
1/2 cup Coconut Flour
3/4 cup Almond meal
3 teaspoons baking powder
3 eggs, seperated
1/2 cup Honey
1/2 cup Orange Juice, freshly squeezed
Zest of 1 Orange
1 cup milk (almond, coconut etc)
1/3 Cup pistachios, chopped
Extra honey for drizzling.

INSTRUCTIONS
Preheat oven to 175C/350F.
Line and grease a 20cm/8inch cake tin.
Combine chickpeas, coconut flour, almond meal and baking powder in a blender and blend until fine (the chickpeas will be broken down).
In a mixing bowl of a stand mixer with a whisk attachment fitted, whisk the egg whites on medium/high until peaks form.
Turn mixer off and add honey and zest and whisk on high again.
With mixer on high, add egg yolks 1 at a time. 
Add dry ingredients and remaining wet (milk and orange juice) alternatively in 3 lots with mixer on low. 
Beat on high for 30 seconds.
Pout cake mixture in prepared cake tin.
Sprinkle the top evenly with pistachios.
Bake for 40 min, or until cooked through.
Rest in tin before removing.
Can be served warm or cold and with whipped coconut cream.
Drizzle cake with honey before serving.


Mummy Made It Copyright © 2010 Designed by Ipietoon Blogger Template Sponsored by Emocutez