Showing posts with label Kids. Show all posts

Wednesday, 16 April 2014

Carrot Cupcakes (Easter Chicken Cupcakes)

Posted by Lisa at 04:43 0 comments
 
4 yo H is quite concerned that Easter Bunny won't be able to find us this year. We are going to an Easter Festival for the weekend so he has decided to leave Easter Bunny a Note. Knowing H, and his tendency to ramble and over share (wonder where he gets that from?) this is probably what his letter will look like:

Dear Easter Bunny
This year we are not at our home. We are at my crazy Uncle Damien's house.
He used to eat a lot of Spanish rice when he was my age.
Sometimes I like to eat it; I like Sweet and Sour too.
I can't eat it at Kinder though.
Sometimes I eat carrots or eggs.
Please leave my Easter presents at Uncle Damien's for me.
And maybe something for my Brother; but only if you want to.
From H.


These Carrot Cupcakes have been decorated to look like super cute Easter Chickens.
They are a yummy and simple Easter treat to make with the kids. I have used desiccated coconut for the 'feathers' and colored them using natural food colorings (the color comes from Tumeric). The beak is made from carrot and the eyes from cream and cocoa paste, however sultanas can be substituted.


CARROT CUPCAKES (Easter Chicken Cupcakes)
Serves 12

Cupcakes
1/2 cup, packed, Dates
1/4 cup boiling water
Dash of Bicarb
3 Eggs separated
2 Tablespoons Maple Syrup
1 teaspoon Vanilla Extract
150 grams Grated Carrots
100g Apple Sauce (see recipe below)
2/3 cup Coconut Flour
1 teaspoon baking powder
1/2 teaspoon Bicarb soda
1 teaspoon Mixed spice
Zest of 1 Lemon
1/2 cup (- 1/2 Tablespoon) Milk of choice
1/2 Tablespoon Vinegar

For Decorating:
1/2 cup unsweetened Desiccated Coconut
All Natural Yellow food coloring
1 tablespoon Cocoa (or use sultanas)
2-3 Tablespoons Lemon Cream
Carrot

Lemon Cream
1 can of  Coconut Cream (400ml can), can placed in fridge overnight
2  1/2 teaspoons Vanilla Extract
1  1/2 teaspoon Maple Syrup
2  1/2 teaspoons Lemon Juice
Zest of 1 Lemon

Apple Sauce
4 apples, peeled and cut into small pieces
3/4 cup water

INSTRUCTIONS
Cupcakes
Preheat oven to 175C/350F
Place dates, boiling water and bicarb in a bowl (making sure dates are covered) and allow to sit and soften (approximately 30 minutes).
Place dates and water in a blender and blend until a smooth date paste is formed.
Place the egg whites in the bowl of a kitchen stand with a whisk attachment fitted.
Whisk on medium/high until soft peaks form.
Add maple syrup 1 tablespoon at a time and continue to whisk on medium/high.
Add purred dates and vanilla extract and whisk on medium/high.
Add egg yolks and whisk until combined.
Place carrots and apple sauce in a blender and blend until combined
With mixer on low add the carrot/apple mix.
Sift dry ingredients together.
Add juice, zest and vinegar to milk.
Add dry ingredients and milk mix alternately whilst whisking on low until combined.
Whisk on medium/high for 1 minute.
Divide evenly amongst 12 greased cupcake liners.
Bake for 22-25 minutes, or until baked through.
Allow to cool in tin for 15 minutes then remove.
Allow to cool completely before frosting with Lemon Cream.

Smooth Lemon Cream onto of each cupcake, retaining 2-3 Tablespoons for the decorations.

Decorations:
Place the coconut in a ziplock bag with a few squirts of food dye and shake the bag until all the coconut is colored.
Put the coconut in a shallow bowl and dip each frosted cupcake in the bowl covering the cream with the colored coconut.
In a small bowl, mix together the cocoa with a small drop of water and stir. Add water one drop at a time until a thick paste is formed.
Pipe/spoon 2 small dots of the reserved coconut cream on the coconut to form the eyes. Use a tooth pick to place a small dot of the cocoa paste in the centre of the cream eye.
Cut the carrot into pieces to use as a beak.
Place the cupcakes in the fridge when not serving.

Lemon Cream
Remove cream can from the fridge and scoop out the thickened cream into the bowl of a kitchen mixer with a whisk attachment. Discard watery component
Whisk on high until thick.
Add extract, maple syrup, juice and zest. Whisk on high until combined.
Store in fridge until required.
Frosted cupcakes will need to be stored in the fridge.

Apple Sauce
Place apples and water in saucepan. Cover with lid.
Bring to boil, then simmer on medium for 7-10 minutes, or until apple is soft.
Store in fridge.



Saturday, 21 December 2013

Gingerbread Man Wreath

Posted by Lisa at 01:18 0 comments

I spent much of my university years working in retail (I did also attend classes... just thought I should point that out!), and Christmas was the most loved and hated time of a shop assistants year.

Christmas meant lots of work; which meant more money. It was the time of the year when we could afford to eat more than just 2-minute noodles and didn't have to drink the nastiest Vodka ever to leave the Bundy grocery store.  That was the love part. More work = more money = better booze.

Christmas meant lots of work; which meant lots of customers, many suffering from too much Christmas stress, long hours on your feet and way too many fake smiles. This was often the hate part. More work = more chance of encountering a nutty customer = pulling your hair out as you hold your breath trying to swallow the words you really want to say (as opposed to the "of course the customer’s always right").

Luckily the bonuses of extra work helped to deal with the issues of the extra work!

So next time you are at the shops and in a rush to get something, just remember that the retail assistants are people too. They've probably encountered more rude people that day than you have in your whole year. So why not give them a smile, compliment their cheesy Christmas T-shirt that they've been forced to wear and wish them festive greetings. God knows they need it; the Boxing Day sales start soon and they are a NIGHTMARE!

How lovely does this Gingerbread man wreath look?! (Sorry no clever segue... it's too hot and I'm too buggered to think about it)

It's actually quite simple to do and looks impressive.  If you are game you can also use Chocolate gingerbread dough and have alternating men.

GINGERBREAD MAN WREATH
Makes approximately 34 5cm gingerbread men; enough for 2 medium size wreaths
(Adapted from Martha Stewart)

INGREDIENTS
1/2 cup Dates
1/4 cup Boiling Water
1 3/4 cups Almond Meal
3/4 cup Arrowroot
4 Tablespoons Coconut flour
1/2 teaspoon Bicarb Soda
1/4 teaspoon Baking Powder
2 teaspoons ground Ginger
1 teaspoon Cinnamon
3/4 teaspoon Cloves
1/2 teaspoon Pepper
3/4 teaspoon Salt
1 egg
1/2 cup Golden Syrup
1/4 Coconut Oil, slightly softened.

INSTRUCTIONS
Place dates into a small bowl and cover with boiling water.
Allow to sit for at least 20 minutes.

Place all the dry ingredients into a bowl and gently whisk to combine.

Place dates in a blender and purée.
Add the golden syrup, egg and coconut oil and blend until smooth and combined.
Add the dry ingredients to the wet and process until combined.

Separate the dough into 2 segments. Form each into a disc, wrap in plastic and refrigerate for 1 hour. At this point the dough can be left in the fridge for up to 3 days, or frozen (if freezing double wrap each disc and thaw to room temperature before using).

Preheat the oven to 175C/350F.
Trace a circle using a plate onto a piece of baking paper.
Turn baking paper over, place in large tray and grease paper (make sure you can see the circle outline).
Remove 1 disc at a time. The dough needs to stay firm to cut out the shapes. As the dough softens during the cutting return it to the freezer for 5-10 minutes. The dough will not hold its cut shape if the dough becomes too soft.

Roll the dough disc between 2 pieces of greased baking paper to 6mm (approx. 1/4 Inch) thickness. Cut out gingerbread men shapes and place them on the tray, lining the arms of the men up with the traced circle and overlapping the hands and feet.

Continue cutting, returning the dough to the freezer when it becomes too soft, until the circle is complete.
Use a small brush to apply a small amount of water to the arm and feet joins of the circle.

Place the tray with the wreath in the freezer for 15 minutes.

Remove from the freezer and bake for 17-19 minutes.
If baking normal Gingerbread men the cooking time should remain the same.

Allow the wreath to cool on the tray.
 

Thursday, 19 December 2013

Reindeer Biscuit Tarts

Posted by Lisa at 02:48 0 comments

It's hot. Christmas in Australia is HOT!
Today was 38C (that's about 100F if you are a White Christmas person), and tomorrow is predicted to be even hotter.
So what does an intelligent woman like myself do on a hot day such as this? Turn the oven on and bake! Ok, so maybe intelligent isn't the right word to use...crazy (that's already been established!), obsessed, gingerbreadaholic?

I promised 12 recipes for Christmas and I will deliver! I'm even wearing my Mrs Claus apron to help get in the spirit.

Today's recipe is really a cheats dessert. It's for the kids (and the big kids at heart), and is perfect for when you need individual servings. And it's cute!

This idea has been floating around the Internet for years; I have just healthified it.

REINDEER BISCUIT TARTS
MAKES 18
(recipe can be easily divided for a smaller number of tarts)
Make each of the biscuits, frosting and Marshmellow 

BUTTERNUT SNAP BISCUIT
See recipe here

Once biscuits have cooled;
Preheat the oven to 175C/350F.
Grease a muffin tray and place a biscuit over the top of each hole.
When the oven has come to temp, place the tray in the oven for 3 minutes.
Remove the tray and gently press and mould each biscuit into the holes whilst still hot.
Allow the biscuits to cool in the tin.

CHOCOLATE FROSTING
See recipe here

Spoon frosting into the biscuit cups.
Set in fridge.

MARSHMALLOW
See recipe here

Spread Marshmallow mixture in a baking tray.
Once set use 2 round cutters (1 larger than the other) to cut out 1 nose and 2 eyes for each reindeer.

Place eyes and nose on the frosting.
Use 1/2 a sultana as each eye ball and a glacé cherry/raspberry/craison etc as Rudolph's nose.
Use a cut pecan (or something else that resembles antlers) for the antlers and wedge into the frosting next to the eyes.

Set the tarts in the fridge before serving.

Wednesday, 18 December 2013

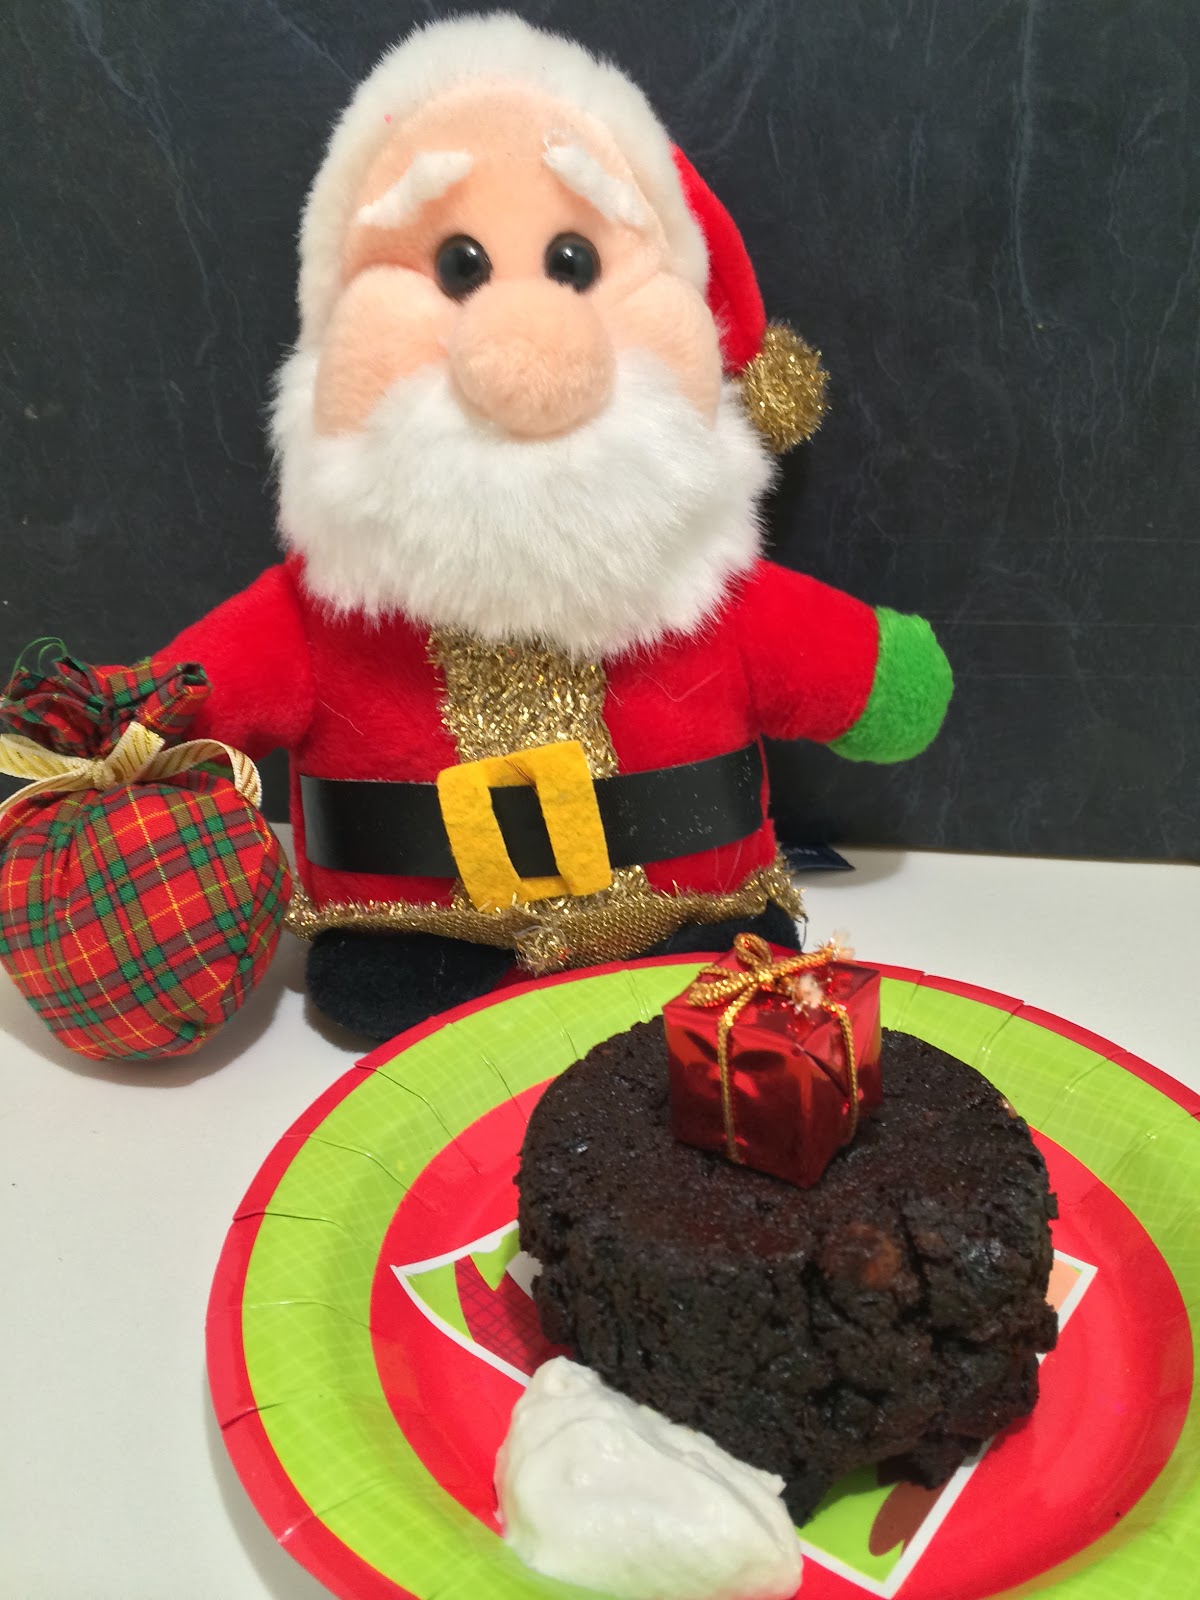
Chocolate Fruit Mince Puddings

Posted by Lisa at 02:46 0 comments

Christmas comes with it but many perks. Presents, parties, days off work and the often forgotten Christmas Movie. Christmas movies, just like gifts from Nanna, can be a bit of a mixed bag.

It's probably easier to start with some simple rules;

  1. If it 'stars' (and I use that word loosely!) Tim Allen then give it a miss.
  2. Any movie with an old action hero (or ex Governor) isn't worthy of your time.
  3. Just because they made a sequel doesn't mean the original movie deserved it.
  4. Movies with multiple small plot lines are often confusing, but as long as Hugh Grant is in it it doesn't matter if it doesn't make sense.
  5. There will always be at least one nauseating Christmas Carol scene, so make sure to plan your bathroom break around that time.
Christmas movies are cheesy, full of 'insights' and usually have an impossibly happy ending with a PG snog scene. They make you smile and, most importantly, they make you believe in Christmas. It doesn't matter how long the queues at the shop where or that someone stole your last festive mint, when a C-grade celebrity starts to sing 'Santa Claus is coming to town' your worries don't seem as bad any more. It may just be that you realized that your life isn't as bad as the once famous person who now has to wear red tights and sing Yuletide hymns.

If these mini Puddings where a Christmas movie it would star Hugh Grant with his floppy hair, an enchanted reindeer that sings carols and at least one scene with a snow ball fight.
It would be magical!

These Puddings are delicious served with Whipped Coconut Cream, and can be eaten hot or cold. 

MINI CHOCOLATE FRUIT MINCE PUDDINGS
Makes 8 individual serves
Adapted from this recipe

INGREDIENTS
1 cup Dates
1/2 cup boiling water
2 cups Mixed Dried Fruit
1 cup Raisins/Sultanas
1/2 cup Golden Syrup
3/4 cup Water
1/4 cup Apple Sauce (see recipe below)
1 1/2 cup Almond Meal
1/2 cup Coconut Oil, melted
1/2 cup + 2 Tablespoons Cocoa
2 Tablespoons Maple Syrup
1 Tablespoon Vanilla Extract
1/4 cup Coconut Flour
3 teaspoons Mixed Spice
1 teaspoon Bicarb Soda

INSTRUCTIONS
Preheat the oven to 175C/350F
Grease an 8 hole Texas Muffin tray (bigger holes the a normal muffin tin) or 8 small ramekins.

Place the dates in a small bowl and cover with the boiling water. Allow to sit for a minimum of 20 minutes.
Place the Fruit, Raisons, Golden syrup, Apple Sauce and 1/4 cup water in a saucepan and bring to a boil.
Simmer the fruit mixture for 5 minutes, then allow to cool.

Blend dates until puréed.
Add the cooled fruit mixture to the dates and pulse until finely chopped.
Transfer the mixture to a large mixing bowl.

To the mixing bowl, add the melted coconut oil, 1/2 cup water, almond meal and maple syrup and stir until combined.
Sift the cocoa, coconut flour, spices and bicarb over the bowl and gently fold together.
Evenly divide the mixture between the muffin holes/ramekins.
Bake for 40-45 minutes, or until cooked through.
Remove from the tin and serve immediately with Whipped Coconut Cream (link).
Alternatively, they taste great cold too!

You can make these up to 3 days ahead and reheat in the microwave.

APPLE SAUCE
INGREDIENTS
4 apples, peeled and cut into small pieces
3/4 cup water

INSTRUCTIONS
Place apples and water in saucepan. Cover with lid.
Bring to boil, then simmer for 7-10 minutes, or until apple is soft.
Store in fridge.


Tuesday, 17 December 2013

Gingerbread House

Posted by Lisa at 01:27 0 comments

Woo-freakin-hoo!!! I did it!

A gluten, dairy, processed sugar free Gingerbread house that tastes amazing!
And not just amazing because I haven't had real Gingerbread in so long but truly fantastic!
I ate so much of this yesterday... and again today!

The Gingerbread will not keep as long as a store bought house, not that you'll be able to stop eating it anyway! Choose whichever healthier decorations you like. I used nuts, glacé cherries, dried apricots that I cut into shapes using cookie cutters, coconut and home made jellies. The choices are endless.

I have used this mold but there are many commercially available. Alternatively I have included links to templates that you can print and cut out.

My secret with this Gingerbread house is the 'glue'. Ordinarily Royal Icing would be the cement that joins the walls, but sadly that is not a healthy option. Instead, in a moment of insanity, I decided to use Gingerbread Cookie Dough Frosting. Yep, cookie dough and Gingerbread. Amazing! The frosting needs to be refrigerated to ensure it stays firm and holds the house together. You can also use honey/golden syrup to adhere some of the lighter decorations.

Make this and enjoy!


GINGER BREAD HOUSE
Makes 1 House using mold.
Alternatively bake in a tray and cut house shapes

INGREDIENTS
300 grams Almond Meal
200 grams Arrowroot flour
Dash Salt
1/2 teaspoon Bicarb
1 Tablespoon Ground Ginger
100 grams coconut oil, softened slightly
125 grams dates
65 ml boiling water
300 grams Golden Syrup

INSTRUCTIONS
Preheat the oven to 170C/340F
Place the dates in a small bowl and cover with boiling water.
Allow to sit for a minimum of 20 minutes (the longer the better).
Place the dates in the blender and process on high until a paste forms.
Add the golden syrup and blend on high for 3 minutes.

In a separate bowl lightly whisk together the dry ingredients.
Add the dry ingredients to the wet and blend until combined.
Add the coconut oil in small pieces and blend on high until combined (1-2 minutes).

Press the dough into the Ginger bread house mold.
Alternatively bake in a tray and use these templates to cut house pieces.
Templates for Gingerbread houses can be found here and here.
The dough should be approximately 7-10mm thick (1/3 Inch).

Bake for 20-25 minutes, or until golden brown.
Remove from oven, but do not remove pieces from the mold until cooled.

Construct the house using Gingerbread Cookie Dough Frosting (see recipe below) as the glue. Use the frosting on the base of the pieces (to stick to tray) and edges to join walls.
Decorate with dried fruits, nuts, jellies, Marshmallow; using the frosting to adhere the decorations to the walls.
Alternatively, use golden syrup or honey to help stick the decorations to the walls.
Spread golden syrup/honey over the serving tray and sprinkle desiccated coconut to look like snow.
Sprinkle desiccated coconut over the top of the house for the snow.

Place finished house in the fridge to set the frosting.
If you live in a hot or humid environment you may need to keep the house in the fridge so the frosting doesn't become soft.


GINGERBREAD COOKIE DOUGH FROSTING

INGREDIENTS
150 grams Almond Meal
100 grams Arrowroot
90 grams Golden Syrup
65 grams dates
33 ml boiling water
1/2 Tablespoon Ground Ginger
50 grams Coconut oil
1to 2 Tablespoons Whipped Coconut Cream

INSTRUCTIONS
Place the dates in a small bowl and cover with boiling water.
Allow to sit for a minimum of 20 minutes (the longer the better).
Place the dates in the blender and process on high until a paste forms.
Add the golden syrup and blend on high for 3 minutes.

In a separate bowl lightly whisk together the dry ingredients.
Add the dry ingredients to the wet and blend until combined.
Add the coconut oil and blend on high until combined (1-2 minutes).

Transfer the mixture to the bowl of a kitchen stand mixer with a whisk attachment.
Add 1 Tablespoon of whipped coconut cream and whisk until fluffy.
If the mixture is too dry add more cream.
Place the frosting in the fridge to firm up, ensuring that it is still spreadable.


Monday, 16 December 2013

White Christmas Crackles

Posted by Lisa at 01:41 0 comments

I saw a sign at the gym yesterday that said "Don’t try to lose weight over the festive season, just try to maintain your weight". I thought this was sound advice. With so many parties, fruitcakes and glasses of eggnog it's easy to develop some extra Christmas cheer around the middle.

But then I thought about this in practical terms. In order to maintain your current weight (and let's say that there has been no recent changes in weight) then food input and exercise would have to remain the same. If we assume that exercise is continuing then it will have to be through diet that weight remains unchanged.

Simple? Yes, but in order to fit in all the Christmas goodies you'll have to forego morning cereal and lunchtime sandwiches. Forgot about stirfrys and pasta bakes for dinner; it's turkey and puddings all the way!

An example:
Breakfast; mince pies with a side of brandy cream (some fruit there!)
Morning tea; the front door of the gingerbread house
Lunch; Chocolate Cherry cake with cherry cream... and some bacon on the side! (as the day of the week ends with Y then it must be a bacon day!)
Afternoon tea; 1,maybe 2, White Christmas Crackles; they are only mini ones after all!
Dinner; Roast Turkey with a side of Chocolate Christmas Pudding.

I don't think this is what the gym meant when they put their message on the wall, however it might be the only way to ensure all that Christmas goodness doesn't go to waste!

This recipe has been a surprising hit. Each White Christmas recipe I found was slightly different, so adapting one to a healthier version allowed a lot of scope. This one is adapted
from Kellogs.

WHITE CHRISTMAS CRACKLES
Adapted from Kellogs
Makes 23 mini crackles

INGREDIENTS
1/3 cup Coconut Oil
1/4 cup Maple Syrup
1/2 cup dried mixed fruit
1/2 cup desiccated Coconut
1 Sachet (equivalent to 50grams or 1/2 cup) of Coconut Milk Powder
1 1/2 cups Rice Bubbles
23 glacé cherries for decoration

INSTRUCTIONS
Line a tray/plate with mini cupcake liners (or use large ones if desired)
Over a very low heat melt the coconut oil.
Add the maple syrup and stir.
In a large bowl combine the fruit, coconut, coconut milk powder and rice bubbles and stir to mix.
Pour in the warmed mixture and stir until combined.
Spoon mixture evenly into liners and place a cherry on the top.
Alternatively, spread into a lined tray and cut into slices once set.
Refrigerate until set (minimum 2 hours).
Keep in the fridge when not serving. 

Sunday, 15 December 2013

Rocky Road Marshmallow

Posted by Lisa at 00:15 0 comments

Last week we took the boys to see Santa. We TRIED to create a lasting family moment. I should have known it wasn't going to happen!

One summer I worked as Santa’s helper taking Santa Claus photos. It was my job to capture the joy and excitement of Christmas and provide families with a lasting treasure...
The reality was a bit less rom-com and a lot more horror movie.

It's unrealistic to except a child, who has been schooled all year in stranger danger, to sit on a fat, strange mans knee and smile. Even if they’re not screaming and kicking poor Santa, the likelihood of getting everyone to smile at the same time - and face the camera - is not great. We had screamers, biters and kickers; we had the ones who wouldn't go anywhere near the old man and the ones who wouldn't leave; we had toddlers in tutus and babies with stinky poo!

But through all the dramas it's Santa who is the real trooper. It would be easy to develop a self-esteem issue when every 2nd person who sees you screams and cries, or 'industrial deafness' from the incessant whining. It is Santa who works so hard to make each child smile and give them a joyous experience. It's not his fault that some kids are just shits!

Santa deserves a reward after he's navigated through the stars and down the blocked chimney. Why not leave him some Rocky Road Marshmallow with his cold beer? (the cold beer might be an Australianism - it can be 40C at Christmas time and the poor obese man isn't in the best shape)

You might call this a deconstructed and reconstructed version of Rocky Road. Feel free to add the options you like, or have handy in the cupboard.

ROCKY ROAD MARSHMALLOW

INGREDIENTS
1 Egg White
3/4 cup Maple Syrup/Honey
200ml water
2 Tablespoons Gelatin
2 Tablespoons Cocoa, unsweetened
3 Tablespoons each Arrowroot and Cocoa

Options;
1-1/2 cups Biscuit pieces
3/4-1 cup Desiccated Coconut

3/4-1 cup dried cranberries/raspberries etc
1/2- 3/4 cup Nuts (macadamias, pecans etc)
1/2 Chocolate Chip Pieces

INSTRUCTIONS
Place the egg white in a clean bowl of a stand mixer with a whisk attached.
Pour 100ml of water into a small bowl/cup and sprinkle gelatin over. Allow to sit and thicken for a minimum of 5 minutes.
Pour the Maple Syrup and 100ml of water into a saucepan and bring to a slow boil.
Once boiling, add the gelatin mixture and whisk to combine.
Bring to the boil again and boil for 30 seconds.

Turn the whisk onto medium and pour the hot mixture down the side of the mixing bowl.
Once added turn to high and whisk for 5 minutes.
Turn off and sift Cocoa over Marshmallow mixture.
Return the whisk to high and whisk for 6-8 minutes, or until the Marshmallow fluffs up and becomes thick.

Add the selected options and fold into Chocolate marshmallow mixture.
Pour mixture into a lined tray/casserole dish (the size/depth of the tin will determine the size of your Marshmallows) and leave at room temperature for a minimum of 4 hours.

Cut the Marshmallow into pieces or cut into shapes using cookie cutters.
Combine additional cocoa and arrowroot, and roll each piece of Marshmallow in it (this prevents it from being too sticky).

Store in an airtight container at room temperature for up to 3 days.
 

Tuesday, 10 December 2013

'Terry's' Chocolate Orange Truffles

Posted by Lisa at 01:00 0 comments

I go a bit cooking mad around kitchen.

Now this is saying something because I tend to be a bit obsessive most months of the year. As soon as I get a idea I like to make it straight away. Sometimes this means working late into the night, eating dessert for breakfast or a total disregard for who I was actually supposed to be doing (does the housework really need to be done anyway?!). Thankfully, 4-year-old H loves to vacuum!

Most years I have ended up with a Christmas favourite that I end up cooking for everybody. Last year it was gingerbread houses, the year before it was gingerbread men wreaths. This year it's been these truffles. The only problem... they don't last long enough to share!

Oh so tasty. These little balls of Christmas cheer are decadent without being naughty, and they're vegan friendly!

I've called these 'Terry's Chocolate Orange Truffles' after the British Chocolate Candy, and my friend Terri. Terri and her family are vegans, and she can rarely eat any of the treats I make. Finally I found something that we can all enjoy; and enjoy them you will!

'TERRY'S' CHOCOLATE ORANGE TRUFFLES
(Makes 13 truffles or 1 small orange and 5 truffles)

INGREDIENTS
1 1/2 cups dates
1 1/2 teaspoons Orange Rind
1/3 cup blanched almonds (or another nut)
1 1/2 tablespoons Maple Syrup
1/4 teaspoon Cardamom
1 1/2 tablespoons Cocoa
1/4 cup Desiccated coconut

INSTRUCTIONS
Place all the ingredients, except the coconut, in a blender and process until well combined.

Option 1. Divide the mixture into even portions and roll into balls.
Roll the balls in the coconut and refrigerate.

Option 2. Cut an orange in half and remove the insides.
Spoon mixture into the orange halves and press the mixture into the Coconut.
Press the 2 halves together.
Cut the orange again, creating quarters.
Press the newly made segments into the Coconut so that all the chocolate edges are coated in coconut. 
Put the quarters together and wrap.

Friday, 6 December 2013

Salted Honey Rice Krispie Treats

Posted by Lisa at 02:55 0 comments

The other week I banged on (a lot) about the stupid Bachelor and his wrong decision. I yelled, I screamed and still he sent the lovely Ali home (anyone would think he couldn't hear me!). Last week was the final rose ceremony and the reunion episode and I STILL haven't watched either of them! I didn't even know who he chose for 24 hours... I didn't care anymore. When he broke Ali's heart he lost my respect.

Now, I have been told that perhaps I was getting just a little bit too emotionally involved in 'The Bachelor'; perhaps even more than horse hair girl or short dress weirdo (my nicknames for some of the girls in the show). I disagree; it's perfectly normal to cancel plans, refuse to answer the phone, yell at your husband if he tries to talk to you and talk incessantly about it for the next week... isn't it?

I know (or at least I hope so) I'm not the only person who gets obsessed with different shows; in particular reality shows. Many Aussies will recall the bum dance from Big Brother series 1 and the dancing doona from series 2. Who could forget the girl band formed from 'Pop Stars' (whose name I cannot remember but let's call them 'Sophie Monk and her moderately talented friends') and the larger girl who won Australian Idol but has never been heard of since (or maybe I have just showed how easy it is to forget!).

Reality shows tend to create a lot of hype...  that quickly dies when it's season is over. Have you ever heard of anyone watching re-runs of X-factor 5 years later? I hope not!

Yet we will never be able to get rid of Gilligan's Island from our TVs!

Snacking whilst watching TV is nearly as old a past time as becoming a quasi reality TV stalker. These Salted Honey Rice Krispie Treats are perfect for your favorite TV marathon. They are gluten, dairy and processed sugar free (containing only honey as a sweetener).

The recipe calls for a serve of Marshmallows. Don't be frightened! These are easy to make and you don't have to wait for them to set as they will be melted anyway.


SALTED HONEY RICE KRISPIE TREATS
(adapted from www.raspberricupcakes.com)

INGREDIENTS

1 serve Marshmallow
3 Tablespoons Coconut Oil
1/3 Cup Honey
1 teaspoon Salt
6 cups rice bubbles


INSTRUCTIONS

Melt Marshmallows, Coconut oil, Honey and salt in a large saucepan over a low heat.
Once completely melted, remove the saucepan from the heat and stir in the rice bubbles 1 cup at a time.
Stir until all the rice bubbles as coated in the Marshmallow mixture.
Spread into a lined tin and set in the fridge.
The choice of tin will depend on the thickness of the pieces. I use 1/2 a backing tray.

Marshmallow

Posted by Lisa at 02:36 0 comments

I've been away at a conference for 3 days now... that means 3 days away from my kitchen, my oven and my spatula. 3 days no baking. Now this might seem like a holiday for some; no cooking, no cleaning, no chores but it drives me crazy (not the no cleaning... I'm fine with that!).

So because I can't bake I've been coming up with ideas for new recipes, searching for recipes to adapt and dreaming about all the creating I can do when I get home.
Rockyroad marshmallow, hot chocolate popcorn, lemon pie, jelly slice... I'm getting hungry just thinking about them!

When experimenting in the kitchen it's good to have a base recipe to adapt and play with. The versatile cake recipe now comes in many different forms, and the basic biscuit base can be made plain, chocolate or hazelnut flavored.

This Marshmallow recipe is simple to master and, in future posts, will be adapted to make different flavors, slices and treats.
I made both marshmallow squares (using a tray) and small marshmallows (using a piping bag). They can be quite sticky. To combat this sprinkle (using a sieve) arrowroot or cornflower over the marshmallows.


MARSHMALLOW
(adapted from www.raspberricupcakes.com)

INGREDIENTS

100ml water
3/4 cup Maple Syrup or Honey
2 Tablespoons Gelatin
100 ml water
1 egg white, at room temperature
1 Tablespoon Vanilla Extract

Arrowroot for sprinkling

INSTRUCTIONS
Place 100ml of water and Maple Syrup/Honey in a saucepan and bring to the boil over a medium heat.
At the same time sprinkle the gelatin over 100ml of water and allow to thicken.
Once the mixture is boiling reduce the heat slightly and add the thickened gelatin mixture, whisking vigorously to incorporated the gelatin and ensure no lumps remain.
Return to medium heat and return to the boil and boil for 1 minute, continuing to whisk.

Place the egg white in a clean bowl of a kitchen stand mixer with a whisk attachment.
Place mixture on medium and whisk until the egg white is frothy.
Pour the hot mixture in to the bowl, pouring slowly along the edge of the bowl.
Turn whisk to high and whisk for 5-7 minutes.
Add the Vanilla and whisk on high until firm but not set (another minute)
The mixture should be shiny and thick, but still able to be piped and spread.

Spread into a greased and lined dish or pipe out onto a greased and lined tray.
Allow to sit at room temperature overnight.

Once set sprinkle the arrowroot over Marshmallow pieces (this makes them less sticky and easier to handle). Alternatively, roll the pieces in arrowroot or you could even use dessicated coconut.  


Wednesday, 27 November 2013

Choc-Orange Cake Balls

Posted by Lisa at 01:23 2 comments

Today I'm off to the nations capital for a 5 day conference.

The car is packed with traveling food (small pieces that are easy to handle without rubbish- so sadly no cupcakes!), 2 excited little boys and a boot full of bags with just enough space for a trip to Costco!

Ahhhh Costco, how I love thee.
Let me count the ways

  • My favourite Hershey's Cocoa
  • Giant bottles of pure Maple Syrup
  • Jars of Organic Coconut Oil
  • Slabs of chickpeas
  • The works largest box of Bicarb Soda (the only away to get stains off my benches!)
  • Enough minced garlic to ward off the entire cast of Twilight
  • Diamond rings (OK, so I won't be buying one of these but it's just so random that they stock them right near where they sell toilets!)

Maybe it's more of a reflection on how boring my life is, but I get so excited about going to Costco. It's not quite as bad as the first time I went to my favorite handbag discount outlet; I was surrounded by so many beautiful (and cheap!) bags that I hyperventilated!

Yep... I have a problem!

NB; please note I was not paid for confessing my undying love for Costco. Instead they will take way too much money off me, entice me to buy unnecessary items that at the time seem like the best thing ever and aid my addiction to baking.

I made these Choc-Orange balls for our road trip.

They are small enough that the kids eat them all without wastage, they don't need liners so there is no rubbish and they are tasty! I chose not to fill them as I didn't want the mess in the car, but I do at home because they are delicious!

CHOC ORANGE CAKE BALLS with CHOCOLATE CREAM
(makes 18-20 balls)

INGREDIENTS
1/3 cup dates
40 ml boiling water
Dash of bicarb
1 cup almond meal
1/2 cup Cocoa
1/2 cup arrowroot/tapioca
3 teaspoons baking powder
3 Tablespoons Maple Syrup/honey
2 eggs
1 Tablespoon vanilla extract
3 Tablespoons Apple Sauce (see below recipe)- can substitute pumpkin purée or mashed banana
3 Tablespoons Milk of choice
Zest of 1 orange
Dash of Cardamom

Optional; Chocolate cream or frosting for filling

INSTRUCTIONS
Preheat the oven to 175C/350F
Place dates in a small bowl and cover with 40 ml of boiling water.
Sprinkle with a dash of bicarb.
Allow to sit for 20 minutes or until softened.
Place in a small blender and process until a soft paste forms and the dates are broken down.
Place the dry ingredients in a blender/kitchen whiz and mix until combined.
Add the dates and the wet ingredients (EXCEPT for the milk) and process until smooth.
Add the milk 1 tablespoon at a time until a smooth consistency is reached (the mixture should be pourable but not super runny.
Add orange zest and Cardamom and pulse briefly.
Pour into a greased cake pop tin, remembering to also grease the lid tin.
Bake in oven for 12 minutes.
Remove from the oven and allow to cool.

Optional;
Once cooled and removed from the tin, fill a piping bag with a small nozzle with the filling of choice. Insert into cake ball and pipe in.
Filled balls will need to be refrigerated; unfilled balls can be kept in an airtight container at room temperature.

APPLE SAUCE
INGREDIENTS
4 apples, peeled and cut into small pieces
3/4 cup water

INSTRUCTIONS
Place apples and water in saucepan. Cover with lid.
Bring to boil, then simmer for 7-10 minutes, or until apple is soft.
Store in fridge.

Wednesday, 13 November 2013

Lolly Gobble Bliss Bombs

Posted by Lisa at 03:06 0 comments

I know I'm supposed to be writing about party food and healthier options but I'm too busy yelling at the TV. To be exact... the bloody Bachelor. Why won't he listen to me? We're not even up to the rose ceremony yet and I'm sure the Neighbours are curious as to why there are loud screams. He says he wants a girl who tells him what she is feeling, then gets scared off when she does (having said that she does come across a bit stalkerish!). He says he wants some he can have fun with, but what about the hard stuff? Life isn't always yachts and private jets (well, not my life anyway!)

I think I've become way too emotionally invested in this realty TV drama. I might need to take a Valium before next weeks last episode!


INGREDIENTS
1/3 cup uncooked popcorn (unflavoured, unsalted)
1/2 to 1 serve caramel - should be runny and warmed
1 cup peanuts
Salt

INSTRUCTIONS
Preheat oven to 150°C
Cook popcorn according to instructions (I do mine in a saucepan).
Place popcorn and nuts in saucepan and add caramel, 1 spoonful at a time.
Stir to coat, and continue to add caramel until the popcorn and nuts are all coated. 
Add salt to taste. 

Spread the mixture evenly over an oven tray. 
Put in oven for 5 minutes, remove and toss, then return to the oven for a further 5 minutes.
This process dries the caramel for easier handling.

Jellies

Posted by Lisa at 02:55 0 comments


Just because you want to have a healthier lifestyle doesn't mean you can't still have awesome parties and treats. It just takes a bit of effort!

These Jelly snacks are a great way to introducing healthier treat choices to other people. Most won't believe they contain so little!


JELLIES
The shape of the jellies will depend on the mould used


INGREDIENTS
1 cup strained juice (orange, pineapple, raspberry etc)
1 Tablespoon lemon juice
3 tablespoons Gelatin


INSTRUCTIONS
Juice and strain 1 cup of fresh juice (I used oranges)
Bring juice to the boil in a saucepan over medium heat.
Once boiling, add lemon juice and take off heat.
Allow to cool for 3 minutes.
Add gelatin to the juice, 1 tablespoon at a time whisking well after each addition.
Add gelatin slowly and ensure it is whisked in to remove any lumps.

Immediately, pour the mixture into the moulds (I used plastic Chocolate moulds but silicon would work also), being careful not to overfill.
Leave to cool on bench and set slightly before setting in fridge.
Once set, remove jellies from the moulds.

Unlike the store bought versions, these jellies will only keep for 2-3 days. That is because they have no sugar or artificial flavours or additives! 


Tuesday, 12 November 2013

Chocolate Crackles

Posted by Lisa at 03:06 0 comments

When I was growing up we would get to pick our favourite foods for our birthday dinner for Mum to cook. I remember having cauliflower in white sauce, battered fish with lemon sauce, beef bourguignon, lamington cakes, roasts, and more. It didn't have to make sense; it was your birthday and you where in charge of the menu.

This year it was my dads 60th birthday (although he swears he doesn't look a day over 50). He has a weak spot for chocolate and often walks away from a fete with a tray of old lady chocolate crackles. My mission for his birthday cake was to create a chocolate crackle cake masterpiece! I baked a chocolate cake in the shape of a 6 and an 0 (according to the 1970's Women's Weekly cake guide this is 2 ring cakes and 2 bar cakes). I then set the chocolate crackles in the same shape tins. 
After cutting the pieces of both the cakes and the crackles to form the 6 and 0, I frosted the cakes with chocolate frosting and placed the crackle numbers on top of the cake. 

Ta Dah!

This recipe is for chocolate crackles in paper liners, but by using the same steps you can make any shape!


CHOCOLATE CRACKLES
Makes approximately 22 small crackles

INGREDIENTS
1/3 Cup Coconut Oil
3 Tablespoons Cocoa
3 Tablespoons Maple Syrup
3 Tablespoons Desicated/Shredded Coconut
2 Cups Rice Bubbles

INSTRUCTIONS
Melt Coconut Oil in a saucepan over very low heat.
Whisk in maple syrup and cocoa until smooth.
In a large bowl, place rice bubbles and coconut
Pour warmed mixture into the dry bowl and mix well until combined.
If there is too much wet mixture add a small amount of extra rice bubbles until combined. 

Spoon into mini cupcake liners (or normal sized liner) and place in freezer until set.
Chocolate crackles need to be kept in the fridge or freezer until ready to serve. 

Monday, 7 October 2013

Choc-Caramel Bites

Posted by Lisa at 02:42 0 comments

When I was little we would spend our holidays visiting my Grandparents. This meant Grandmas sponges for afternoon tea, playing 'crocodile' in the front yard with the neighboring kids and going to church on a Sunday.
Church with the grandparents was where I taught my younger cousins to poke out their tounges and developed knowledge of bribery. If we were well behaved Grandad would stop off at the shops on the way home and get us a chocolate frog or caremello koala. This was well worth the badly sung hymns!

Whilst not snapped Iike a koala, these Choc-caramel bites do taste like them. A Crisp Chocolate shell with a gooey caramel centre... so decadent! There's no reason you couldnt do these in shaped chocolate or Easter egg moulds; the process would simply be different.

CHOC-CARAMEL BITES

INGREDIENTS
Caramel 
1 can coconut cream
1/2 cup Maple Syrup 
dash of salt
2 teaspoons Vanilla Extract

Chocolate
1/4 Cup Coconut Oil
1/4 Cup Cocoa
1 Tablespoon Maple Syrup

INSTRUCTIONS
Caramel 
Pour coconut cream into a heavy based saucepan. Add maple syrup and salt.
Bring mixture to the boil over a medium/high heat.
When bubbling, reduce to a medium heat and simmer for approximatly 25 minutes.
Whisk very regularly.
Add the vanilla and whisk in.
The caramel will turn a dark golden.
Place caramel in fridge over night (or freezer for a shorter duration) to allow it to thicken (not required when using shaped chocolate moulds)

Chocolate
Place Coconut oil in a heavy based saucepan and melt over a very low heat.
Add the maple syrup and whisk til combined,
Add the cocoa and whisk til combined.
Pour into a lined tray/container and freeze until set (at least 1 hour).

CONSTRUCTION
Bites
Melt Chocolate in a heat proof bowl over a pot of simmering water (double boiler technique).
Allow Chcoclate to cool slightly (but not set).
Take 1-2 teaspoons of thickened,cold caramel and roll into a small ball.
Drop ball into melted chocolate and stir to coat.
Place ball on baking paper and set in freezer.
(if you like thick chocolate around your caramel then dip again once first layer is set).
Keep cold until serving.

Shapes 
Using chocolate moulds, silicone shapes etc coat the moulds with melted chocolate (using double boile technique) and freeze til set. Fill set mould with runny (but not hot) caramel (the caramel nay need to be plad over a low heat to thinnit out) and freeze again. Once caramel has set either coat the caramel with Chcoclate or join 2 moulds together using melted chocolate to create a 3D shape (eg Easter egg).


Mummy Made It Copyright © 2010 Designed by Ipietoon Blogger Template Sponsored by Emocutez