Showing posts with label Chickpeas. Show all posts

Wednesday, 19 March 2014

Banana Fritters with Chocolate Chips

Posted by Lisa at 03:56 2 comments

Today I am suffering from an acute case of ‘Psychological Gastro’.

Whilst not severe in nature, it’s symptoms include imaginary nausea, absent stomach cramps and a feeling of general malaise (also known as ‘the yucks’).

Psychological Gastro comes from the class of illnesses commonly known as Imaginitis (aka ‘I think I have it because someone else around me has it’- in this case 2 year old S at 1am last night). 

Other illnesses in this classification include:
Phantom Scalp Itching; a common ailment affecting mothers with small children who have had head lice.
Invisible Pox; a condition with irritating patches of itchiness without any visible spots (this tends to occur as an immediate reaction to the words ‘Chicken pox’)
Good Leg Limping; a change in walking style, without the need for crutches or a wheel chair. This non-life threatening condition usually occurs after walking behind someone with a broken leg or sprained ankle.

Psychological gastro, and other Imaginitis Syndromes, can be treated quickly and easily using the following technique;

Take a deep breathe in and hold for 10 seconds whilst standing on your right leg and placing your left hand on your head.

Another treatment method (this has not been scrutinised by a double blinded T study but has been peer reviewed in my kitchen) are Banana Fritters with Chocolate Chips. Take 1 (or 3) every hour until all the ‘symptoms’ are relieved. The Banana Fritters with Chocolate Chips are best taken on an empty stomach, as this allows for more to be eaten.  Chocolate sauce and whipped cream are optional extras, however they are highly recommended.


BANANA FRITTERS WITH CHOCOLATE CHIPS

BANANA FRITTER
INGREDIENTS
1/3 Cup Dates
40 ml boiling Water
2 Tablespoons Maple Syrup
½ cup Chickpeas; canned, drained and patted dried
1 teaspoon Vanilla Extract
3/4 Cup Almond Meal
1/2 Cup Arrowroot
Dash Salt
¼ Cup Banana, mashed
¼ teaspoon Cinnamon
50 grams Chocolate Chips (see recipe below)

INSTRUCTIONS
Place the dates in a small bowl and cover with boiling water. Allow to sit for at least 30 minutes and soften.
Place the dates and water in a blender with the maple syrup and blend until a purée forms.
Add the chickpeas and blend until the chickpeas are broken down and a thick puree forms.
Add the Vanilla extract and pulse in.
Add the dry ingredients and blend until all combined.
Add the banana and blend until a smooth mixture is formed.
Transfer the fritter dough to a bowl and place in the fridge for at least 1 hour. This makes the dough firm and easier to handle.
After 1 hour, remove the dough from the fridge and stir in the chocolate chips.
Take 1 tablespoon of the fritter dough and roll it into a ball. Repeat this until all the cookie dough is used (it should make 14 balls).Place the balls on a lined tray and freeze for 1 hour. Whilst the balls are freezing make the batter

BATTER
INGREDIENTS
1/3 cup + 1 Tablespoon Almond Meal
3 ½ Tablespoons Arrowroot
1/2 teaspoon Baking Powder
Dash Salt
½ Cup Milk
½ Tablespoon Maple Syrup
1 teaspoon Vanilla Extract
1 teaspoon Coconut oil
Oil for frying
Cinnamon for sprinkling

INSTRUCTIONS
Combine the dry ingredients in a mixing bowl.
Add the wet ingredients and whisk until combined.
Allow the mixture to sit and thicken (this can be quickened by placing the bowl in the fridge).

Pour the oil into a medium sized heavy based saucepan to a height of approximately 5cms/2 inches (I used 1 litre of oil).
Use a candy thermometer (these are available quite cheaply at most kitchen and department stores; it’s a must for this recipe) in the oil, over medium heat, bring the oil to 180C/355F.
This can be quite tricky if you’ve never done it before. The oil will want to keep increasing its temperature so be sure to keep an eye on it as it nears the required temp. If it gets too hot, take the saucepan off the heat until it returns to the 180C. You will need to continue watching it like a hawk when the balls are cooking otherwise they will go black. If the temperature gets too hot when the balls are cooking, don’t worry. Just keep them in the saucepan and remove the pan from the heat; the balls will keep cooking regardless. Just return it to the heat when it gets to the right temperature.

Remove 3 balls from the freezer (keep the remainder in the freezer until needed).
Place the balls in the batter and, using a spoon, coat them all over by rolling them around.
When the oil is at the right temperature, carefully drop the balls in and cook for 3 minutes (set a timer to make sure they don’t burn).
Flip the balls half way to ensure they cook evenly.
Remove with a slotted spoon and place on plate lined with absorbent paper or baking paper.
Repeat for the remaining balls, making sure the oil temperature remains constant.
Sprinkle the warm Fritters with Cinnamon and serve.

CHOCOLATE
INGREDIENTS
2 Tablespoons Coconut Oil
3/4 Tablespoon Maple Syrup
2 Tablespoons cup Cocoa
Optional; dash of vanilla extract

INSTRUCTIONS
Place the Coconut oil in a small saucepan and melt over a very low heat.
Add the maple syrup and whisk.
Add the cocoa and whilst til combined. Stir until slightly thickened. Pour the chocolate mixture into a lined container/tin and place in the freezer for 30 minutes, or until set. Once set, break or cut into small pieces.


Wednesday, 12 March 2014

Chocolate Cookie Dough Pie

Posted by Lisa at 04:11 0 comments

I promise… I'll check into Cookie Dough Rehab tomorrow.

CHOCOLATE COOKIE DOUGH PIE

INGREDIENTS
PIE CRUST
1/4 cup Almond Meal
1/2 cup Coconut Flour (available from health food and specialty stores)
2 tablespoons unsweetened Cocoa
1/4 teaspoon Salt
1/4 teaspoon Baking Soda
1/4 cup Coconut Oil, softened
1/4 cup Maple Syrup (you could substitute honey etc)
1 Egg
1 teaspoon Vanilla Extract

COOKIE DOUGH FILLING
1/2 cup Dates
1/4 cup Boiling Water
1/4 cup Maple Syrup
3/4 cup Chickpeas; canned, drained and patted dry
3 teaspoons Vanilla Extract
1/2 cup minus 1 Tablespoon Almond meal
1/4 cup minus 1 Tablespoon Arrowroot
4 Tablespoons Cocoa
2 Eggs

INSTRUCTIONS
Preheat the oven to 160C/325F.
Grease a 20cm/8inch Pie tin.

Place the pie crust dry ingredients into a blender and combine.
Add the wet ingredients and blend until combined and a dough ball forms.
Place the dough in the fridge for 20 minutes.

While the dough is chilling make the cookie dough filling.
Place the dates in a bowl and cover with the boiling water and allow to soften for at least 20 minutes.
Place the dates and maple syrup in a blender and mix until a purée forms.
Add the chickpeas and vanilla extract and purée until well combined and the chickpeas have broken down.

In a separate bowl sift the dry ingredients together.

Place the eggs in the bowl of a kitchen stand mixer and beat until frothy.
Add the puréed mixture and beat until combined.
Add in the sifted dry ingredients and beat until just combined.

Remove the pie crust dough from the fridge and press into the prepared tin, making sure the dough is pressed up the sides of the tin.
Pour the cookie dough filling into the crust and bake on the middle shelf of the oven for 27-30 minutes.

Remove from oven and serve warm with Whipped Coconut Cream.

Monday, 10 March 2014

Fried Chocolate Cookie Dough Balls

Posted by Lisa at 02:38 2 comments

Someone needs to stop me.

I think I may have taken this obsession one step too far. First there was the Cookie, then the dip and the surprise cookie. Then came the decadent Death by Chocolate. Soon I’ll share with you the Chocolate Cookie Dough Pie (it’s worth waiting for!).

Today I give you the ultimate in my Chocolate and Chickpea madness.

Fried Chocolate Cookie Dough Balls.

Yep - I deep fried chickpeas in batter and they were THE MOST AMAZING THING EVER!

Then I dipped one in chocolate sauce and splashed on some raspberry sauce. That’s when I knew that this is the right job for me. Crazed perfection!

OK, I am the first to admit that deep frying food is hideously bad for you. I don’t fry any other food; I don’t even own a microwave because I like to cook as healthily as I can. But let’s focus on moderation and the good points.

•    This is not an everyday treat (although I would be tempted!)
•    It contains NO Gluten, NO Dairy and NO Processed Sugars
•    It does contain Chickpeas, which are full of fibre and low in calories
•    It is Vegetarian friendly, and maybe even Vegan approved (if they’re not too strict)

Of course the most important thing to remember when justifying to yourself that it’s ok to eat the whole bowl is that they taste like they’re full of evil ingredients...only they’re not so therefore it would a crime not to finish them off.

Not Guilty your Honour!

FRIED CHOCOLATE COOKIE DOUGH BALLS
(Inspired by SugarHero)

COOKIE DOUGH
INGREDIENTS
½ Cup Dates
¼ Cup boiling Water
2 Tablespoons Maple Syrup
½ cup Chickpeas; canned, drained and patted dried
1 teaspoon Vanilla Extract
2/3 Cup Almond Meal
1/3 Cup Arrowroot
3 Tablespoons Cocoa
Dash Salt
1 Tablespoon Milk

INSTRUCTIONS
Place the dates in a small bowl and cover with boiling water. Allow to sit for at least 30 minutes and soften.
Place the dates and water in a blender with the maple syrup and blend until a purée forms.
Add the chickpeas and blend until the chickpeas are broken down and a thick puree forms.
Add the Vanilla extract and pulse in.
Add the dry ingredients and blend until all combined.
Add the milk and blend until a smooth mixture is formed.

Transfer the cookie dough to a bowl and place in the fridge for at least 1 hour. This makes the dough firm and easier to handle.
Take 1 tablespoon of the cookie dough and roll it into a ball. Repeat this until all the cookie dough is used (it should make 14 balls).
Place the balls on a lined tray and freeze for 1 hour.
Whilst the balls are freezing make the batter

CHOCOLATE BATTER
INGREDIENTS
1/3 cup Almond Meal
2 ½  Tablespoons Arrowroot
1 ½ Tablespoons Cocoa
1/2 teaspoon Baking Powder
Dash Salt
½ Cup Milk
½ Tablespoon Maple Syrup
1 teaspoon Vanilla Extract
1 teaspoon Coconut oil
Oil for frying

INSTRUCTIONS
Combine the dry ingredients in a mixing bowl.
Add the wet ingredients and whisk until combined.
Allow the mixture to sit to thicken (this can be quickened by placing the bowl in the fridge).

Pour the oil into a medium sized heavy based saucepan to a height of approximately 5cms/2 inches (I used 1 litre of oil).
Use a candy thermometer (these are available quite cheaply at most kitchen and department stores; it’s a must for this recipe) in the oil, over medium heat, bring the oil to 180C/355F.
This can be quite tricky if you’ve never done it before. The oil will want to keep increasing its temperature so be sure to keep an eye on it as it nears the required temp. If it gets too hot, take the saucepan off the heat until it returns to the 180C. You will need to continue watching it like a hawk when the balls are cooking otherwise they will go black. If the temperature gets too hot when the balls are cooking, don’t worry. Just keep them in the saucepan and remove the pan from the heat; the balls will keep cooking regardless. Just return it to the heat when it gets to the right temperature.

Remove 3 balls from the freezer (keep the remainder in the freezer until needed).
Place the balls in the batter and, using a spoon, coat them all over by rolling them around.
When the oil is at the right temperature, carefully drop the balls in and cook for 3 minutes (set a timer to make sure they don’t burn).
Flip the balls half way to ensure they cook evenly.
Remove with a slotted spoon and place on plate lined with absorbent paper or baking paper.
Repeat for the remaining balls, making sure the oil temperature remains constant.

Serve warm with Raspberry sauce, Chocolate sauce or whipped cream (or by themselves they are pretty good too!)

RASPBERRY SAUCE
INGREDIENTS
1 cup frozen Raspberries
1 Tablespoon water
1 teaspoon Maple Syrup

INSTRUCTIONS
Place all the ingredients into a small saucepan and bring to the boil over medium heat.
Reduce the heat slightly and simmer for 5- 10 minutes, or until the sauce has thickened (this will depend on how much liquid was in your raspberries).
Place in the fridge to cool.

CHOCOLATE SAUCE
INGREDIENTS
2 Tablespoons Coconut Oil
2 Tablespoons Maple Syrup
¼ cup Cocoa
½ teaspoon Vanilla Extract

INSTRUCTIONS
Melt the coconut oil over a very low heat.
Add the maple syrup and whisk to combine.
Add the cocoa and vanilla extract and whisk/stir until thicken.
Store at room temperature (it will harden in the fridge)

Monday, 24 February 2014

Death By Chocolate - 4 Layer Mousse Cake

Posted by Lisa at 02:14 0 comments


Today I ran my first Half Marathon.

It was awesome! I blitzed my 10km PB and ran the HM quicker than I had done 20km in training. WOO HOO! I've only taken up running regularly over the last year and started distance training 4 months ago so I'm very proud of my results (hence this has turned into a brag post opposed to a blog post!).

Running and exercise (as well as this blog!) have helped me to get through some pretty tough times. The distraction, the endorphins and the sense of satisfaction in achieving something you thought was impossible have helped me deal with feelings of anxiety, inadequacy and stress. All those months of training, the 6am wake ups and chafing are all worth it when you cross the finish line!

Someone recently described me as manic (I chose to take this as a compliment-not sure it was intended this way!) but I prefer dedicated, strong minded and driven. You say obsessed; I say focused. You say crazy; I say passionate!

Training for the 1/2 Marathon has taught me a lot about how to train. Up until now it was a question of "if" we could finish; now it's "how fast". Training doesn't have to be about hours of running at a time; speed, variance and stamina are all important. So now I have a new goal to train for and a new program to do it... and yes it probably does make me slightly manic that I had this done 2 hours after my race!

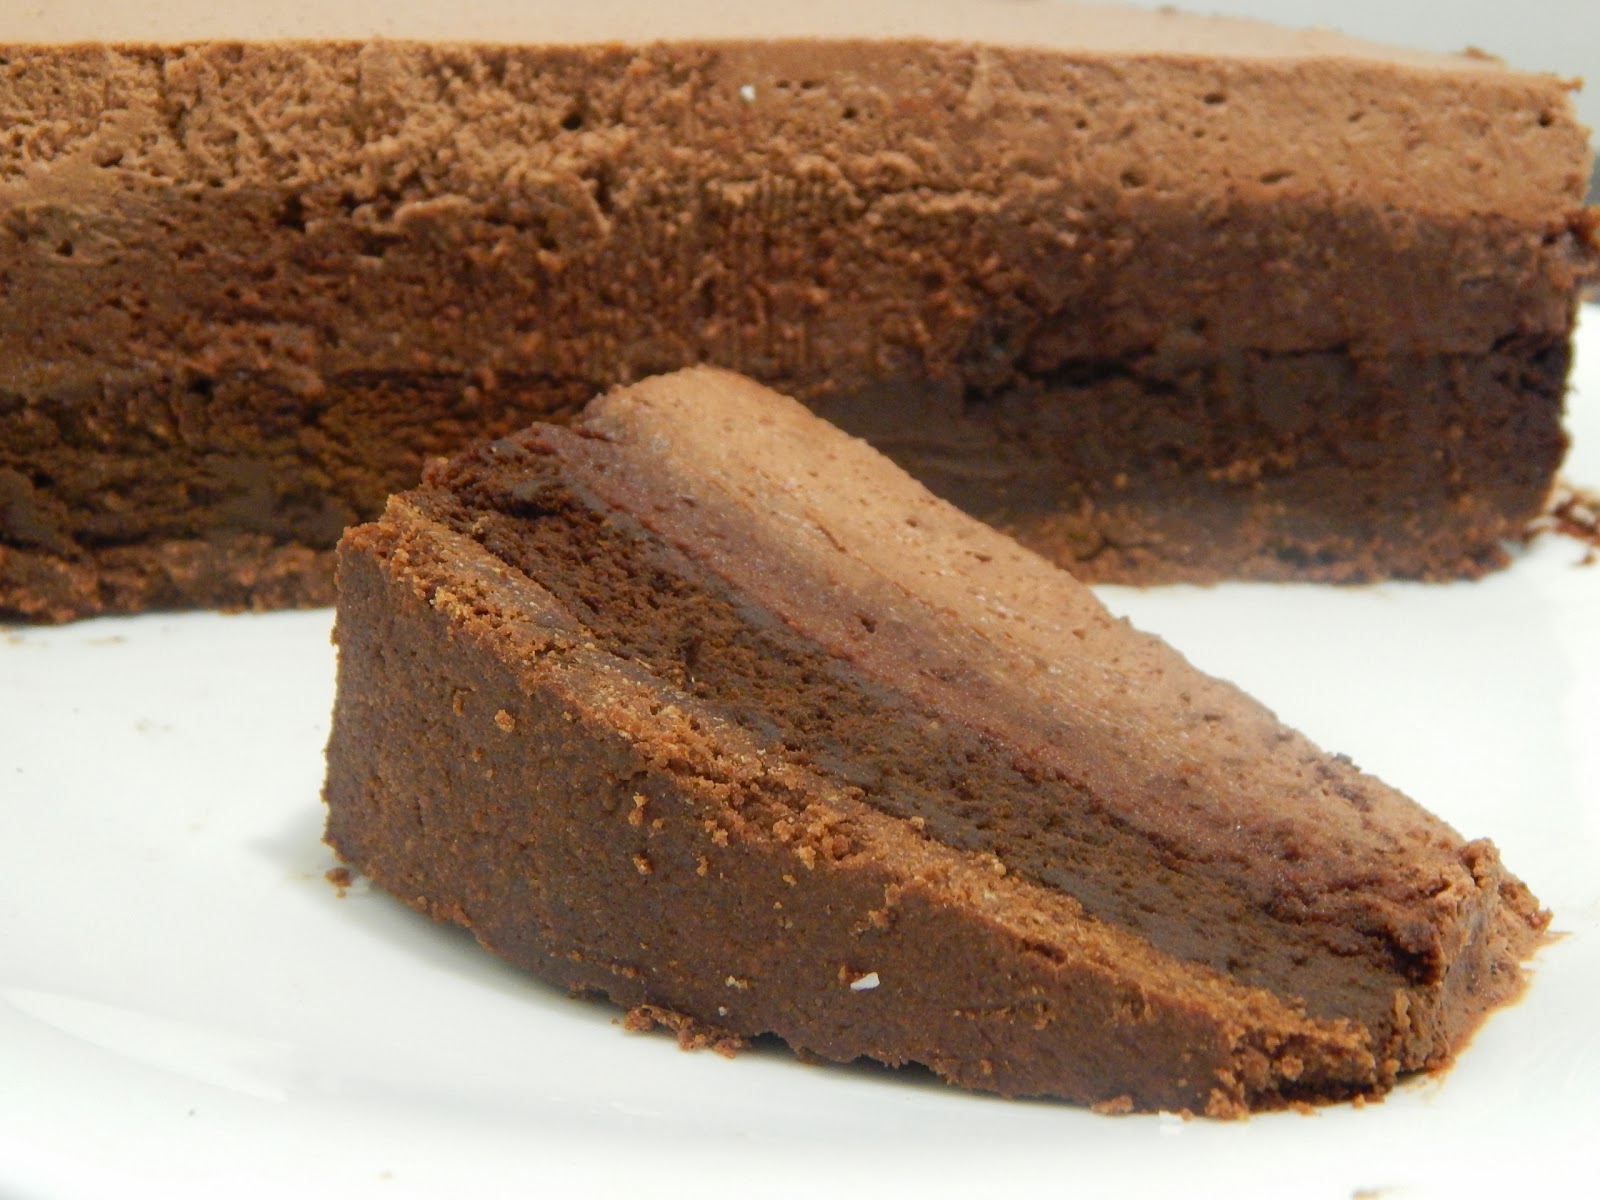
This dessert; this amazing, decadent, chocolatey masterpiece (did I mention I’m modest?!) was our reward for crossing the finish line. So was the Strawberry Donut Trifle but that was entree so it can hardly count as dessert.

It is amazing. It's soft layers melt in your mouth as you devour multiple pieces.
You'd never guess that there was no gluten, no dairy and no processed sugars.
You'd never be able to tell that inside the cake was 2 sweet potatoes, a cup of chickpeas and dates. SHHHHHH! Let's keep all that to ourselves so when everyone is saying "no" to having seconds you can (guilt free) dive straight back in for another... and save the left overs for later!

This cake comprises 4 layers. The pudding is cooked on top of the previously cooked biscuit base. The cookie dough mousse can be made ahead of time, however the cream needs to be spread as soon as it is made. This cream is being 'stabilised' by the gelatin. This means it will set and hold its shape once the springform tin is removed. It does not set firm like jelly does, but more like a dense mousse.

Make, enjoy and reward yourself for achieving your goals!

DEATH BY CHOCOLATE - 4 LAYER MOUSSE CAKE

This cake has 4 layers. Make them in the order listed.

CHOCOLATE BISCUIT BASE
INGREDIENTS
1/4 cup almond meal
1/2 cup coconut flour (available from health food and specialty stores)
2 tablespoons unsweetened cocoa
1/4 teaspoon salt
1/4 teaspoon baking soda
1/4 cup coconut oil, softened
1/4 cup maple syrup (you could substitute honey etc)
1 egg
1 teaspoon vanilla

INSTRUCTIONS
Preheat the oven to 175C (350F).
Grease/Spray and line a 20cm/8 inch springform cake tin.
If you don't have a springform tin make the lining very long on all sides to enable the dessert to be lifted out. I have not tried this method but in theory it should work. I would highly recommend a springform tin.
Mix the dry ingredients in a blender.
In a separate small bowl, whisk together the wet ingredients.
Pour the wet ingredients into the dry, and blend until combined.
Press the dough flat into the bottom of the tin. DO NOT go up the edges.
Pierce the dough several times with a sharp knife.
Bake for 7 minutes.
Remove from the oven and allow to cool completely.

CHOCOLATE PUDDING
INGREDIENTS
230 grams Sweet Potato, baked-measured after baking (to bake: cut sweet potato into small pieces and place in a moderate oven for 40 minutes)
1 tablespoon Coconut flour
1/2 cup Coconut Oil, melted
3/4 cup Cocoa, unsweetened
1/4 cup plus 2 tablespoons Maple Syrup
3 Eggs
2 teaspoon Vanilla Extract
1 teaspoon Baking Soda
dash of Salt

INSTRUCTIONS
Preheat oven to 160C/325F
Place sweet potato in blender and mix until a puree forms.
Add all other ingredients and mix until blended and smooth.
Add to cooled chocolate biscuit base and bake for 27 minutes.
Cake should still be slightly gooey when removed from the oven.
Allow to cool before placing in fridge.
Leave in fridge for a minimum of 1 hour before adding the Cookie Dough Mousse Layer.

CHOCOLATE COOKIE DOUGH MOUSSE
INGREDIENTS
1 cup Dates
1/2 cup boiling water
Dash of Bicarb Soda
1 cup Chickpeas; canned, drained and then measured
4 Tablespoons Maple Syrup
4 teaspoons Vanilla Extract
1 1/3 cup Almond Meal
2/3 cup Arrowroot Flour
6 Tablespoons Cocoa
dash Salt

INSTRUCTIONS
Place the dates in a small bowl and cover with the boiling water and the bicarb.
Allow to sit for at least 20 minutes.
Place the dates in a blender and purée.
Add the chickpeas, maple syrup and vanilla extract and blend until a smooth paste is formed.
Add the dry ingredients to the blender and mix until combined.
Add the milk and blend until combined.
A delicious cookie dough mousse will form.

Ensure that the ring of the springform tin is still attached to the the tin.
Spray the exposed edges of the tin.
Spread the cookie dough mousse over the pudding layer.
Flatten the top with a knife or spatula to ensure an even finish.
Place in the fridge to firm up before putting the cream on top.

CHOCOLATE CREAM
INGREDIENTS
1 can Coconut Cream, can opened and left in the fridge overnight (will be approx. 1 1/2 cups of cream). If you measure 2 cups increase the gelatine to 2 1/4 teaspoons, or if 1 cup open a 2nd can. You will need 1 1/2 cups to spread evenly on the cake.
2 Tablespoons Cocoa
1 1/2 Tablespoons Maple Syrup
2 teaspoons Vanilla Extract
1 3/4 teaspoons Gelatin

INSTRUCTIONS
Remove the can of coconut cream from the fridge and spoon out the thickened cream from the top of the can into a kitchen stand mixer bowl fitted with a whisk attachment (or use a hand blender).
Retain the watery remains from the can. Measure 2 Tablespoons of the watery remains and put into a small bowl. Sprinkle the gelatin over the water and allow to stand and thicken.
Add the maple syrup, vanilla extract and cocoa to the cream and whip until thick (allow between 5-10 minutes).
Add the gelatin mixture and whip until incorporated.
Evenly spread the Chocolate Whipped Cream over the Cookie Dough Mousse.
Place the dessert in the fridge to set for at least 4 hours (overnight is preferable).

Serve straight from the fridge.

Sunday, 23 February 2014

Chocolate Cookie Dough Dip

Posted by Lisa at 01:36 0 comments

 Things that seem so wrong together but somehow just work.
•    Cheese Doritos, Peanut butter and Milo (don’t judge me til you’ve tried it!)
•    Fun and Run in the same sentence.
•    Bacon and Chocolate
•    Michael Jackson and Lisa Marie Presley (OK, maybe a bad example)
•    Musical episodes and Buffy
•    Chilli and Chocolate
•    Doogie Howser and adult comedy (legend...wait for it....non-dairy!)
•    Chocolate, Chickpeas and Carrots

Yep, that’s what I said. CHOCOLATE, CHICKPEAS and CARROTS.

No, I’m not going crazy. No, I haven’t joined some odd cult that only makes you eat Oscar the Grouch’s left-overs. I’m serious; and soon you’ll want to find a cult that eats only this dip. It’s that good!

This dip can be used as a frosting on cupcakes, as a mousse in a cake or trifle or as a dip with carrots, celery, biscuits, bread or even wraps. Personally I prefer my fingers; that means I have 10 perfectly good (clean) swipes at the dip before I have to grab the bunny sticks.

There is no egg in this recipe so it is safe to eat and the normal raising agents aren’t required as it is not being baked.Quick, simple and your friends will have NO idea they’re eating chickpeas, no processed sugar or gluten. Why, it’s practically a health food! Share it around or, (as I may have done) hide it and hoard it for yourself!


CHOCOLATE COOKIE DOUGH DIP (or Frosting or Mousse!)

INGREDIENTS
1/2 cup Dates
1/4 cup boiling water
Dash of Bicarb Soda
1/2 cup Chickpeas; canned, drained and then measured
2 Tablespoons Maple Syrup
2 teaspoons Vanilla Extract
2/3 cup Almond Meal
1/3 cup Arrowroot Flour
3 Tablespoons Cocoa
dash Salt
1 Tablespoon Milk (of choice)

INSTRUCTIONS
Place the dates in a small bowl and cover with the boiling water and the bicarb.
Allow to sit for at least 30 minutes.
Place the dates in a blender and purée.
Add the chickpeas, maple syrup and vanilla extract and blend until a smooth paste is formed.
Add the dry ingredients to the blender and mix until combined.
Lastly, add the milk and blend (if you want a runnier dip add milk an extra teaspoon at a time until the right consistency is reached).
A delicious cookie dough will form.
The dip can be eaten right away, or stored in the fridge. The dip will firm slightly in the fridge.
Eat with a spoon or a carrot, spread on celery, use as frosting for cakes or as a mousse.
Just EAT IT!

Thursday, 20 February 2014

Surprise Chocolate Cookies

Posted by Lisa at 02:06 0 comments

My 2 boys are part cookie dough and part pork crackling. They were my 2 main nutrient sources whilst pregnant.

I remember carrying a tub of cookie dough in my handbag during my first trimester and sneaking secret spoonfuls when no one was looking. At home I could be more open about my addiction... sitting on the couch in my trackies, with a bowlful of cookie dough and a soup spoon (because a dessert spoon just isn't big enough and a ladle seemed unladylike) watching Buffy DVD's (and for those you gasping at the thought of food poisoning- it was egg free dough!).

Had I had this recipe 5 years ago then perhaps I wouldn't have 2 (almost) 10-pound babies and maybe now I would be able to run down a hill without having to cross my legs. Awkward; yes, worth it; of course!

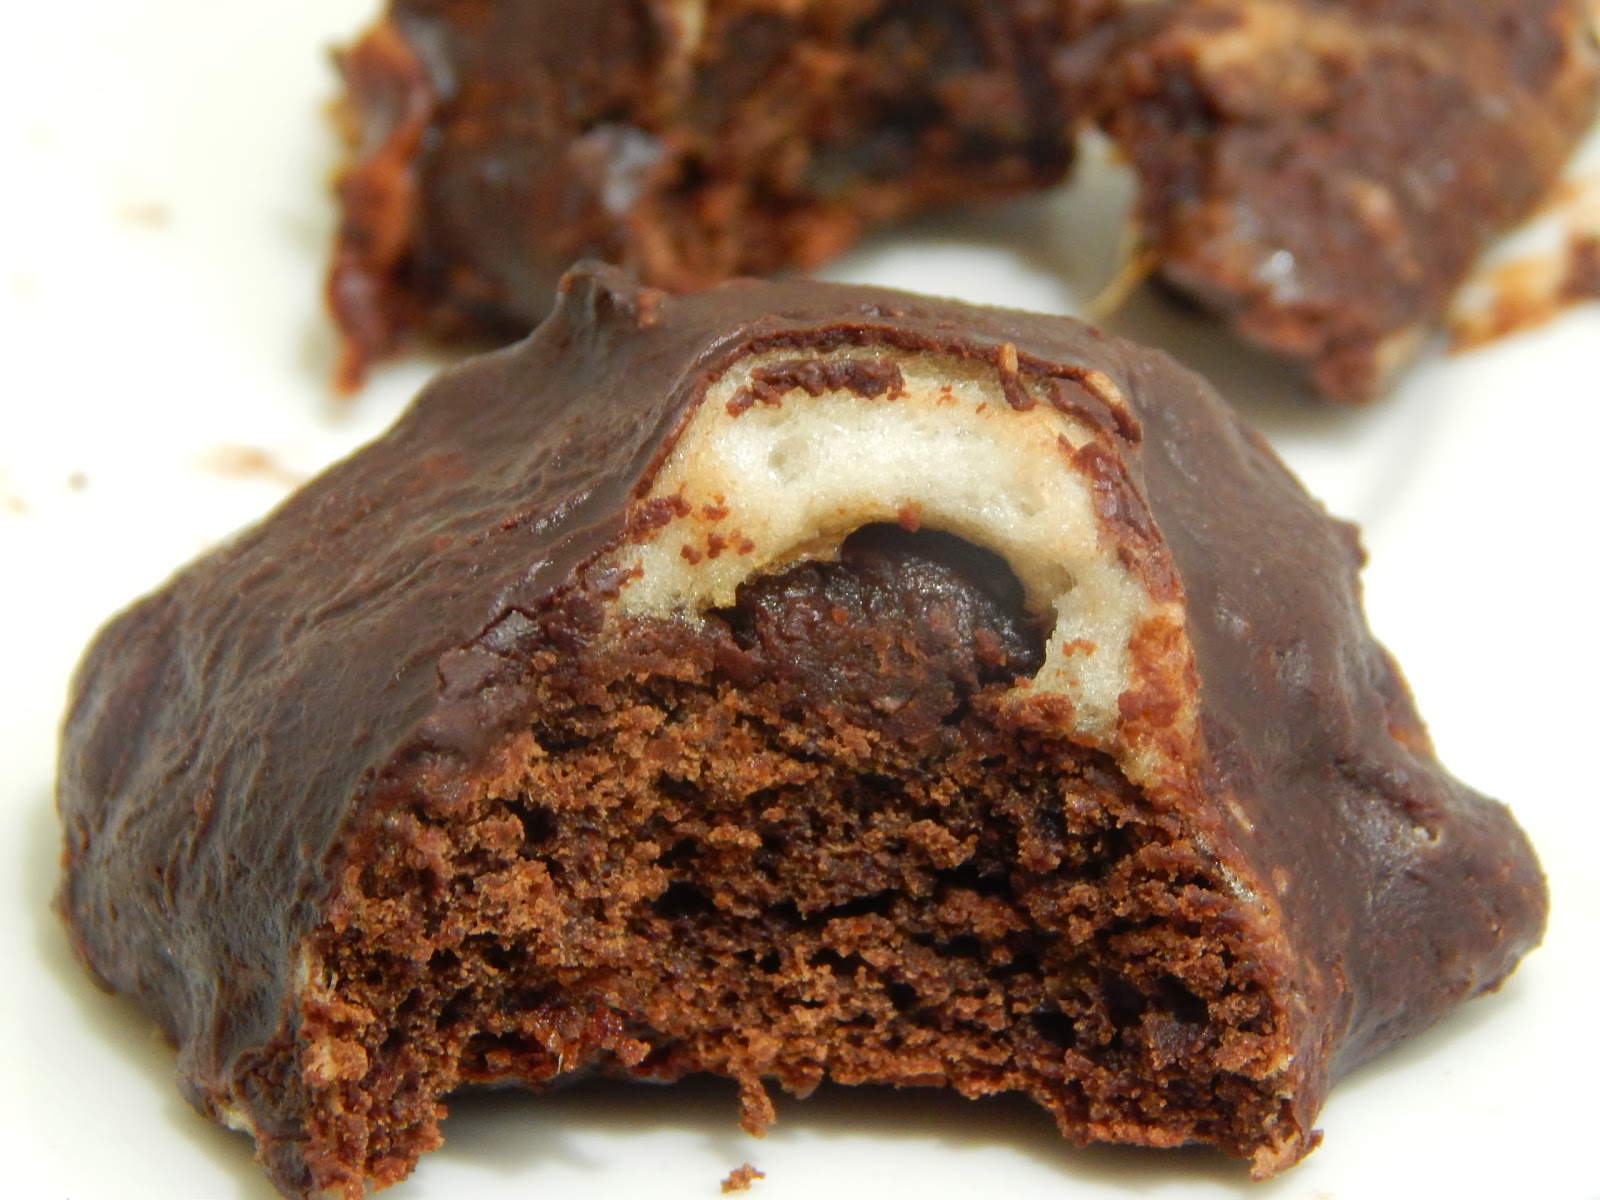
These Surprise Chocolate Cookies are really a double surprise; marshmallow under the Chocolate coating and chickpeas in the cookie. Super Surprise! Not only will these cookies help those hormonal induced cravings, they'll help keep you regular (chickpea fibre!).
These make great treats for the kids and being gluten, dairy and processed sugar free its ok if they have more than one... As long as they don't eat into your stash!


SURPRISE CHOCOLATE COOKIES
Makes 12 Cookies

INGREDIENTS
1/2 cup Dates
1/4 cup boiling water
Dash of Bicarb Soda
1/2 cup Chickpeas; canned, drained and then measured
2 Tablespoons Maple Syrup
2 teaspoons Vanilla Extract
2/3 cup Almond Meal
1/3 cup Arrowroot Flour
3 Tablespoons Cocoa
1 Egg
1/2 teaspoon Baking Powder
dash Salt
1 serve Marshmallow (there will be heaps left over but its not easy to make a 1/2 recipe on account of the egg white. Eat the rest or make a 1/2 recipe of Salted Honey Rice Krispie Treats)
Chocolate (see recipe below)

INSTRUCTIONS
Preheat the oven to 175C/350F
Line and grease a large baking tray.
Place the dates in a small bowl and cover with the boiling water and the bicarb.
Allow to sit for at least 20 minutes.
Place the dates in a blender and purée.
Add the chickpeas, maple syrup and vanilla extract and blend until a smooth paste is formed.
Add the egg and blend in.
Add the dry ingredients to the blender and mix until combined.
A delicious cookie dough will form.

Using a dessert spoon, scoop spoonfuls of dough onto the tray.
The spoonfuls will form round balls on the baking tray.
Will make 12 biscuits.
DO NOT FLATTEN THE BALLS.

Place in the middle rack of the oven and bake for 16 minutes.
The cookies will be firm on the bottom and top, but still soft (not gooey) in the middle.
Remove from the oven and allow to cool on the trays.

Whilst the cookies are cooling cut the Marshmallow into squares; with each square being the same size as the top of the cookie.
Place the Marshmallow on top of the cooled cookie and, using a kitchen blow torch, lighter etc, lightly melt the marshmallow. If the Marshmallow starts to 'run' down the side of the cookie use a knife to spread it back on top.
If the Marshmallow becomes too soft then it will seep into to the cookie and the only surprise you'll get is that there isn't any surprise!
Once the Marshmallow is adhered to the cookie and has re-firmed, place the cookies on a wire cooling rack which rests over a baking tray.
Melt the chocolate and pour over the marshmallow cookie.
Reuse the Chocolate that has dripped into the baking tray.
Place cookies in the fridge to set.
Store in an airtight container in the fridge for up to 4 days.

MARSHMALLOW
(adapted from Rasbperri Cupcakes)

INGREDIENTS
100ml water
3/4 cup Maple Syrup or Honey
2 Tablespoons Gelatin
100 ml water
1 egg white, at room temperature
1 Tablespoon Vanilla Extract

Arrowroot for sprinkling

INSTRUCTIONS
Place 100ml of water and Maple Syrup/Honey in a saucepan and bring to the boil over a medium heat.
At the same time sprinkle the gelatin over 100ml of water and allow to thicken.
Once the mixture is boiling reduce the heat slightly and add the thickened gelatin mixture, whisking vigorously to incorporated the gelatin and ensure no lumps remain.
Return to medium heat and return to the boil and boil for 1 minute, continuing to whisk.

Place the egg white in a clean bowl of a kitchen stand mixer with a whisk attachment.
Place mixture on medium and whisk until the egg white is frothy.
Pour the hot mixture in to the bowl, pouring slowly along the edge of the bowl.
Turn whisk to high and whisk for 5-7 minutes.
Add the Vanilla and whisk on high until firm but not set (another minute)
The mixture should be shiny and thick, but still able to be piped and spread.

Spread into a greased and lined dish or pipe out onto a greased and lined tray.
Allow to sit at room temperature overnight.

Once set sprinkle the arrowroot over Marshmallow pieces (this makes them less sticky and easier to handle). Alternatively, roll the pieces in arrowroot or you could even use dessicated coconut.  

CHOCOLATE
Makes 200 grams of Chocolate.
Store left over chocolate in the freezer for future use.

INGREDIENTS
1/2 Cup Coconut Oil
1/2 Cup Cocoa
2 Tablespoons Maple Syrup

INSTRUCTIONS
Over a very low heat melt the coconut oil.
Add the maple syrup and stir.
Add the cocoa and stir until combined, ensuring no lumps.
Allow to cool slightly before using, or keep in freezer for future use.

Wednesday, 19 February 2014

Chocolate Cookies

Posted by Lisa at 03:25 0 comments

I was an anxious partygoer growing up. When I was invited to a school friend’s party I was always worried if I had the right day, the right time. How uncool would it be arrive and be the only one there!

As I got older it was about what to wear, if my robot moves would cut it on the dance floor, boys and, oh yeah, boys. It was no 'arriving to school naked' dream and, of course, there was always a party bag to take home so that made it all ok.

4yo H started Kinder recently and this morning was supposed to be a meet and greet coffee session at a local Cafe for all the new mums. I have a tendency to not be very social in new circles (I think this comes from having a job where I talk to people all day and sometimes I need quiet time without my polite social face) so I decided to move out of my comfort zone, put on my sexy cowgirl outfit (sans hat) and go and 'meet and greet'. Here's how it went (and why party anxiety can extend to cafes).

8:50am - First one there. Decided to sit in the car with 2yo S and wait for someone else to arrive. Don't want to look like a loser sitting there by myself!
8:55am - a great big black van decided to park next to me and block my view of the cafe entrance. Have to leave the car to be able to see the entrance. My cover is blown!
9:00am - feeling like a bit of a knob sitting out the front so took 2yo S for a walk around the corner. Could spy a look in the cafe window... no one there yet!
9:05am - starting to feel like I must be a bit stinky, or perhaps I should have worn the cowgirl hat! Pretend to do something on phone to look less like a loser and more important.
9:10am - still no one else! The only new friend 2yo S and I made was a small rock he found under the park bench. We called him rocky… sadly he went missing at Aldi not long after.

New friends made: 0
Rocks lost: 1

So, the universal question: is it worse to get rejected by people who don't know you or by those who already dislike you?

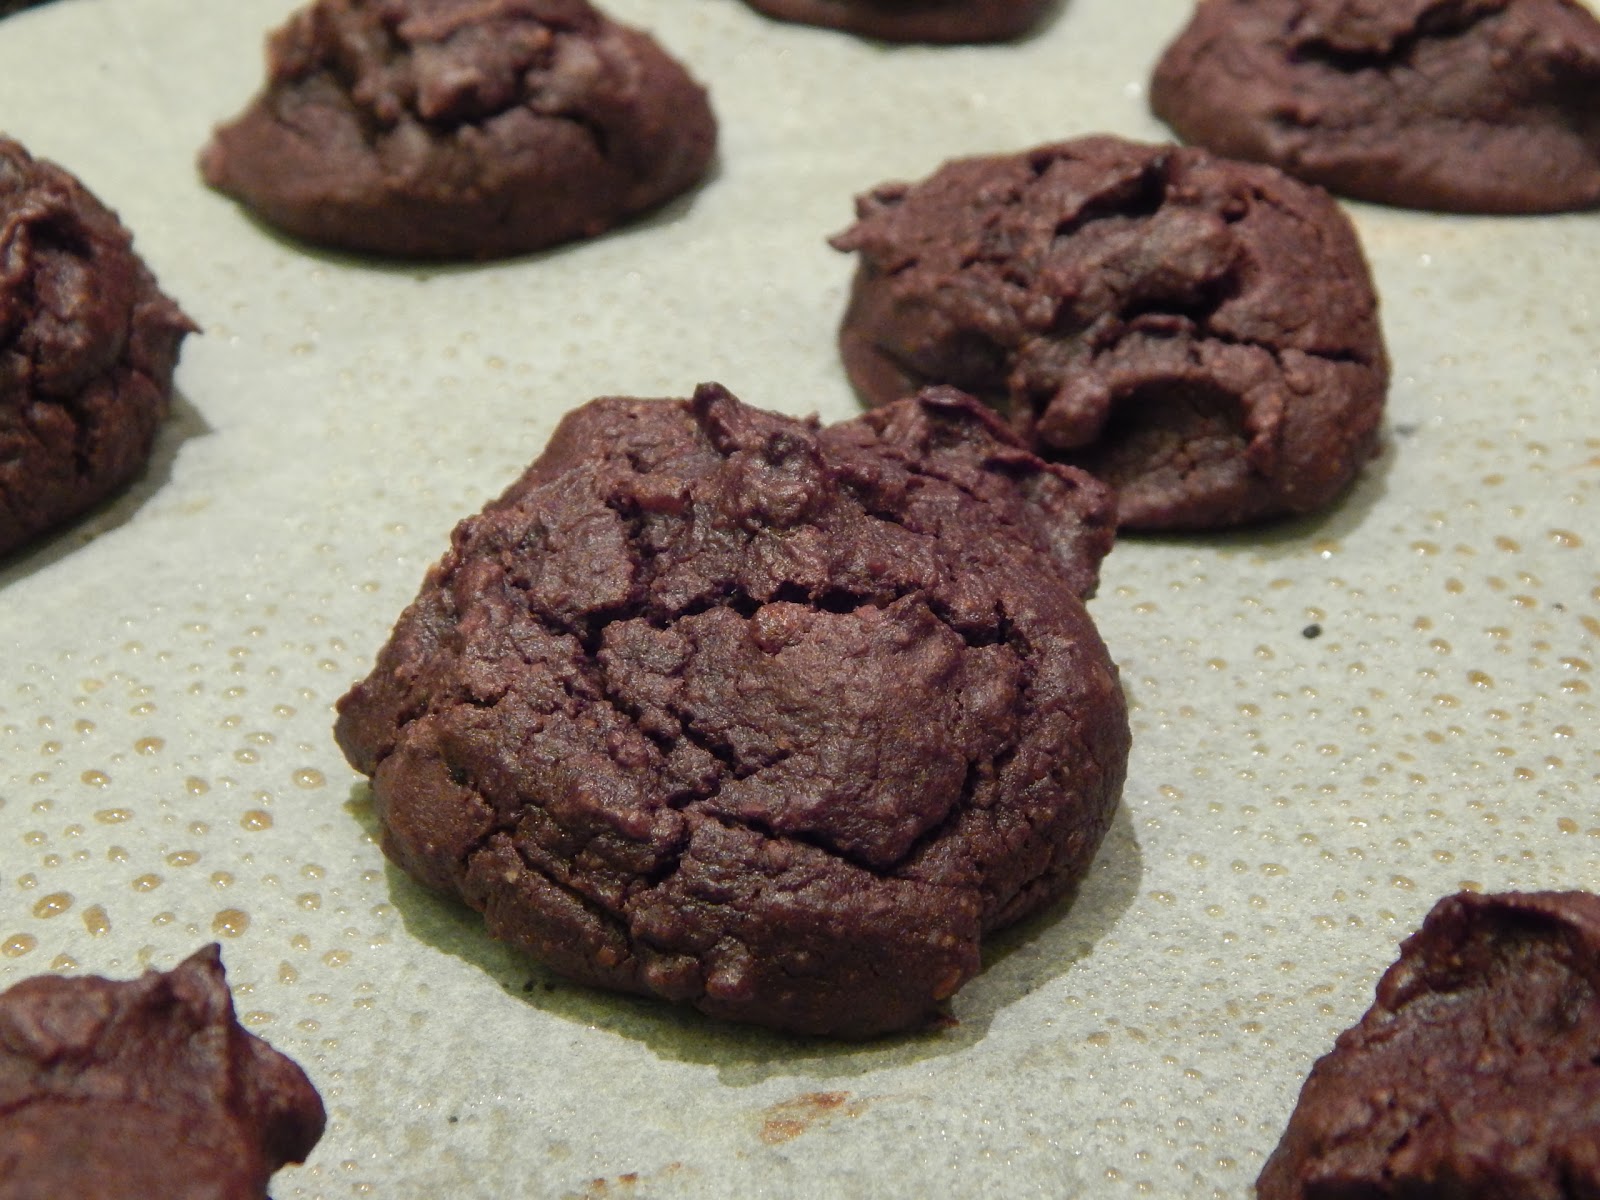
When you are stood up there is only 1 cure...Chocolate Cookies. Chewy, Chocolate cookies with a secret, fibre fueled ingredient; Chickpeas! These cookies are gluten, dairy and processed sugar free. They are low in fat and calories as they have no butter or sugar and, most important, they taste great! If you want to jazz up your cookies add some chocolate chips, nuts, dried fruits etc but they are pretty tasty even without it.

CHOCOLATE COOKIES... with a healthy secret!

INGREDIENTS
1/2 cup Dates
1/4 cup boiling water
Dash of Bicarb Soda
1/2 cup Chickpeas; canned, drained and then measured
2 Tablespoons Maple Syrup
2 teaspoons Vanilla Extract
2/3 cup Almond Meal
1/3 cup Arrowroot Flour
3 Tablespoons Cocoa
1 Egg
1/2 teaspoon Baking Powder
dash Salt

Optional extras: chocolate chips, nuts, coconut

INSTRUCTIONS
Preheat the oven to 175C/350F
Line and grease a large baking tray.
Place the dates in a small bowl and cover with the boiling water and the bicarb.
Allow to sit for at least 20 minutes.
Place the dates in a blender and purée.
Add the chickpeas, maple syrup and vanilla extract and blend until a smooth paste is formed.
Add the egg and blend in.
Add the dry ingredients to the blender and mix until combined.
A delicious cookie dough will form.

Using a dessert spoon, scoop spoonfuls of dough onto the tray.
The spoonfuls will form round balls on the baking tray.
Will make 12 biscuits.
DO NOT FLATTEN THE BALLS.

Place in the middle rack of the oven and bake for 16 minutes.
The cookies will be firm on the bottom and top, but still soft (not gooey) in the middle.
Remove from the oven and allow to cool on the trays.
Store in an airtight container for up to 3 days.

Wednesday, 2 October 2013

Honey, Orange and Pistachio Cake

Posted by Lisa at 04:07 0 comments

I think I might start the Chickpea Appreciation Society.  There are groups that honor all types of odd things; orchids, shitzus, Spock. So why not Chickpeas?

I have been a bit obsessed about the humble legume of late. They are full of fibre, low in calories and cheap; and I LOVE weirding people out by using them in the most unusual of ways. But beware, when you have a diet high in chickpeas and Brussels sprouts it's a recipe for a very stinky household!

This is a cake I made for the lovely Judy. Judy is like a mother hen; she's always looking out for people, taking care of them and making sure they know they're special. It was Judys birthday, so I wanted to make her a cake to let her know we all think she's pretty special too.

This is a moist, tasty cake that would be ideal for an afternoon tea with a cuppa and a big bowl of coconut whipped cream... and no will ever know that it came from the Chickpea Appreciation Society. 

HONEY, ORANGE AND PISTACHIO CAKE

INGREDIENTS
110grams chickpeas; canned, drainedm rinsed and patted dried
1/2 cup Coconut Flour
3/4 cup Almond meal
3 teaspoons baking powder
3 eggs, seperated
1/2 cup Honey
1/2 cup Orange Juice, freshly squeezed
Zest of 1 Orange
1 cup milk (almond, coconut etc)
1/3 Cup pistachios, chopped
Extra honey for drizzling.

INSTRUCTIONS
Preheat oven to 175C/350F.
Line and grease a 20cm/8inch cake tin.
Combine chickpeas, coconut flour, almond meal and baking powder in a blender and blend until fine (the chickpeas will be broken down).
In a mixing bowl of a stand mixer with a whisk attachment fitted, whisk the egg whites on medium/high until peaks form.
Turn mixer off and add honey and zest and whisk on high again.
With mixer on high, add egg yolks 1 at a time. 
Add dry ingredients and remaining wet (milk and orange juice) alternatively in 3 lots with mixer on low. 
Beat on high for 30 seconds.
Pout cake mixture in prepared cake tin.
Sprinkle the top evenly with pistachios.
Bake for 40 min, or until cooked through.
Rest in tin before removing.
Can be served warm or cold and with whipped coconut cream.
Drizzle cake with honey before serving.


Wednesday, 25 September 2013

Chocolate Cupcakes with Peanut Butter Cookie Dough Frosting

Posted by Lisa at 02:46 0 comments


When I was 8 years old my best friend was a girl named Andrea. We made up our own language and would eat egg shells because we thought it would make us smarter (she is a lawyer, or magistrate now so I guess it worked!). I remember crying my eyes out when she moved to Sydney, and even watched the sky to try and see her plane fly by.

When I was 11 years old my best friend was Annaliese. I would spend ages crimping my hair before going to her house for a swim... which would render my efforts flat! Her brother built a spy trap to put on his door so we couldn't sneak in.

Nearly 4 year old H recently told me that he was my best friend. It was a beautiful mothering moment... until he told me that his best friends were Harrison, Henry and Archer; not me! Thankfully I'll always have coconut whipped cream.

I like to think peanut butter and chocolate are best friends. Sometimes they get together over a slice of bread, other times they get stuck in(to) a muffin. They simply belong together. 

What happens when best friends chocolate and peanut butter meet chickpeas? It would be like the cool kids at high school coming across a nerdy foureyed geek. At first sight they are complete opposites but, in classic coming-of-age-teen-movie style, the geek turns out to be the pretty girl/basketball hero/awesome break dancer. 

Chickpeas can be friends with choclate and peanut butter! 

I came accross this recipe from Texanerin via Facebook. I was skeptical but thought it was worth a go. The results... AMAZING! My kids love these cookies. The chickpeas blend up into a creamy cookie base reminiscent of creamed butter and sugar. The recipe is dairy, gluten and sugar free; so it's a healthy cookie then?

Once I discovered the versatile Chickpea my mind went into overdrive, with the genius moment happening last night in a sleep deprived state. I was determined to be able to make a peanut butter frosting that had the same consistency as the one I used to make that contained cream cheese, butter AND icing sugar (is anyone else thinking diabetic coma?!) and tasted fluffy and delisious. The results; peanut butter cookie dough frosting! My finest kitchen moment EVER!

This recipe contains a lot of chickpeas but don't be scared because you can't tell! Chickpeas are cheap, low in calories and I am finding no end to their uses! They really are the magical bean that Jack once had. 

CHOCOLATE CUPCAKES WITH PEANUT BUTTER COOKIE DOUGH FROSTING
Makes 6 frosted cupcakes

Chocolate Cupcakes
INGREDIENTS
100ml boiling water
1/3 cup Cocoa
25 grams (packed tablespoon) of dates
15ml (3 teaspoons) boiling water
2 eggs, seperated
1/4 cup Maple Syrup
1 teaspoon Vanilla Extract
65 grams canned chickpeas (drained, rinsed)
1/4 cup (32 grams) Coconut Flour
2 teaspoons baking powder

INSTRUCTIONS
Preheat oven to 175C/350F
Combine Cocoa and boiling water in a bowl. Stir and allow to rest.
Combine Dates and boiling water in a bowl. Allow to soften.
Once softened (10-20 minutes) place date/water mixture into blender and blend until dates have been broken down (alternatively use a fork).
Place egg whites into a bowl of a stand mixer with a whisk attachment.
Whisk egg whites on high until medium peaks form.
Add maple syrup 1 spoonful at a time whilst still on high.
Add vanilla essence and puree dates whilst still whisking.
Add egg yolks one at a time and mix on medium/high until combined.
Meanwhile, combine chickpeas, coconut flour and baking powder in a blender and blend until the chickpeas have broken down and are mixed with the coconut flour.
Fold dry ingredients into the egg mixture. Add cocoa mixture, and continue to fold gently until combined.
Divide mixture into 6 greased cupcake liners.
Bake for 20-22 minutes, or until inserted skewer is clean.
Remove from oven and allow to cool completely before frosting.

Peanut Butter Cookie Dough Frosting
INGREDIENTS
2/3 cup Chickpeas
1/3 cup Peanut Butter
40ml Maple Syrup
1 teaspoon Vanilla Extract
1 Tablespoon Coconut Whipped Cream (or just plain Coconut Cream)

INSTRUCTIONS
Place the chickpeas, peanut butter, maple syrup and vanilla extract in a blender and blend for 1-2minutes, or until the chickpeas have broken down and the mixture combined. 
Transfer the mixture to the bowl of a kitchen stand fitted with a whisk attachment. Add whipped coconut cream and whisk until fluffy.
If your frosting mixture is too thick to pipe with, add another 1/2-1 tablespoon of coconut cream until the right consistency is reached.
Pipe/spread onto cupcakes...or simply consume by the spoonful!.


Mummy Made It Copyright © 2010 Designed by Ipietoon Blogger Template Sponsored by Emocutez