Showing posts with label Pudding. Show all posts

Thursday, 26 December 2013

Christmas Pudding

Posted by Lisa at 01:49 0 comments


Merry (belated) Christmas!

This is my final post in the 12 recipes of Christmas Series.
It is my favorite, and the one that I am most proud of!
My family ate this pudding for Christmas lunch and it was just like a 'normal' Christmas pudding. The taste, the smell, the texture; it was all there!
It was also all there when I ate more at dinnertime!

The pudding is such an iconic part of a Christmas meal. It right up there with Turkey and the post dinner nap. For me it wouldn't be Christmas without pudding, despite the fact that our climate here in Australia isn't always conducive to a hot dessert.

Thank you for allowing me to share my Christmas recipes with you.
Christmas cooking is a tradition that has been passed down to me from my Mother and Grandmother. I love to give baked goods to people as gifts during the festive season, and even more so now when they later discover what they actually ate!

I hope you have enjoyed your Christmas and I look forward to creating more Christmas goodness for next year!

CHRISTMAS PUDDING

INGREDIENTS
1 cup Dates
1/2 cup Boiling Water
200 grams Mixed Dried Fruit
1/2 cup Port/Sherry
1/4 cup Golden Syrup
300 grams Dates, chopped
1 cup Boiling Water
1 teaspoon Bicarb Soda
4 eggs, separated
200 grams Chickpeas, canned and drained
2 Tablespoons Coconut Flour
1 Tablespoon Arrowroot
2 cups Almond meal
1 teaspoon Baking Powder
2 teaspoons Mixed Spice
2 teaspoons Ground Ginger
Optional; 2 Tablespoons Brandy/Rum for brushing

INSTRUCTIONS
Place 1 cup of dates in a small bowl and cover with 1/2 cup of boiling water.
Leave to sit for 20 minutes.
Place softened dates in a blender and purée.
In a sealable container place the dried fruit, port, golden syrup and puréed dates.
Stir the contents of the container and place the lid on tightly.
Store in a dark, cool cupboard for at least overnight, but up to 6 weeks.
(NB; I left mine in the cupboard for 1 month, shaking the container every few days)

To make Pudding:
(this can be done on the day of serving or ahead of time. The pudding will keep, covered, for up to 3 days or can be double wrapped and frozen)

Place the dates in a small bowl and add the boiling water and bi-carb. Allow to sit and soften for at least 20 minutes.

Place the egg whites in the bowl of a kitchen stand mixer with a whisk attachment.
Whisk the egg whites on high until medium peaks form.
Add the puréed dates and continue to whisk.
Add the egg yolks and whisk for 1 minute.

Place the chickpeas in a blender (or use a hand blender) and process until they have broken down.
Add the almond meal, coconut flour, arrowroot, baking powder and spices and blend until combined.
Add the dry mixture to the eggs and stir in until combined (alternatively whisk on low)
Add the fruit mixture to the combined mixture and stir in until combined (alternatively whisk on low).

Take a 2 litre (8 cup capacity) pudding bowl and grease the sides of the bowl.
Place a small piece of baking paper on the bottom of the basin and grease it also.
Pour the mixture into the pudding bowl, smoothing the top for a flat surface.
Place another piece of baking paper on the pudding and screw on the lid.

Place the pudding bowl inside a large saucepan, sitting it on top of a trivet or small plate.

Pour water into the saucepan, ensuring it comes 3/4 of the way up the edge of the pudding bowl.
Bring the water to the boil and simmer on medium/low, with lid on, for 5 hours.
Check the water levels regularly to ensure that they are 3/4 of the way up the edge of the pudding bowl.

After 5 hours remove the pudding bowl from the saucepan and allow to sit for 10 minutes.
Remove the lid and run a knife around the edge of the pudding to ensure it can be easily removed.
Invert pudding onto a serving tray.
Brush the pudding with the optional Brandy if desired.

If serving immediately pour the Salted Toffee Sauce (see recipe below) over the top of the pudding, allowing it to drip down the edges of the pudding.

Serve with Brandy Custard (see recipe below) and/or Whipped Coconut Cream.

Pudding can be stored for up to days and then reheated.
Reheat pudding by placing the pudding back into a greased/lined (as above) pudding bowl and simmering in a large saucepan (as above) for 1 hour.
Slices of pudding can be warmed in the microwave.

Pudding can be double wrapped and frozen also.


SALTED TOFFEE SAUCE

INGREDIENTS
1/2 cup Dates
1/4 cup boiling water
Dash Bi-carb Soda
2 Tablespoons Golden Syrup
100 ml coconut cream (the thickened part from the top of a chilled can)
1/2 cup Whipped Coconut Cream (link)
1/2 teaspoon salt flakes

INSTRUCTIONS
Place the dates into a small bowl and cover with boiling water and add the bicarb.
Allow to sit and soften for at least 20 minutes.
Plate the date mixture, golden syrup and coconut cream in a blender and purée.
Pour the purée mixture into a small saucepan and, over a medium heat, stir until bubbling.
Reduce the heat to low and add the whipped coconut cream and cook, stirring occasionally for 7-10 minutes, or until slightly thickened.
Stir in the salt and allow to sit for 5 minutes.
Pour over the top of the pudding.
Alternatively, it can be served individually as a sauce.


BRANDY CUSTARD
(Adapted from the Australian Better Homes and Gardens Magazine)

INGREDIENTS
1/3 cup dates
2 1/2 Tablespoons Boiling Water
Dash of bi-carb
500 ml milk (of choice)
200 ml Coconut cream (the thick part removed from the top of a chilled can)
1 teaspoon vanilla extract
6 egg yolks
3 Tablespoons Arrowroot
1 Tablespoon Brandy

INSTRUCTIONS
Place the dates in a small bowl and cover with the boiling water.
Add the bicarb and allow to sit and soften for at least 20 minutes.
Purée in a blender.

Place the milk, cream and vanilla in a saucepan and bring to a simmer over a medium heat. Remove from the heat.
In a separate bowl whisk together the egg yolks, purée dates and arrowroot until smooth and combined. Pour in 1 cup of the warmed milk mixture and whisk until smooth and combined.
Add the egg yolk mixture to the reaming milk in the saucepan and return to the heat.
Cook over a low heat for 6-8 minutes, or until thickened.
Add the brandy and stir to combine.
Serve immediately or refrigerate for up to 3
Wednesday, 18 December 2013

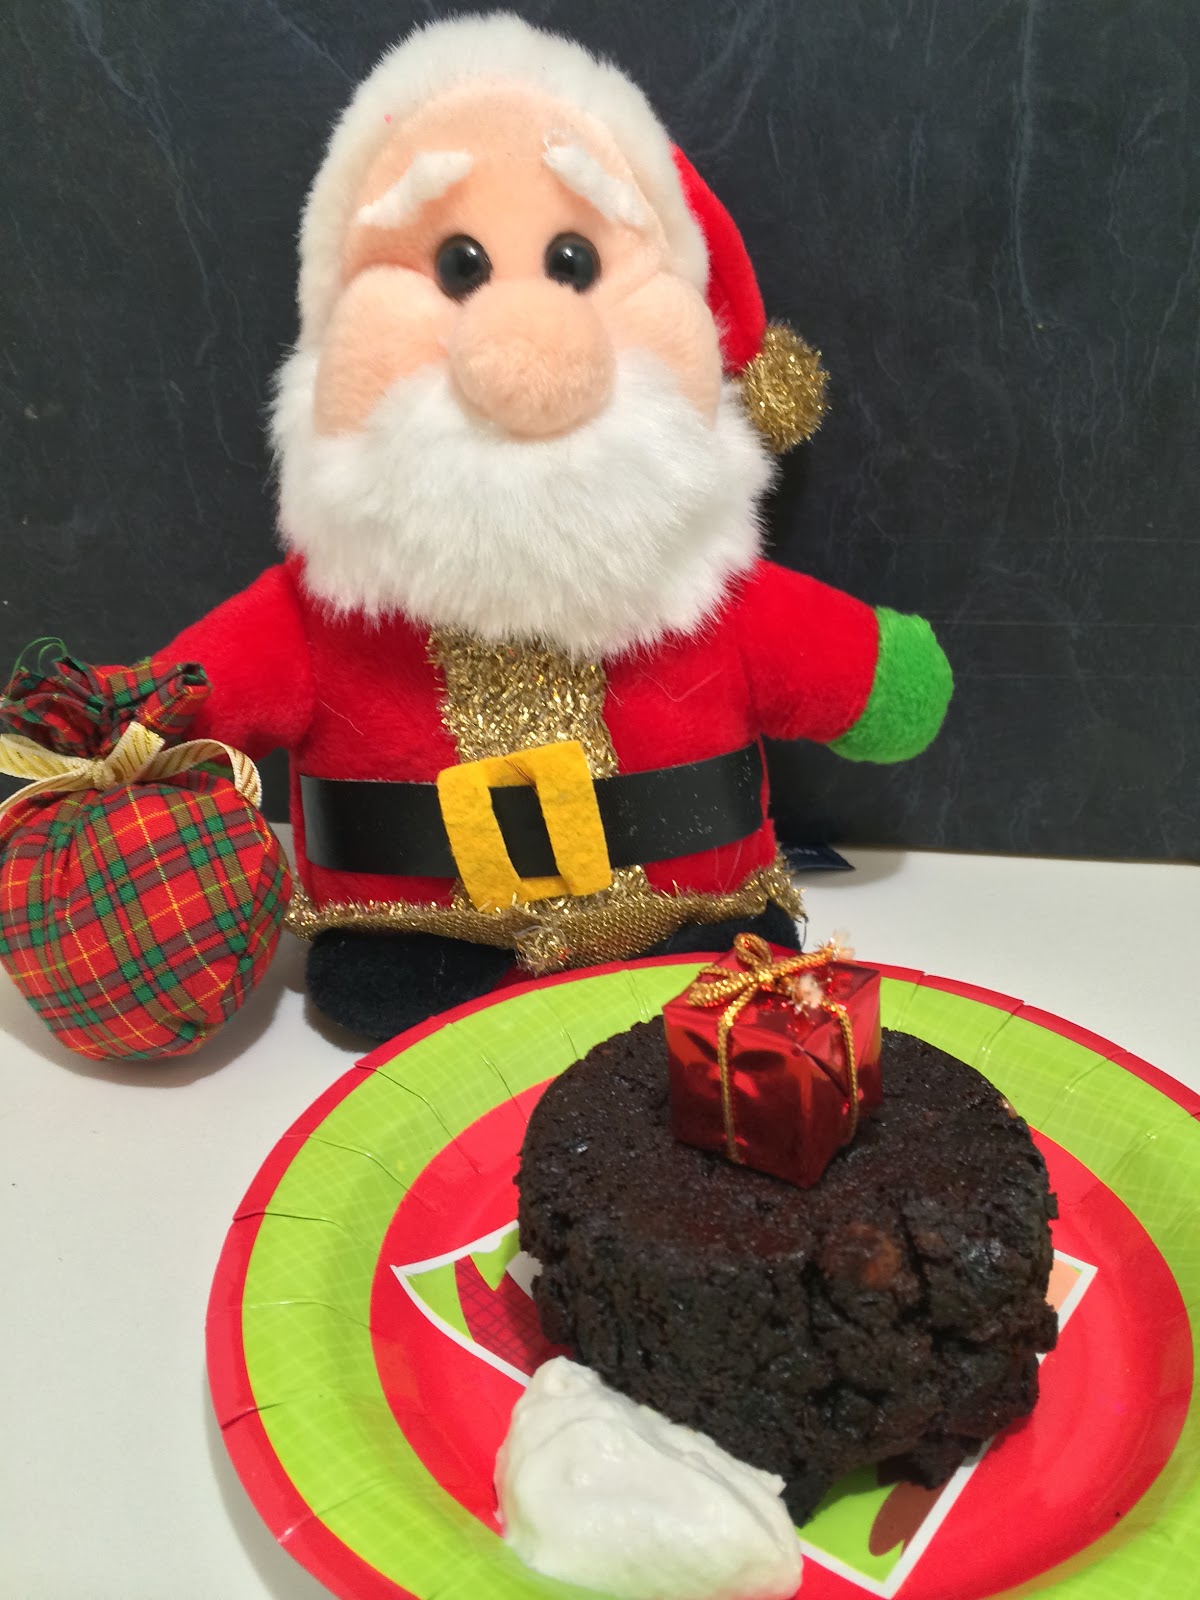
Chocolate Fruit Mince Puddings

Posted by Lisa at 02:46 0 comments

Christmas comes with it but many perks. Presents, parties, days off work and the often forgotten Christmas Movie. Christmas movies, just like gifts from Nanna, can be a bit of a mixed bag.

It's probably easier to start with some simple rules;

  1. If it 'stars' (and I use that word loosely!) Tim Allen then give it a miss.
  2. Any movie with an old action hero (or ex Governor) isn't worthy of your time.
  3. Just because they made a sequel doesn't mean the original movie deserved it.
  4. Movies with multiple small plot lines are often confusing, but as long as Hugh Grant is in it it doesn't matter if it doesn't make sense.
  5. There will always be at least one nauseating Christmas Carol scene, so make sure to plan your bathroom break around that time.
Christmas movies are cheesy, full of 'insights' and usually have an impossibly happy ending with a PG snog scene. They make you smile and, most importantly, they make you believe in Christmas. It doesn't matter how long the queues at the shop where or that someone stole your last festive mint, when a C-grade celebrity starts to sing 'Santa Claus is coming to town' your worries don't seem as bad any more. It may just be that you realized that your life isn't as bad as the once famous person who now has to wear red tights and sing Yuletide hymns.

If these mini Puddings where a Christmas movie it would star Hugh Grant with his floppy hair, an enchanted reindeer that sings carols and at least one scene with a snow ball fight.
It would be magical!

These Puddings are delicious served with Whipped Coconut Cream, and can be eaten hot or cold. 

MINI CHOCOLATE FRUIT MINCE PUDDINGS
Makes 8 individual serves
Adapted from this recipe

INGREDIENTS
1 cup Dates
1/2 cup boiling water
2 cups Mixed Dried Fruit
1 cup Raisins/Sultanas
1/2 cup Golden Syrup
3/4 cup Water
1/4 cup Apple Sauce (see recipe below)
1 1/2 cup Almond Meal
1/2 cup Coconut Oil, melted
1/2 cup + 2 Tablespoons Cocoa
2 Tablespoons Maple Syrup
1 Tablespoon Vanilla Extract
1/4 cup Coconut Flour
3 teaspoons Mixed Spice
1 teaspoon Bicarb Soda

INSTRUCTIONS
Preheat the oven to 175C/350F
Grease an 8 hole Texas Muffin tray (bigger holes the a normal muffin tin) or 8 small ramekins.

Place the dates in a small bowl and cover with the boiling water. Allow to sit for a minimum of 20 minutes.
Place the Fruit, Raisons, Golden syrup, Apple Sauce and 1/4 cup water in a saucepan and bring to a boil.
Simmer the fruit mixture for 5 minutes, then allow to cool.

Blend dates until puréed.
Add the cooled fruit mixture to the dates and pulse until finely chopped.
Transfer the mixture to a large mixing bowl.

To the mixing bowl, add the melted coconut oil, 1/2 cup water, almond meal and maple syrup and stir until combined.
Sift the cocoa, coconut flour, spices and bicarb over the bowl and gently fold together.
Evenly divide the mixture between the muffin holes/ramekins.
Bake for 40-45 minutes, or until cooked through.
Remove from the tin and serve immediately with Whipped Coconut Cream (link).
Alternatively, they taste great cold too!

You can make these up to 3 days ahead and reheat in the microwave.

APPLE SAUCE
INGREDIENTS
4 apples, peeled and cut into small pieces
3/4 cup water

INSTRUCTIONS
Place apples and water in saucepan. Cover with lid.
Bring to boil, then simmer for 7-10 minutes, or until apple is soft.
Store in fridge.


Tuesday, 10 December 2013

'Terry's' Chocolate Orange Truffles

Posted by Lisa at 01:00 0 comments

I go a bit cooking mad around kitchen.

Now this is saying something because I tend to be a bit obsessive most months of the year. As soon as I get a idea I like to make it straight away. Sometimes this means working late into the night, eating dessert for breakfast or a total disregard for who I was actually supposed to be doing (does the housework really need to be done anyway?!). Thankfully, 4-year-old H loves to vacuum!

Most years I have ended up with a Christmas favourite that I end up cooking for everybody. Last year it was gingerbread houses, the year before it was gingerbread men wreaths. This year it's been these truffles. The only problem... they don't last long enough to share!

Oh so tasty. These little balls of Christmas cheer are decadent without being naughty, and they're vegan friendly!

I've called these 'Terry's Chocolate Orange Truffles' after the British Chocolate Candy, and my friend Terri. Terri and her family are vegans, and she can rarely eat any of the treats I make. Finally I found something that we can all enjoy; and enjoy them you will!

'TERRY'S' CHOCOLATE ORANGE TRUFFLES
(Makes 13 truffles or 1 small orange and 5 truffles)

INGREDIENTS
1 1/2 cups dates
1 1/2 teaspoons Orange Rind
1/3 cup blanched almonds (or another nut)
1 1/2 tablespoons Maple Syrup
1/4 teaspoon Cardamom
1 1/2 tablespoons Cocoa
1/4 cup Desiccated coconut

INSTRUCTIONS
Place all the ingredients, except the coconut, in a blender and process until well combined.

Option 1. Divide the mixture into even portions and roll into balls.
Roll the balls in the coconut and refrigerate.

Option 2. Cut an orange in half and remove the insides.
Spoon mixture into the orange halves and press the mixture into the Coconut.
Press the 2 halves together.
Cut the orange again, creating quarters.
Press the newly made segments into the Coconut so that all the chocolate edges are coated in coconut. 
Put the quarters together and wrap.

Sunday, 20 October 2013

Rhu-berry Meringue Pie

Posted by Lisa at 02:44 1 comments

Everyone has one. Their shameful little secret. Some are big; others can fit into a kitchen drawer. Mine filled an entire garage. You hope your visitors don't notice; that they don't see parts poking out. You try hard to deny that there's a problem, even lying about its severity.

Then one day it hits you, literally, as everything starts to fall down around you. It's the junk room.

The place where you throw anything and everything; from old phone chargers to university notes, bill notices from last year to broken old furniture. It's where things go... never to be found again.

Ours used to be the 3rd bedroom, before we needed it for 4yo H. More recently it has been the garage; until this weekend. I wish I'd taken a before shot because no one will ever believe that the clean, ordered space that we have now was ever a crammed, dirty, eyesore. Believe me it was!

2 days, 2 trips to the tip and a few sales on Facebook later we have a miracle... aka the new Man Cave.

My children had never seen the walls of the garage before today!

Cleaning the junk room is not the time to the timid. I was ruthless! Gone were the university notes I slaved over for hours, gone were the broken outdoor chairs that might one day come in handy (for what? they're broken!) and gone was the wonky kids tent that we bought at a garage sale when someone else was probably cleaning up their junk room.

Some decisions about what to throw out are easy, others are not. Possessions, however old or new, hold memories or hopes for the future. Does getting rid of them mean you get rid of the memory? Does letting go mean you can move forward? Does a decision today mean it the end of one chapter and the start of another?

Cleaning a space can be cathartic, smelly and dirty work. It can also be exhausting (just ask my husband who I think will be asleep before this blog hits your inbox!).

A reward for such a big weekends work? A pie as messy as the junk room was to begin with; Rhu-berry Meringue Pie. A tart rhubarb and blueberry pie which is balanced by the soft, delicate meringue peaks. The filling collapses on your plate, so it can be scooped up in the fluffy meringue. It tastes gooood!

NOTES:

This is a messy pie, but I think that is part of its charm. It makes it more rustic than chic.

If you want a firmer filling these are some options:

1. Add an extra tablespoon of arrowroot. The consistency of the filling will remain the same but it will be thicker .

2. Use gelatin instead of Arrowroot. I have not done this, but in theory it will result in a firmer, jelly like consistency. Add 3-4 teaspoons of gelatin (not tested - only an idea in theory) to the 1/4 cup of liquid and allow to sit for 5 minutes. Instead of boiling the mixture, simmer for  5 minutes. The consistency will be very different. The cool mixture would need longer to set in the crust before adding the meringue topping.


RHU-BERRY MERINGUE PIE
Makes 16 slices, each 136 Calories

PIE CRUST (adapted from Against all Grain)

INGREDIENTS
1/4 cup almond flour
1/2 cup coconut flour + 2 tablespoons  (available from health food and specialty stores)
1/4 teaspoon salt
1/4 teaspoon baking soda
1/4 cup coconut oil, softened
1/4 cup maple syrup (you could substitute honey etc)
1 egg
1 teaspoon vanilla

INSTRUCTIONS
Preheat oven to 175C/350F
Grease/Spray a 20cm (8 inch) spring form cake tin or pie dish (a 22cm/9inch can also be used)
Mix the dry ingredients in a blender.
In a separate small bowl, whisk together the wet ingredients.
Pour the wet ingredients into the dry, and blend until combined. A dough ball will form.
Roll the doughnut between 2 sheets of baking paper and trace a plate/tin bigger than tart tin.
Gently place circle in tin. Use excess dough to ensure an even edge.
Alternatively, spread dough evenly in tin and up edges by hand.
Pierce bottom of pie crust with a knife 4 to 5 times to prevent the dough 'bubbling'.
Bake for 15 minutes. Cool completely.
If using a spring form tin, remove the crust and place on a serving tray. This may be more difficult if using a pie tin and you may choose to construct the pie and serve from the tin.

RHUBARB AND BLUEBERRY PIE FILLING

INGREDIENTS
350 grams Rhubarb (measured after cutting into 2cm pieces); approximately 5 stalks
1 cup orange juice, freshly squeezed
1 cup water
450 grams Blueberries (I used frozen ones)
3 Tablespoons Arrowroot/Tapioca (See recipe  notes above on tips to make filling firmer)
2-3 Tablespoons Maple Syrup (this will depend on the desired tartness of the filling)

INSTRUCTIONS
Place the cut rhubarb in a saucepan with the orange juice and water.
Bring to a slow boil over medium heat.
Simmer for 5 minutes, or until the Rhubarb is tender and breaking down.
Strain the liquid from the rhubarb using a sieve with a small weave (holes), retaining the liquid.
Place the rhubarb and blueberries back in the saucepan, along with 1/2 a cup of the retained liquid and the maple syrup.
Bring the mixture to a warm temperature over a medium heat.
Taste the mixture a this point and add more maple syrup if required.
Meanwhile, mix the arrowroot with 1/4 of a cup of the retained liquid. Whisk to ensure it is well combined.
Add the arrowroot liquid mixture to the saucepan and bring to the boil, stirring constantly.
Once boiling, continue to stir for another minute.
Place the mixture in the fridge to allow to cool and thicken.
Once completely cooled, pour into the cooled pie crust (there may be filling left over).
Place filled pie crust in the fridge for at least 2 hours.

MERINGUE TOPPING

INGREDIENTS
2 egg whites
Dash of salt
1/2 cup maple syrup
1/2-1 teaspoon Vanilla Extract

INSTRUCTIONS
Preheat oven to 220C/440F (not required of using a kitchen blow torch)
Place the egg whites and salt in the bowl of a kitchen stand with a whisk attachment.
Whisk on high until soft peaks form.
Whilst still whisking on high, slowly add the maple syrup.
Add the vanilla.
Stiff, form peaks of meringue will have formed.
Spread evenly over the pie filling.
Place pie on a oven proof tray and place on bottom shelf of oven for 2-3 minutes, turning halfway.
Alternatively, use a kitchen blowtorch until desired counting is reached.
Serve.

Keep refrigerated when not eating.


Thursday, 5 September 2013

7 Layer Citrus Trifle

Posted by Lisa at 04:37 1 comments

When I was at University I worked at a retail store in a shopping centre. It was a great job; discount clothes, working with my best mates, cute customers! Thursday nights were my favourite. It was army payday and it was corporate policy to give servicemen a percent discount (or at least it was my own personal policy!). The crushes I had! 
One of our jobs was to 'dress the windows'. We had mannequins, props and signage and often a theme to follow. This was a challenge for me as I like symmetry. Sounds weird I know, but I like things even, centered and balanced... In life and windows displays! This made my merchandising efforts quite boring (but hopefully not my life!).

I do like symmetry and balance in my cooking as well, especially in plating and decorating. Sometimes going off centre can make a dish look messy and less appealing. How do you challenge an anally symmetrical food blogger? A 7 layer trifle!

This concept comes from Raspberri Cupcakes. I had made it twice in my sugar eating days and it was a hit a parties. With so many different textures and flavours it's a different dessert with each spoonful. It is a lot of work with so many different elements and cooking methods but it is well worth it! Ensure you plan ahead. Some elements can be made a couple of days ahead (curd, mousse, biscuits, cream) and then constructed before serving. If you put it together a few hours before serving it will help the and textures settle into each other. 


7 LAYER CITRUS TRIFLE
(based on this recipe from Raspberri Cupcakes)

LAYER 1: Lemon Mousse
(adapted from Empowered Sustenance)


INGREDIENTS
3/4 cup Lemon Curd (from recipe below)
1 cup coconut cream, tin opened and placed in fridge for at least 2 hours, preferably overnight
1 Tablespoon Gelatin
Maple Syrup to taste

INSTRUCTIONS
In a small saucepan whisk together coconut cream and gelatin. Let sit for 10 minutes.
Place saucepan over a medium heat and whisk until gelatin dissolves.
Pour into a bowl and allow to set for 4 hours.
In a food processer, place curd and set gelatin cream and blend on high until creamy. This may take up to 5 minutes. Add maple syrup to taste if required.
Once smooth place on bottom of trifle dish. Store in fridge.
If storing in fridge before assembly the Mousee may need to be blended again before using.

LAYER 2: Lemon Cake
This is a 1/2 recipe of the lemon flavored versatile cake.

INGREDIENTS
3 eggs
1/4 cup Maple syrup
2 teaspoons Vanilla essence
1/4 plus 1/8 Coconut flour
2 teaspoons baking powder
1 tablespoon lemon juice
1/2 teaspoon lemon zest

INSTRUCTIONS
Preheat oven to 175C.
Place egg whites in a clean mixing bowl and whisk on medium/high until soft peaks form.
Slowly add the maple syrup; 1 spoonful at a time.
Mixture will triple in size and form peaks.
Add vanilla and whisk on medium/high until combined.
Turn whisk to medium and add egg yolks, 1 at a time. Add next yolk only once the previous one has been combined.
In a separate bowl, sift the coconut flour and baking powder together 3 times.
Gently fold the sifted dry mix into the egg mixture in 3 lots.
Add  the juice/rind and gently fold.
Pour into a greased and lined 20cm/8 inch cake tin.
Bake for 20 min, or until skewer comes out clean.
Cool on rack. If the cake is too big to fit easily into the trifle dish cut in half and trim until it fits. Pledge on top of mousse layer.

LAYER 3: Lemon Curd
See Lemon Curd recipe

Part of this curd can be used in the Lemon Mousse recipe. When cooled, the remainder can be spread over the cake.

LAYER 4: Orange Jelly
Set in a flat dish so it can be cut into small pieces, or into a springform cake tin the same size as trifle dish.

INGREDIENTS
120ml boiling water
10 gram Gelatine
350ml orange juice, strained

INSTRUCTIONS
Dissolve gelatin in boiling water.
Add orange juice and stir until combined.
Pour into a lined baking tray and set in fridge for at least 4 hours
Once set cut into small pieces and place on top of curd.

LAYER 5: Almond Orange Biscotti with Choc Chips
See recipe from Tasty Yummies

Once cooled, cut biscuits into small pieces to resemble a chunky crumble. Scatter evenly over the jelly.

LAYER 6: Lemon Cream

INGREDIENTS
1 can coconut cream, opened and refrigerated overnight (or at least 2 hours)
2 teaspoons Vanilla Extract
1 teaspoon maple syrup
2 teaspoons lemon juice
Zest of 1 lemon

INSTRUCTIONS
Remove thickened cream from the can, discard watery component.
Place cream into mixing bowl and whisk on high until thickened.
Add vanilla, maple syrup, lemon juce and zest and whisk until combined and thick.
Store in fridge and let thicken.
Dollop evenly over biscuit layer.

LAYER 7: Mini Meringues

INGREDIENTS
2 egg whites
1/2 cup Maple Syrup
1/2 teaspoon Vanilla Extract
Pinch of salt
Pinch of cream of tartar
Optional; lemon or orange zest

INSTRUCTIONS
Preheat oven to 95C/200 F.
Combine egg whites and maple syrup in the bowl of a stand mxer  Add vanilla extract.
Set bowl over a pot of simmering water, and stir until combined and mixture is warm, about 3 minutes.
Add salt and cream of tartar.
Beat with a mixer on medium-high speed until stiff, glossy peaks form and meringue is mostly cooled, about 7 minutes. Beat in zest if using
Fill bag fitted with piping nozzle with meringue, and pipe circular shapes (they don't need to be perfect rounds) on lined baking trays. Alternative,y dollop spoonfuls on baking tray.
Bake meringues until crisp on the outside but still soft inside, between 1 hour- 1 hour 15 minutes.
Let cool completely on wire rack.

TRIFLE CONSTRUCTION
The trifle can be constructed the day before, but place the meringues on top just before serving. Trifle needs to be stored in the fridge. The meringues may go soft if left for too long.


Sunday, 11 August 2013

Paleo Rochers

Posted by Lisa at 03:29 0 comments

I found a gorgeous (fake) red leather jacket in a shop today. Super cute, matched my boots and new handbag. Unfortunately it's was a bit snug across my man shoulders which I was willing to live with, until my husband told me I looked like I was out of a Canadian Sci-Fi show. Apparently this is an OK look if you also have horns attached to your forehead and makeup scales along your neck; I have neither, therefore I have no new jacket. 

I did have the find of the century at my local op-shop recently. A vintage tan leather jacket, straight from the 1970's, in mint condition (also matched my boots, unfortunately I had to buy a new handbag to match!) for $7. Bargin. I'm sure I look more 'Starsky and Hutch' than 'Charlies Angels' but I'm ok with that. For $7 I'd happily be Marsha Brady!

Fashion is a funny thing. Unfortunately, many looks come around again; which can be concerning as they were horrid the first time around. When I was 10, I (and the rest of the population) went through a neon, bright colour phase. I took this 1 step further and in order to emulate my favourite singer at the time - Collette (who had a one hit wonder with a remake of 'Ring my Bell') - wore neon Lycra shorts with my brightly coloured scrunchies. Let's just say I wont be looking for any more of that look at the op shop any time soon!

Some things need to stay in the past... ex-boyfriends, thigh masters, fondue and neon lycra pants. Some things bounce in-and-out of style - like the Ferrero Rocher.

These Paleo Rochers are like seeing BABBA. You know you're never going to get to have the real thing again, but if you close your eyes you can almost imagine that it is the real deal (for those non-Auusies BABBA are an ABBA tribute band who do a great version of 'Living on a Prayer' by Bon Jovi)
They are missing the wafer component of the Fererro Rocher, but once you taste the soft hazelnut nougat that will no longer be an issue. They are the truffle tribute version.

PALEO ROCHERS
(inspired by Good To Know)
Makes 16

INGREDIENTS
16 hazelnuts
1 tablespoon caramel
150 grams Nutella (I make my own using this recipe)
2 tablespoons Cocoa
2 tablespoons coconut oil
1 1/2 teaspoons maple syrup 
2 tablespoons coconut cream
60 grams roasted hazelnuts, coarsley chopped

INSTRUCTIONS
Warm caramel in a saucepan and add hazelnuts. Stir to coat nuts completely in caramel.
Place nuts on tray lined with baking paper and allow to dry (depending on your room temperature, this can also be done by placing the nuts in a low oven for only a few minutes)
In a saucepan add the remaining ingredients (except for the chopped nuts). 
Stir over low heat until mixed thoroughly.
Leave to cool and thicken slightly (this can be done by placing saucepan in the fridge)
When nuts are dry and mixture has cooled and thickened; use a spoon to scoop out enough mixture to cover the nut.
Form a ball around the nut, and roll in palm to create a perfect ball.
Roll the covered nut ball in the chopped hazelnuts.
Repeat the process for all the nuts, using equal amounts of nutellla mixture to ensure consistency (I measured the mixture, divided by 16 and weighed each scoop).
Store in the fridge for at least 1 hour to set before serving.
Keep in fridge.

Monday, 29 July 2013

Steamed Maple Syrup Pudding

Posted by Lisa at 03:51 0 comments


There are certain things that evoke magical memories from your childhood.
Places, smells, TV shows and, of course, food.

For the first few years of my primary school life I ate strass and tomato sauce sandwiches. Mum tells me it wasn't every day; but in my version I was slowly turning into a lump of processed meat. 
For a while in high school I made myself fairy bread sandwhiches for lunch... which was a better option than using the communal sandwich toaster (jaffle iron) which the science class showed contained more bacteria than a toilet seat.

Each year for our birthday Mum let us choose our favourite dishes for dinner. Golden syrup dumplings were most definately in my top 5... and not just for birthdays! They were sweet, sticky and oh so yummy! Whilst the recipe could be made gluten free, a Paleo friendly version seemed impossible.

Until now! OH MY GOSH! These puddings nearly made me cry; they tasted like my childhood. The maple syrup had been absorbed into the top layer of cake to create a soft, maple pudding. I didn't even need whipped coconut cream; which is a big call seeing how much I love the stuff!

The recipe is a bit fiddly but well worth it. Take the time to whisk the eggs as per the instructions. The more air in the mixture the lighter the pudding will be. Creating a tight seal on the baking tray is important, as is putting in enough boiling water.

These puddings are my new go-to dessert. Perfect for a winters day, by the fire in your pajamas.

Note; the photo shows a Steamed Jam Pudding also. This was made using the same method but instead of maple syrup in the empty ramekin, jam was used (1-2 tablespoons of jam per ramekin, mixed with 1/2 teaspoon of warm water). This version was tasty, but not in the league of the maple syrup puddings.

STEAMED MAPLE SYRUP PUDDING
Makes 4 puddings in ramekins

INGREDIENTS
3 eggs, room temperature 
1/4 cup maple syrup
1 teaspoon vanilla extract
1/4 cup coconut flour
1 1/2 teaspoon baking powder
Extra, 8 tablespoons maple syrup 

INSTRUCTIONS
Preheat oven to 170C/340F
Warm the extra maple syrup in a saucepan for 5 minutes until it begins to thicken slightly. 
Grease the 4 ramekins, and divide the warmed maple syrup evenly (2 tablespoons in each). 
Place in the fridge to chill.
Seperate the eggs and place egg whites into a mixing bowl with a whisk attachment.
Whisk egg whites on medium/high until soft peaks form.
Gradually add the maple syrup, 1 spoonful at a time whilst whisking on medium/high. This is a slow process but allows for the syrup to be incorporated and eggs whites to thicken.
Add vanilla extract; whisk.
With the whisk on medium, add the egg yolks 1 at a time. Ensure that each yolk is incorporated before adding the next yolk. 
The mixture should be large and fluffy.

Mix the coconut flour and baking powder in a bowl and sift 3 times.
Fold the flour mixture into the egg mixture in 3 lots, being careful not to over mix.

Remove the ramekins from the fridge. Evenly divide the cake mixture into the 4 ramekins.
Place the ramekins in a high sided baking tray.
Pour enough boiling water into the tray to come halfway up the sides of the ramekins.
Cover the tray tightly with tin foil, spraying the foil with oil spray so the cakes do not stick. 

Placed the covered tray in the oven for 45 minutes.
Remove the ramekins from the tray immediately and invert onto serving plates.
Serve with whipped coconut cream if desired.


Mummy Made It Copyright © 2010 Designed by Ipietoon Blogger Template Sponsored by Emocutez