Showing posts with label Honey. Show all posts

Wednesday, 4 June 2014

Compost Cookies

Posted by Lisa at 03:19 0 comments

I think Cookies might be the new cupcake. A big call, I know. I have been on a cookie fix lately; weird ones, normal ones and now ones with an uninviting name.Cookies are quick to eat, they're so easy to adapt the flavours and who doesn't love a cookie break?

These Compost Cookies are also known as Garbage, Left Over or Rubbish Cookies. I think they all sound a bit ick; thankfully the cookies taste amazing so you'll soon forget the gross name. Compost Cookies are a great way to use left overs and odds and ends from the cupboard. Don't have sultanas? Use Raisins, Craisins or Dates. Maybe switch in Dried Apricots, Pecan Nut Brittle or white chocolate. The possibilities are endless!! And tasty!

COMPOST COOKIES
Inspired by Christina Tosi from Momfoko Milkbar

INGREDIENTS
112 grams Avocado (approximately 1/2 cup or 1 small-medium avocado but measure to be sure)
1/2 Tablespoon Honey
1/3 cup Maple Syrup
1/2 Egg (I know this sounds weird but I couldn't eat 18 cookies myself. If you can double the recipe)
1/2 teaspoons Vanilla Extract
3/4 Cup Almond Meal
1/3 Cup + 1 Tablespoon Arrowroot
1/4 teaspoon Baking Powder
Dash Bicarbonate
1/2 teaspoon Salt
Add ins: (swap according to what's in your cupboard)
1/4 Cup Almond Brittle (see recipe below)- break into small pieces using a food processor or by hammering
50 grams Chocolate Chips (see recipe below)
1/4 Cup Desiccated Coconut
1/4 Cup Sultanas

INSTRUCTIONS
If not already done so make the Almond Brittle and Chocolate chips.

Place the avocado, maple syrup and honey in a blender and blend for 3 minutes.
The mixture will be silky smooth and an odd green colour.
Transfer the green mixture to the bowl of a kitchen stand mixer with a paddle attachment.
Add the egg and vanilla and beat for 30 seconds.
Scrape down the edges of the bowl and then beat on medium/high for 7 minutes.
Add the dry ingredients (except for the add ins) and mix on low until just combined.
Stir in the add ins by hand (not literally with your hand; but not by the mixer) being careful not to over mix.

Line 2 baking trays with baking paper and grease.
Using an ice cream scooper, or a 1/4-1/3 cup measure, make 8-9 mounds of cookie dough over the 2 sheets. Do not place the cookies too close to each other.
Using your fingers or the back of a spoon, shape each mound into a circle by flattening the top.
Cover each tray with plastic wrap and place in the fridge for a minimum of 1 hour (can be left for up to 2 days).

Preheat the oven to 190C/375F
Place 1 tray of cookies in the oven and bake for 18 minutes.
Remove and allow the cookies to cool completely on the tray.
Bake the other tray of cookies next. (Don't bake the 2 trays at the same time as the bottom tray will not get crispy on top)

The cookies are best eaten fresh but can be stored in an airtight container for up to 4 days...good luck not eating them all at once! They are crispy on top and soft on gooey on the inside.

ALMOND BRITTLE
INGREDIENTS
1 Tablespoon Maple Syrup
1 Tablespoon Honey
1/4 Cup Almonds, halved
Optional, dash of Salt

INSTRUCTIONS
Prepare a split-mat (a silicon baking mat) or line a baking tray with baking paper and grease. 
Place the maple syrup and honey in a small saucepan and bring to a rolling boil over medium heat.
Simmer the mixture over a medium heat until it turns a golden colour.
The mixture will need to be stirred continuously to prevent it sticking to the bottom of the saucepan and burning.
Take the saucepan off the heat and immediately stir in the almonds, ensuring the nuts are coated in the mixture.
IMMEDIATELY spread the coated nuts over the prepared mat/tray and allow to cool completely.
Sprinkle with salt if you wish.
To fasten the process the brittle can be placed in the fridge.

CHOCOLATE
INGREDIENTS
1 1/2 Tablespoons Coconut Oil
1/2 tablespoon Maple Syrup
1 1/2 Tablespoons Cocoa
Optional; 1/2 teaspoon of Vanilla Extract (for a sweeter, less bitter, chocolate)

INSTRUCTIONS
Over a very low heat, melt the Coconut oil in a saucepan.
Add the maple syrup and stir
Add the cocoa and whisk to combine.
Allow to thicken slightly, but DO NOT boil or over heat (as this causes the coconut oil to separate).
Place in lined dish and freeze until set (approximately 30 minutes)
To make into chips; place the chocolate in a zip lock bag and break up using a hammer, rolling pin or your large feet.
Store in the freezer.

Sunday, 18 May 2014

Peanut Butter Cookies

Posted by Lisa at 05:02 0 comments


I had a movie montage moment this morning.
I was out for my morning run (I much prefer to call it running as jogging makes me think of pink leotards in the eighties... I'm marginally cooler than that!) and 'Fighter' by Christina Aguilera came on.

For some reason I actually listened to the lyrics (rather than just thinking how much I hate the skanky film clip) and found myself reflecting on how much I have grown and changed over the past 18 months.

I am faster.
I am stronger.
I am fitter.
I am focused.

And these changes couldn't have come without the bad times. Sometimes you have to hit rock bot-tom to change, grow and shine. So, as I was pounding the pavement in my full length Lycra I gave thanks to those who helped me get to the place I'm in today.

Thank you to the bullies.
Thank you to their enablers.
Thank you to the media.
Thank you to the ill-informed judgmental strangers.

You have all helped me to realise that there is much, much more to life than your issues, your personal agendas and your insecurities. It was never about me; I am ok. I was not the problem but I was a casualty and that will never be ok.

Thank you to my family.
Thank you to my friends and colleagues.
Thank you to the people I've never met who showed me, and others, support and love when it felt that there was no one out there who cared.

You have all helped me to realise that there is good out there and that there is more in life to appreciate, to enjoy and to put your energy towards.

So, as I was movie montaging in my Lycra I discovered that I am stronger than yesterday (I also had old Brittany on my playlist) and that the future will be what I want it to be. No one else will ever make me feel like that again because now I am a fighter.

These Peanut Butter Cookies are a bit like me; tough on the outside, gooey in the middle and a little bit nutty. They are an adaptation of the Peanut Butter Cookies from Mumofuku Milk Bar. I have made them gluten free, dairy free and refined sugar free and so so sooooo tasty.

I have made a Peanut Brittle to sweeten the cookies slightly and give them an extra crunch. With-out the brittle they are not quite there... the extra crunch is so worth the effort.

PEANUT BUTTER COOKIES
Makes 9-10 cookies

INGREDIENTS
85 grams Avocado (approximately 1/3 cup or 1 small avocado but measure to be sure)
1/3 cup Maple Syrup
1 Tablespoon Honey
1/2 Cup Peanut Butter (I used all natural crunchy but smooth would work also)
1 Egg
1/2 teaspoons Vanilla Extract
3/4 Cup Almond Meal
1/3 Cup + 1 Tablespoon Arrowroot
1/4 teaspoon Baking Powder
Dash Bicarbonate
1 teaspoon Salt
1 recipe Peanut Brittle (see recipe below)

INSTRUCTIONS
Place the avocado, maple syrup and honey in a blender and blend for 3 minutes.
The mixture will be silky smooth and an odd green colour.
Transfer the green mixture to the bowl of a kitchen stand mixer with a paddle attachment.
Add the peanut butter, egg and vanilla and beat for 30 seconds.
Scrape down the edges of the bowl and then beat on medium high for 3 minutes.
Add the dry ingredients (except for the peanut brittle) and mix on low until just combined.
Break the peanut brittle into small pieces. This can be done by pulsing the brittle in a blender or placing the brittle in a bag and hammering with a rolling pin (I have been known to use the jumping method as well!).
Stir in the Peanut Brittle Pieces (not literally your hand; but not by the mixer).

Line 2 baking trays with baking paper and grease.
Using an ice cream scooper, or a 1/4-1/3 cup measure, make 9-10 mounds of cookie dough over the 2 sheets. Do not place the cookies too close to each other.
Using your fingers or the back of a spoon, shape each mound into a circle and flatten the tops.
Cover each tray with plastic wrap and place in the fridge for a minimum of 1 hour (can be left for up to 2 days).

Preheat the oven to 190C/370C
Place 1 tray of cookies in the oven and bake for 18 minutes.
Remove and allow the cookies to cool completely on the tray.
Bake the other tray of cookies next. (Don't bake the 2 trays at the same time as the bottom tray will not get crispy on top)

The cookies are best eaten fresh but can be stored in an airtight container for 4 days...good luck not eating them all at once! They are crispy on top and soft on gooey on the inside with crunchy peanut pieces in every bite. Oh yeah they're amazing!

PEANUT BRITTLE
INGREDIENTS
1 Tablespoon Maple Syrup
1 Tablespoon Honey
1/4 Cup Peanuts, skins removed

INSTRUCTIONS
Prepare a split-mat (a silicon baking mat) or line a baking tray with baking paper and grease. 
Place the maple syrup and honey in a small saucepan and bring to a rolling boil over medium heat.
Simmer the mixture over a medium heat until it turns a golden colour.
The mixture will need to be stirred continuously to prevent it sticking to the bottom of the saucepan and burning.
Take the saucepan off the heat and immediately stir in the peanuts, ensuring the nuts are coated in the mixture.
IMMEDIATELY spread the coated nuts over the prepared mat/tray and allow to cool completely.
To fasten the process the brittle can be placed in the fridge.
Break in large pieces and serve.
Can be served at room temperature.   

Peanut Brittle

Posted by Lisa at 04:51 0 comments

Sometimes you need something with a bit of crunch.
If it also happens to be sweet then it's a double bonus.

Nut brittle's can be eaten as a candy, wrapped nicely and given as a present or used in baking.
This Peanut Brittle was made for the super tasty Peanut Cookies, which were adapted from Christina Tosi from Mumofoko Milk Bar. Without the brittle the cookies were just alright; stir in the broken brittle and... magic!

PEANUT BRITTLE

INGREDIENTS
1 Tablespoon Maple Syrup
1 Tablespoon Honey
1/4 Cup raw Peanuts, skins removed and halved
Optional, dash of Salt

INSTRUCTIONS
Prepare a split-mat (a silicon baking mat) or line a baking tray with baking paper and grease. 
Place the maple syrup and honey in a small saucepan and bring to a rolling boil over medium heat.
Simmer the mixture over a medium heat until it turns a golden colour.
The mixture will need to be stirred continuously to prevent it sticking to the bottom of the saucepan and burning.
Take the saucepan off the heat and immediately stir in the peanuts, ensuring the nuts are coated in the mixture.
IMMEDIATELY spread the coated nuts over the prepared mat/tray and allow to cool completely.
Sprinkle with salt if you wish.
To fasten the process the brittle can be placed in the fridge.

Wednesday, 14 May 2014

Chocolate Chocolate Cookies

Posted by Lisa at 02:59 2 comments

I feel like my head is about to explode with over dramatisation!
It must be getting close to the end of the TV season as both my favourite shows have just dropped bombs that I didn't see coming. Despite my screams at the TV and excessive hand gestures, no one listened to me as I tried to warn the hero of his impending murder and the princess of her foolish mistake. They just went on their way getting killed and falling into booby traps.

Do the script writers know what they're doing with my emotions and sanity? I mean, for the next week now I'll be stressing over whether Regina returns to her evil ways and if David is really still alive. Maybe this is why books are better than TV. You don't have to wait a week to find out what happens in the next chapter, you just turn the page.

I think I should just stick to watching simpler shows where I don't become over invested and somewhat obsessed (so who really is A?!). Surely Big Bird would never double cross Ernie, who was actually in cahoots in Abby after being secretly blackmailed by Bert; 'Days of our Sesame Street' ? You can always rely on Sesame Street for some clean fun and hilarious celebrity cameos.

These Chocolate Chocolate Cookies are just as the Cookie Monster intended; crispy on the outside with soft, chocolatey goodness on the inside.
They are also a little bit weird (how unusual for one of my recipes!). Avocado replaces the butter and the maple syrup and honey give the cookies sweetness. The combination of the 2 sweeteners cannot be changed; it helps to give the cookies a crispness and the perfect flavour balance.

This is (yet another) recipe adapted from Christina Tosi of Mumofokos Milk Bar. Her attention to detail and technique is what makes her recipes so successful.
So when the recipe says beat it for 7 minutes, beat it for 7 minutes! I know, it's boring and takes so long. Set your timer and walk away. Check your email, update your Facebook status to "waiting for #cookies", paint your house; just don't stop the cookie magic in action.

These Chocolate Chocolate Cookies are Gluten Free, Dairy Free, Refined Sugar Free and Paleo friendly. I have only used 1/2 an egg in this recipe. This is a matter of waist line control! This recipes bakes 9 cookies, which will last about 9 minutes. If you want to use a whole egg make 18 cookies, otherwise use your left over egg in an omelette. 


CHOCOLATE CHOCOLATE COOKIES
Inspired by Christina Tosi from Mumofucko Milkbar

INGREDIENTS
112 grams Avocado (approximately 1/2 cup or 1 small-medium avocado but measure to be sure)
1/3 cup plus 1 Tablespoon Maple Syrup
1 Tablespoon Honey
1/2 Egg (I know this sounds weird but I couldn't eat 18 cookies myself. If you can double the recipe)
1/2 teaspoons Vanilla Extract
1 Tablespoon Cocoa
1 Tablespoon Coconut Oil, melted
2/3 Cup Almond Meal
1/3 Cup Arrowroot
1/2 Cup Cocoa
1/2 teaspoon Baking Powder
Dash Bicarbonate
3/4 teaspoon Salt
1/4 Cup Chocolate Crumbs (see recipe below)

INSTRUCTIONS
If not already done so make the Chocolate Crumbs.

Place the avocado, maple syrup and honey in a blender and blend for 3 minutes.
The mixture will be silky smooth and an odd green colour.
Transfer the green mixture to the bowl of a kitchen stand mixer with a paddle attachment.
Add the egg, vanilla, 1 tablespoon cocoa, coconut oil and beat for 30 seconds.
Scrape down the edges of the bowl and then beat on medium/high for 7 minutes.
Add the dry ingredients (except for the chocolate crumbs) and mix on low until just combined.
Stir in the Chocolate crumbs by hand (not literally with your hand; but not by the mixer).

Line 2 baking trays with baking paper and grease.
Using an ice cream scooper, or a 1/4-1/3 cup measure, make 9 mounds of cookie dough over the 2 sheets. Do not place the cookies too close to each other.
Using your fingers or the back of a spoon, shape each mound into a circle by flattening the top.
Cover each tray with plastic wrap and place in the fridge for a minimum of 1 hour (can be left for up to 2 days).

Preheat the oven to 190C/375F
Place 1 tray of cookies in the oven and bake for 18 minutes.
Remove and allow the cookies to cool completely on the tray.
Bake the other tray of cookies next. (Don't bake the 2 trays at the same time as the bottom tray will not get crispy on top)

The cookies are best eaten fresh but can be stored in an airtight container for up to 4 days...good luck not eating them all at once! They are crispy on top and soft on gooey on the inside...just as Cookie Monster intended!

CHOCOLATE CRUMBS
Makes 1/4 Cup

INGREDIENTS
1/4 Cup Almond Meal
1 Tablespoon + 1/2 teaspoon Arrowroot
1/3 Cup Cocoa
1 1/2 Tablespoons Maple Syrup
1/2 Teaspoon Salt
1 Tablespoon Coconut Oil, melted
1/2 teaspoon Vanilla Extract

INSTRUCTIONS
Preheat the oven to 150C/300F.
Line and grease a baking tray.
Combine the almond meal, arrowroot, cocoa, maple syrup and salt in a bowl of a kitchen stand mixer and mix on low until mixed together (alternatively do this by hand and use your strong biceps).
Add the coconut oil and mix until combined.
The mixture will form small clumps, similar to a crumble mixture, rather than a normal doughy mixture.
Spread the mixture over the baking tray and bake for 15-20 minutes, or until crispy (but not burnt!).
Allow the crumbs to cool on the tray. Break up the crumbs into small pieces if they have stuck together.Wait to cool completely before using.
Store in an air tight container if not using straight away.

Sunday, 4 May 2014

Banana Honey Muffins

Posted by Lisa at 02:22 0 comments

I challenge the promoters of todays 'fun run' to show me why it shouldn't be changed to an 'un-fun run'. Sure, crossing the finishing line was rewarding; being passed on the final stretch by a 12 year old girl was less so. Making it to the top of the hill was an achievement; getting there caused some gluteal tightness that I'm sure to feel tomorrow (this is also known as 'can't get myself off the couch butt pain'). Going down the hill was super fast; only I looked like a demented horse as I tried to not fall flat on my face. Actually, it was a little fun but mostly challenging. A 'Challenge Run' probably won't get you as many entries as a 'Fun Run' will though.

Today's hill run was my 3rd Fun Run for the year. I tend to judge an event not on the course (although I guess that is important) but on the quality of their T-shirts (today's was ok; best so far, whilst not a fun run, is Spartan), the medals (or lack of for the past 2 runs), the post run hydration and food options (please; just give me water. Who in their right mind wants a beer after running their guts out?) and the fanfare as you cross the finish line. I mean, after running that long you want at least a flag and someone to give you a cheer as you collapse across the finish line. Strangers, family; it doesn't matter!

What would make my Fun Run Day would be one of these Banana Honey Muffins as I crossed the finish line. Bananas for muscle recovery honey for refueling the depleted energy stores and nutty protein to rebuild.

These Banana Honey Muffins are probably the simplest thing on my blog to make. No appliances needed, no fancy ingredients and no nasties! Simple, tasty Banana Honey Muffins. 4 year old H and I decided to make them for his friend Henry, whose favorite lunch is a honey sandwich. They are a muffin version of the honey cakes that are used as currency on the 'Bananas and Pajamas'... but that opens up a philosophical question for all the preschoolers out there. Would B1 and B2 eat Banana Honey Muffins, or is that cannibalistic?

Banana Honey Muffins are a great snack treat, breakfast on the run or warm them up and serve with whipped cream (link) for a winter dessert.

BANANA HONEY MUFFINS
Makes 8 Muffins


INGREDIENTS
1/3 Cup Honey
2 Eggs
1/2 Cup Milk(of choice)
1/3 Cup mashed Banana (approximately 1 medium Banana but measure to be sure)
1 Cup Almond Meal
4 Tablespoons Coconut Flour
1 Tablespoon Baking Powder


INSTRUCTIONS
Preheat the oven to 175C/350F
Line a muffin tray with 8 muffin cases and lightly grease each one.
Put all the wet ingredients into a small bowl and whisk together lightly by hand.
In another bowl, put all the dry ingredients and whisk together lightly by hand.
Pour the wet ingredients into the dry ingredients bowl and stir until combined.
Do not over mix as the muffins will turn out tough.
Divide the mixture evenly into the muffin cases.
Bake for 27-30 minutes or until cooked through.
The tops will go light brown and a little crunchy when done.
Allow the muffins to cool in the tin before removing.
Store in an airtight container.

Thursday, 20 February 2014

Surprise Chocolate Cookies

Posted by Lisa at 02:06 0 comments

My 2 boys are part cookie dough and part pork crackling. They were my 2 main nutrient sources whilst pregnant.

I remember carrying a tub of cookie dough in my handbag during my first trimester and sneaking secret spoonfuls when no one was looking. At home I could be more open about my addiction... sitting on the couch in my trackies, with a bowlful of cookie dough and a soup spoon (because a dessert spoon just isn't big enough and a ladle seemed unladylike) watching Buffy DVD's (and for those you gasping at the thought of food poisoning- it was egg free dough!).

Had I had this recipe 5 years ago then perhaps I wouldn't have 2 (almost) 10-pound babies and maybe now I would be able to run down a hill without having to cross my legs. Awkward; yes, worth it; of course!

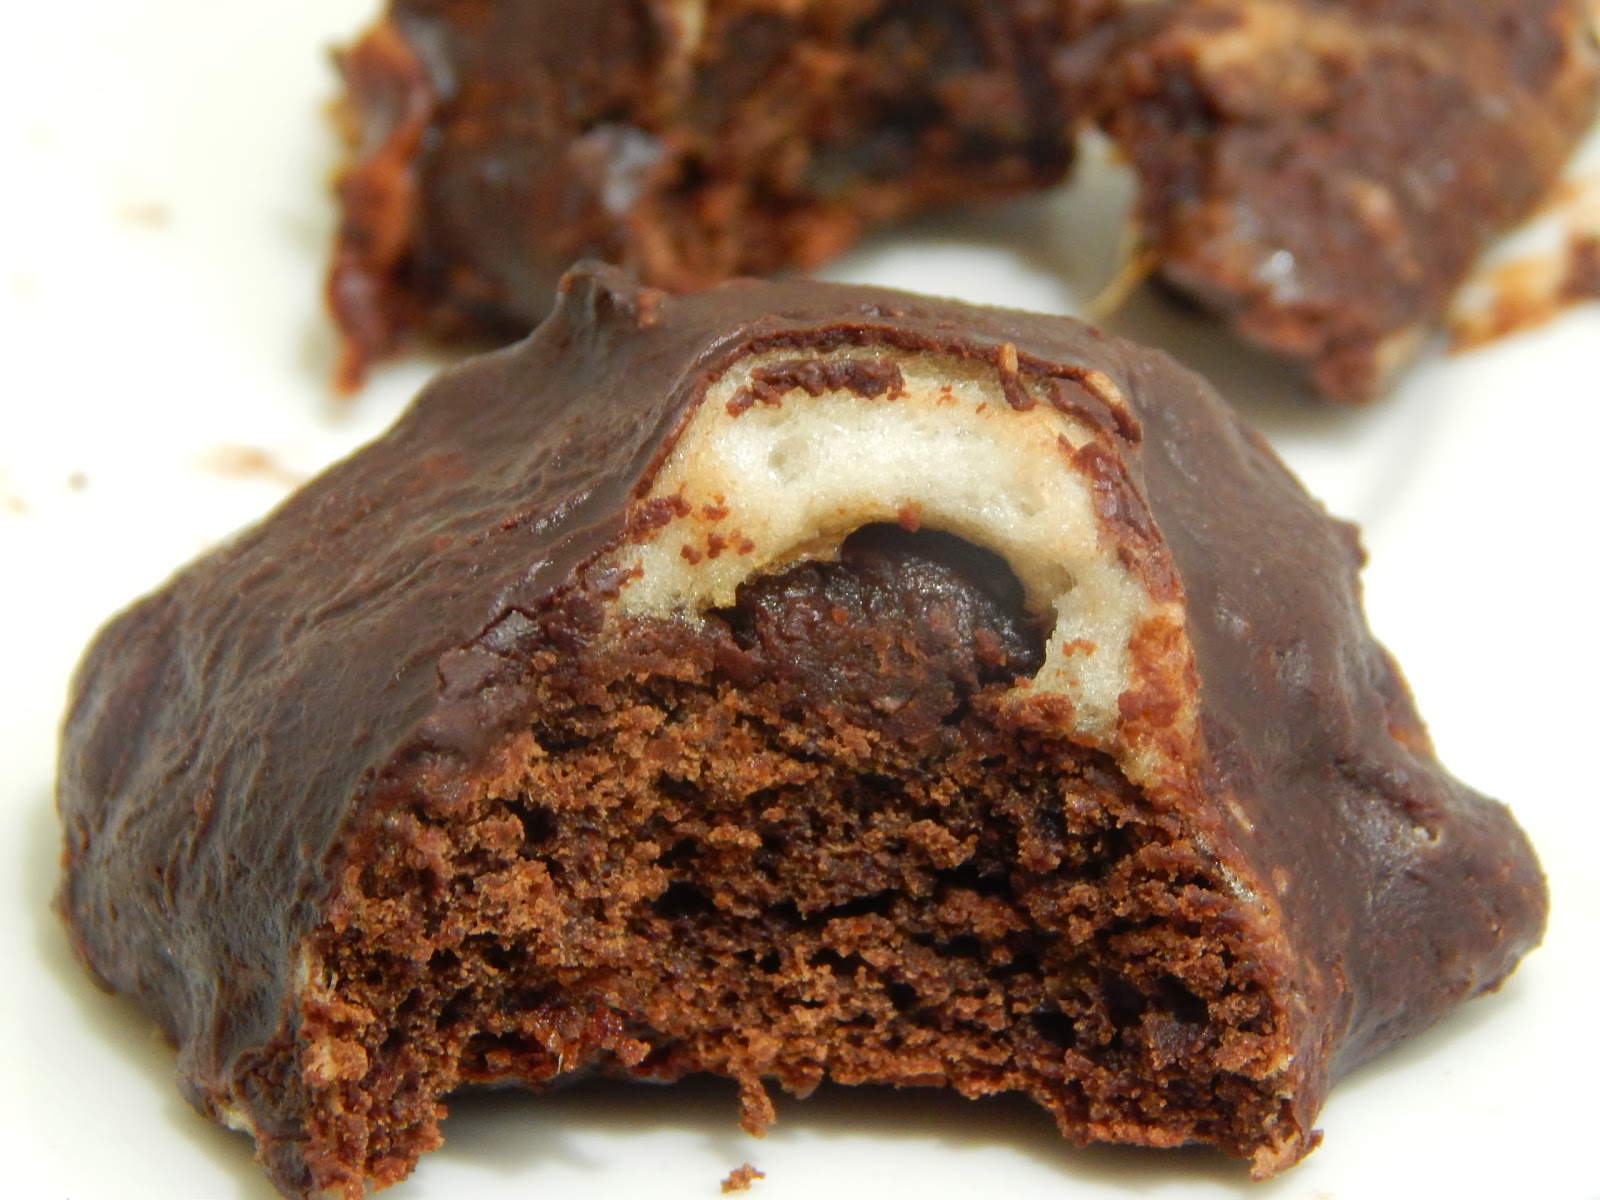
These Surprise Chocolate Cookies are really a double surprise; marshmallow under the Chocolate coating and chickpeas in the cookie. Super Surprise! Not only will these cookies help those hormonal induced cravings, they'll help keep you regular (chickpea fibre!).
These make great treats for the kids and being gluten, dairy and processed sugar free its ok if they have more than one... As long as they don't eat into your stash!


SURPRISE CHOCOLATE COOKIES
Makes 12 Cookies

INGREDIENTS
1/2 cup Dates
1/4 cup boiling water
Dash of Bicarb Soda
1/2 cup Chickpeas; canned, drained and then measured
2 Tablespoons Maple Syrup
2 teaspoons Vanilla Extract
2/3 cup Almond Meal
1/3 cup Arrowroot Flour
3 Tablespoons Cocoa
1 Egg
1/2 teaspoon Baking Powder
dash Salt
1 serve Marshmallow (there will be heaps left over but its not easy to make a 1/2 recipe on account of the egg white. Eat the rest or make a 1/2 recipe of Salted Honey Rice Krispie Treats)
Chocolate (see recipe below)

INSTRUCTIONS
Preheat the oven to 175C/350F
Line and grease a large baking tray.
Place the dates in a small bowl and cover with the boiling water and the bicarb.
Allow to sit for at least 20 minutes.
Place the dates in a blender and purée.
Add the chickpeas, maple syrup and vanilla extract and blend until a smooth paste is formed.
Add the egg and blend in.
Add the dry ingredients to the blender and mix until combined.
A delicious cookie dough will form.

Using a dessert spoon, scoop spoonfuls of dough onto the tray.
The spoonfuls will form round balls on the baking tray.
Will make 12 biscuits.
DO NOT FLATTEN THE BALLS.

Place in the middle rack of the oven and bake for 16 minutes.
The cookies will be firm on the bottom and top, but still soft (not gooey) in the middle.
Remove from the oven and allow to cool on the trays.

Whilst the cookies are cooling cut the Marshmallow into squares; with each square being the same size as the top of the cookie.
Place the Marshmallow on top of the cooled cookie and, using a kitchen blow torch, lighter etc, lightly melt the marshmallow. If the Marshmallow starts to 'run' down the side of the cookie use a knife to spread it back on top.
If the Marshmallow becomes too soft then it will seep into to the cookie and the only surprise you'll get is that there isn't any surprise!
Once the Marshmallow is adhered to the cookie and has re-firmed, place the cookies on a wire cooling rack which rests over a baking tray.
Melt the chocolate and pour over the marshmallow cookie.
Reuse the Chocolate that has dripped into the baking tray.
Place cookies in the fridge to set.
Store in an airtight container in the fridge for up to 4 days.

MARSHMALLOW
(adapted from Rasbperri Cupcakes)

INGREDIENTS
100ml water
3/4 cup Maple Syrup or Honey
2 Tablespoons Gelatin
100 ml water
1 egg white, at room temperature
1 Tablespoon Vanilla Extract

Arrowroot for sprinkling

INSTRUCTIONS
Place 100ml of water and Maple Syrup/Honey in a saucepan and bring to the boil over a medium heat.
At the same time sprinkle the gelatin over 100ml of water and allow to thicken.
Once the mixture is boiling reduce the heat slightly and add the thickened gelatin mixture, whisking vigorously to incorporated the gelatin and ensure no lumps remain.
Return to medium heat and return to the boil and boil for 1 minute, continuing to whisk.

Place the egg white in a clean bowl of a kitchen stand mixer with a whisk attachment.
Place mixture on medium and whisk until the egg white is frothy.
Pour the hot mixture in to the bowl, pouring slowly along the edge of the bowl.
Turn whisk to high and whisk for 5-7 minutes.
Add the Vanilla and whisk on high until firm but not set (another minute)
The mixture should be shiny and thick, but still able to be piped and spread.

Spread into a greased and lined dish or pipe out onto a greased and lined tray.
Allow to sit at room temperature overnight.

Once set sprinkle the arrowroot over Marshmallow pieces (this makes them less sticky and easier to handle). Alternatively, roll the pieces in arrowroot or you could even use dessicated coconut.  

CHOCOLATE
Makes 200 grams of Chocolate.
Store left over chocolate in the freezer for future use.

INGREDIENTS
1/2 Cup Coconut Oil
1/2 Cup Cocoa
2 Tablespoons Maple Syrup

INSTRUCTIONS
Over a very low heat melt the coconut oil.
Add the maple syrup and stir.
Add the cocoa and stir until combined, ensuring no lumps.
Allow to cool slightly before using, or keep in freezer for future use.

Sunday, 15 December 2013

Rocky Road Marshmallow

Posted by Lisa at 00:15 0 comments

Last week we took the boys to see Santa. We TRIED to create a lasting family moment. I should have known it wasn't going to happen!

One summer I worked as Santa’s helper taking Santa Claus photos. It was my job to capture the joy and excitement of Christmas and provide families with a lasting treasure...
The reality was a bit less rom-com and a lot more horror movie.

It's unrealistic to except a child, who has been schooled all year in stranger danger, to sit on a fat, strange mans knee and smile. Even if they’re not screaming and kicking poor Santa, the likelihood of getting everyone to smile at the same time - and face the camera - is not great. We had screamers, biters and kickers; we had the ones who wouldn't go anywhere near the old man and the ones who wouldn't leave; we had toddlers in tutus and babies with stinky poo!

But through all the dramas it's Santa who is the real trooper. It would be easy to develop a self-esteem issue when every 2nd person who sees you screams and cries, or 'industrial deafness' from the incessant whining. It is Santa who works so hard to make each child smile and give them a joyous experience. It's not his fault that some kids are just shits!

Santa deserves a reward after he's navigated through the stars and down the blocked chimney. Why not leave him some Rocky Road Marshmallow with his cold beer? (the cold beer might be an Australianism - it can be 40C at Christmas time and the poor obese man isn't in the best shape)

You might call this a deconstructed and reconstructed version of Rocky Road. Feel free to add the options you like, or have handy in the cupboard.

ROCKY ROAD MARSHMALLOW

INGREDIENTS
1 Egg White
3/4 cup Maple Syrup/Honey
200ml water
2 Tablespoons Gelatin
2 Tablespoons Cocoa, unsweetened
3 Tablespoons each Arrowroot and Cocoa

Options;
1-1/2 cups Biscuit pieces
3/4-1 cup Desiccated Coconut

3/4-1 cup dried cranberries/raspberries etc
1/2- 3/4 cup Nuts (macadamias, pecans etc)
1/2 Chocolate Chip Pieces

INSTRUCTIONS
Place the egg white in a clean bowl of a stand mixer with a whisk attached.
Pour 100ml of water into a small bowl/cup and sprinkle gelatin over. Allow to sit and thicken for a minimum of 5 minutes.
Pour the Maple Syrup and 100ml of water into a saucepan and bring to a slow boil.
Once boiling, add the gelatin mixture and whisk to combine.
Bring to the boil again and boil for 30 seconds.

Turn the whisk onto medium and pour the hot mixture down the side of the mixing bowl.
Once added turn to high and whisk for 5 minutes.
Turn off and sift Cocoa over Marshmallow mixture.
Return the whisk to high and whisk for 6-8 minutes, or until the Marshmallow fluffs up and becomes thick.

Add the selected options and fold into Chocolate marshmallow mixture.
Pour mixture into a lined tray/casserole dish (the size/depth of the tin will determine the size of your Marshmallows) and leave at room temperature for a minimum of 4 hours.

Cut the Marshmallow into pieces or cut into shapes using cookie cutters.
Combine additional cocoa and arrowroot, and roll each piece of Marshmallow in it (this prevents it from being too sticky).

Store in an airtight container at room temperature for up to 3 days.
 

Friday, 6 December 2013

Salted Honey Rice Krispie Treats

Posted by Lisa at 02:55 0 comments

The other week I banged on (a lot) about the stupid Bachelor and his wrong decision. I yelled, I screamed and still he sent the lovely Ali home (anyone would think he couldn't hear me!). Last week was the final rose ceremony and the reunion episode and I STILL haven't watched either of them! I didn't even know who he chose for 24 hours... I didn't care anymore. When he broke Ali's heart he lost my respect.

Now, I have been told that perhaps I was getting just a little bit too emotionally involved in 'The Bachelor'; perhaps even more than horse hair girl or short dress weirdo (my nicknames for some of the girls in the show). I disagree; it's perfectly normal to cancel plans, refuse to answer the phone, yell at your husband if he tries to talk to you and talk incessantly about it for the next week... isn't it?

I know (or at least I hope so) I'm not the only person who gets obsessed with different shows; in particular reality shows. Many Aussies will recall the bum dance from Big Brother series 1 and the dancing doona from series 2. Who could forget the girl band formed from 'Pop Stars' (whose name I cannot remember but let's call them 'Sophie Monk and her moderately talented friends') and the larger girl who won Australian Idol but has never been heard of since (or maybe I have just showed how easy it is to forget!).

Reality shows tend to create a lot of hype...  that quickly dies when it's season is over. Have you ever heard of anyone watching re-runs of X-factor 5 years later? I hope not!

Yet we will never be able to get rid of Gilligan's Island from our TVs!

Snacking whilst watching TV is nearly as old a past time as becoming a quasi reality TV stalker. These Salted Honey Rice Krispie Treats are perfect for your favorite TV marathon. They are gluten, dairy and processed sugar free (containing only honey as a sweetener).

The recipe calls for a serve of Marshmallows. Don't be frightened! These are easy to make and you don't have to wait for them to set as they will be melted anyway.


SALTED HONEY RICE KRISPIE TREATS
(adapted from www.raspberricupcakes.com)

INGREDIENTS

1 serve Marshmallow
3 Tablespoons Coconut Oil
1/3 Cup Honey
1 teaspoon Salt
6 cups rice bubbles


INSTRUCTIONS

Melt Marshmallows, Coconut oil, Honey and salt in a large saucepan over a low heat.
Once completely melted, remove the saucepan from the heat and stir in the rice bubbles 1 cup at a time.
Stir until all the rice bubbles as coated in the Marshmallow mixture.
Spread into a lined tin and set in the fridge.
The choice of tin will depend on the thickness of the pieces. I use 1/2 a backing tray.

Marshmallow

Posted by Lisa at 02:36 0 comments

I've been away at a conference for 3 days now... that means 3 days away from my kitchen, my oven and my spatula. 3 days no baking. Now this might seem like a holiday for some; no cooking, no cleaning, no chores but it drives me crazy (not the no cleaning... I'm fine with that!).

So because I can't bake I've been coming up with ideas for new recipes, searching for recipes to adapt and dreaming about all the creating I can do when I get home.
Rockyroad marshmallow, hot chocolate popcorn, lemon pie, jelly slice... I'm getting hungry just thinking about them!

When experimenting in the kitchen it's good to have a base recipe to adapt and play with. The versatile cake recipe now comes in many different forms, and the basic biscuit base can be made plain, chocolate or hazelnut flavored.

This Marshmallow recipe is simple to master and, in future posts, will be adapted to make different flavors, slices and treats.
I made both marshmallow squares (using a tray) and small marshmallows (using a piping bag). They can be quite sticky. To combat this sprinkle (using a sieve) arrowroot or cornflower over the marshmallows.


MARSHMALLOW
(adapted from www.raspberricupcakes.com)

INGREDIENTS

100ml water
3/4 cup Maple Syrup or Honey
2 Tablespoons Gelatin
100 ml water
1 egg white, at room temperature
1 Tablespoon Vanilla Extract

Arrowroot for sprinkling

INSTRUCTIONS
Place 100ml of water and Maple Syrup/Honey in a saucepan and bring to the boil over a medium heat.
At the same time sprinkle the gelatin over 100ml of water and allow to thicken.
Once the mixture is boiling reduce the heat slightly and add the thickened gelatin mixture, whisking vigorously to incorporated the gelatin and ensure no lumps remain.
Return to medium heat and return to the boil and boil for 1 minute, continuing to whisk.

Place the egg white in a clean bowl of a kitchen stand mixer with a whisk attachment.
Place mixture on medium and whisk until the egg white is frothy.
Pour the hot mixture in to the bowl, pouring slowly along the edge of the bowl.
Turn whisk to high and whisk for 5-7 minutes.
Add the Vanilla and whisk on high until firm but not set (another minute)
The mixture should be shiny and thick, but still able to be piped and spread.

Spread into a greased and lined dish or pipe out onto a greased and lined tray.
Allow to sit at room temperature overnight.

Once set sprinkle the arrowroot over Marshmallow pieces (this makes them less sticky and easier to handle). Alternatively, roll the pieces in arrowroot or you could even use dessicated coconut.  


Sunday, 10 November 2013

Honey Crackles (aka Honey Joys)

Posted by Lisa at 02:27 0 comments

Ahhhhh, memories. Simple things can take you back to yesteryear (don't worry, I haven't aged 60 years since my last post!). 

Turing on the radio and hearing Rick Astley takes me back to grade 6 camp; when denim shorts with floral patchwork print were fashionable (well... I thought they were, anyway).
Watching an episode of Home and Away reminds me that I was never allowed to watch Neighbours growing up... which seems pointless as they are essentially the same thing.
Walking past a deli reminds me of strass and tomato sandwiches (a memory too gross to delve into right now but lets just say processed meat is not in my top 100 favourite foods).

Honey Crackles. Honey Crackles remind me of childhood parties. Of cousins and friends, of backyard shenanigans and the time we tried to play backyard Olympics with cricket wickets as hockey sticks (concussion anyone?!). Honey Crackles; with their golden colour and crunchy exterior. I remember almost eating the wrapper to consume every last bit of the toffee like honey that had melted on the wrapper. Kind of gross but oh so tasty!

HONEY CRACKLES (JOYS)
Makes approximately 9 cupcake sized Honey Crackles

Ingredients
1/4 Cup minus 1 Tablespoon Maple Syrup
2 Tablespoons Honey
2 Tablespoons Coconut Oil
3 Cups Cornflakes

Instructions
Preheat oven to 150C/300F
Melt Coconut Oil in a saucepan over very low heat,
Add Honey and Maple Syrup. Stir until combined.
Add Cornflakes and stir until well combined and all the cornflakes are coated in the homey mixture.

Spoon into greased cupcake liners placed in a muffin tray (or any cupcake tray).
Cook in oven for 10-12 minutes, or until just browning on top.
Leave crackles in the tray until cooled and set.

Store in an airtight container at room temperature.

Wednesday, 2 October 2013

Honey, Orange and Pistachio Cake

Posted by Lisa at 04:07 0 comments

I think I might start the Chickpea Appreciation Society.  There are groups that honor all types of odd things; orchids, shitzus, Spock. So why not Chickpeas?

I have been a bit obsessed about the humble legume of late. They are full of fibre, low in calories and cheap; and I LOVE weirding people out by using them in the most unusual of ways. But beware, when you have a diet high in chickpeas and Brussels sprouts it's a recipe for a very stinky household!

This is a cake I made for the lovely Judy. Judy is like a mother hen; she's always looking out for people, taking care of them and making sure they know they're special. It was Judys birthday, so I wanted to make her a cake to let her know we all think she's pretty special too.

This is a moist, tasty cake that would be ideal for an afternoon tea with a cuppa and a big bowl of coconut whipped cream... and no will ever know that it came from the Chickpea Appreciation Society. 

HONEY, ORANGE AND PISTACHIO CAKE

INGREDIENTS
110grams chickpeas; canned, drainedm rinsed and patted dried
1/2 cup Coconut Flour
3/4 cup Almond meal
3 teaspoons baking powder
3 eggs, seperated
1/2 cup Honey
1/2 cup Orange Juice, freshly squeezed
Zest of 1 Orange
1 cup milk (almond, coconut etc)
1/3 Cup pistachios, chopped
Extra honey for drizzling.

INSTRUCTIONS
Preheat oven to 175C/350F.
Line and grease a 20cm/8inch cake tin.
Combine chickpeas, coconut flour, almond meal and baking powder in a blender and blend until fine (the chickpeas will be broken down).
In a mixing bowl of a stand mixer with a whisk attachment fitted, whisk the egg whites on medium/high until peaks form.
Turn mixer off and add honey and zest and whisk on high again.
With mixer on high, add egg yolks 1 at a time. 
Add dry ingredients and remaining wet (milk and orange juice) alternatively in 3 lots with mixer on low. 
Beat on high for 30 seconds.
Pout cake mixture in prepared cake tin.
Sprinkle the top evenly with pistachios.
Bake for 40 min, or until cooked through.
Rest in tin before removing.
Can be served warm or cold and with whipped coconut cream.
Drizzle cake with honey before serving.


Mummy Made It Copyright © 2010 Designed by Ipietoon Blogger Template Sponsored by Emocutez