Showing posts with label Clean. Show all posts

Wednesday, 5 March 2014

Date Pinwheel Biscuits

Posted by Lisa at 03:13 2 comments

I cannot 'do' accents. I know this as I just tried to do an English impersonation and sounded like a cockney tramp. My American accent is a cross between a wild cowboy and a cockney tramp... clearly I won't be winning any Oscars anytime soon (as least I'll have Leo DiCaprio for company!).

I find it quite unnerving when you see an actor being himself and they have a completely different voice to the character they play. Take Brody from 'Homeland'; a US marine with terrorist tendencies, who was played by a Londoner (who I thought was a Scotsman - I told you I can't do accents!). Or Hugh Laurie from 'House'; an Englishman who can play the piano. Freaks me out!

Accents are not my forte, but thankfully I can bake.
I can bake these cookies; actually they don't need baking.
I can simmer and roll these cookies (although that doesn't sound quite as poetic).
The original recipe comes from My Heart Beets
I have made some changes to suit a vegan diet.

These are dainty, adult biscuits. Sometimes you want to feel like you’re having High Tea at the Palace with the Queen, dressed in your finery with your best (non-cockney) English princess accent (think Kate not Beatrice), rather than the reality of snot covered trackies, dirty ugg boots and an unwashed hair do. These biscuits will help you to escape to a Disney approved palace... at least until they’re all gone that is - which unfortunately is all too soon.

DATE PINWHEEL BISCUITS
Makes 18 biscuits
(adapted from My Heart Beets)
INGREDIENTS
200 grams pitted Dates
16 grams chopped Pistachios
1/2 Tablespoon Maple Syrup
1 Tablespoon Coconut Oil
1/2-1 teaspoon Cardamom
16 grams Cashews/Walnuts/Almonds, chopped
2-3 Tablespoons Desiccated Coconut

INSTRUCTIONS
Take the chopped pistachios and mix with the maple syrup in a small bowl.
Chop the dates into small pieces and add them to a small saucepan with the coconut oil and cardamom.
Cook the dates over a low heat for 5 minutes, stirring often to prevent the dates from sticking to the pot and burning.
After 5 minutes reduce the heat to very low and continue to stir until a smooth paste is formed (5-7 minutes).
These steps must be done at a low temperature otherwise the coconut oil will separate.
Add both the types of nuts and stir to combine.
Remove from the heat and allow to cool so it can be handled without burning your fingers (I place the mixture in the fridge to fasten the process).
 
When the mixture is cool enough to handle, roll it out thinly between 2 sheets of baking paper to form a rectangle. It will be approximately 20cms x 10cms.
Take the pistachio mixture from the bowl and place along the long length of the rectangle.
Roll up the date roll into a long log, like you would a sushi roll or snake cake.
Spread the desiccated coconut over a piece of the baking paper and roll the log in the coconut until it is all covered.
Wrap the coconut log in plastic wrap and leave in the fridge to firm (at least 1 hour).
Slice the log into equal pieces (approximately 18) and serve at room temperature.
Store the biscuits in the fridge between high teas.
 

Thursday, 26 December 2013

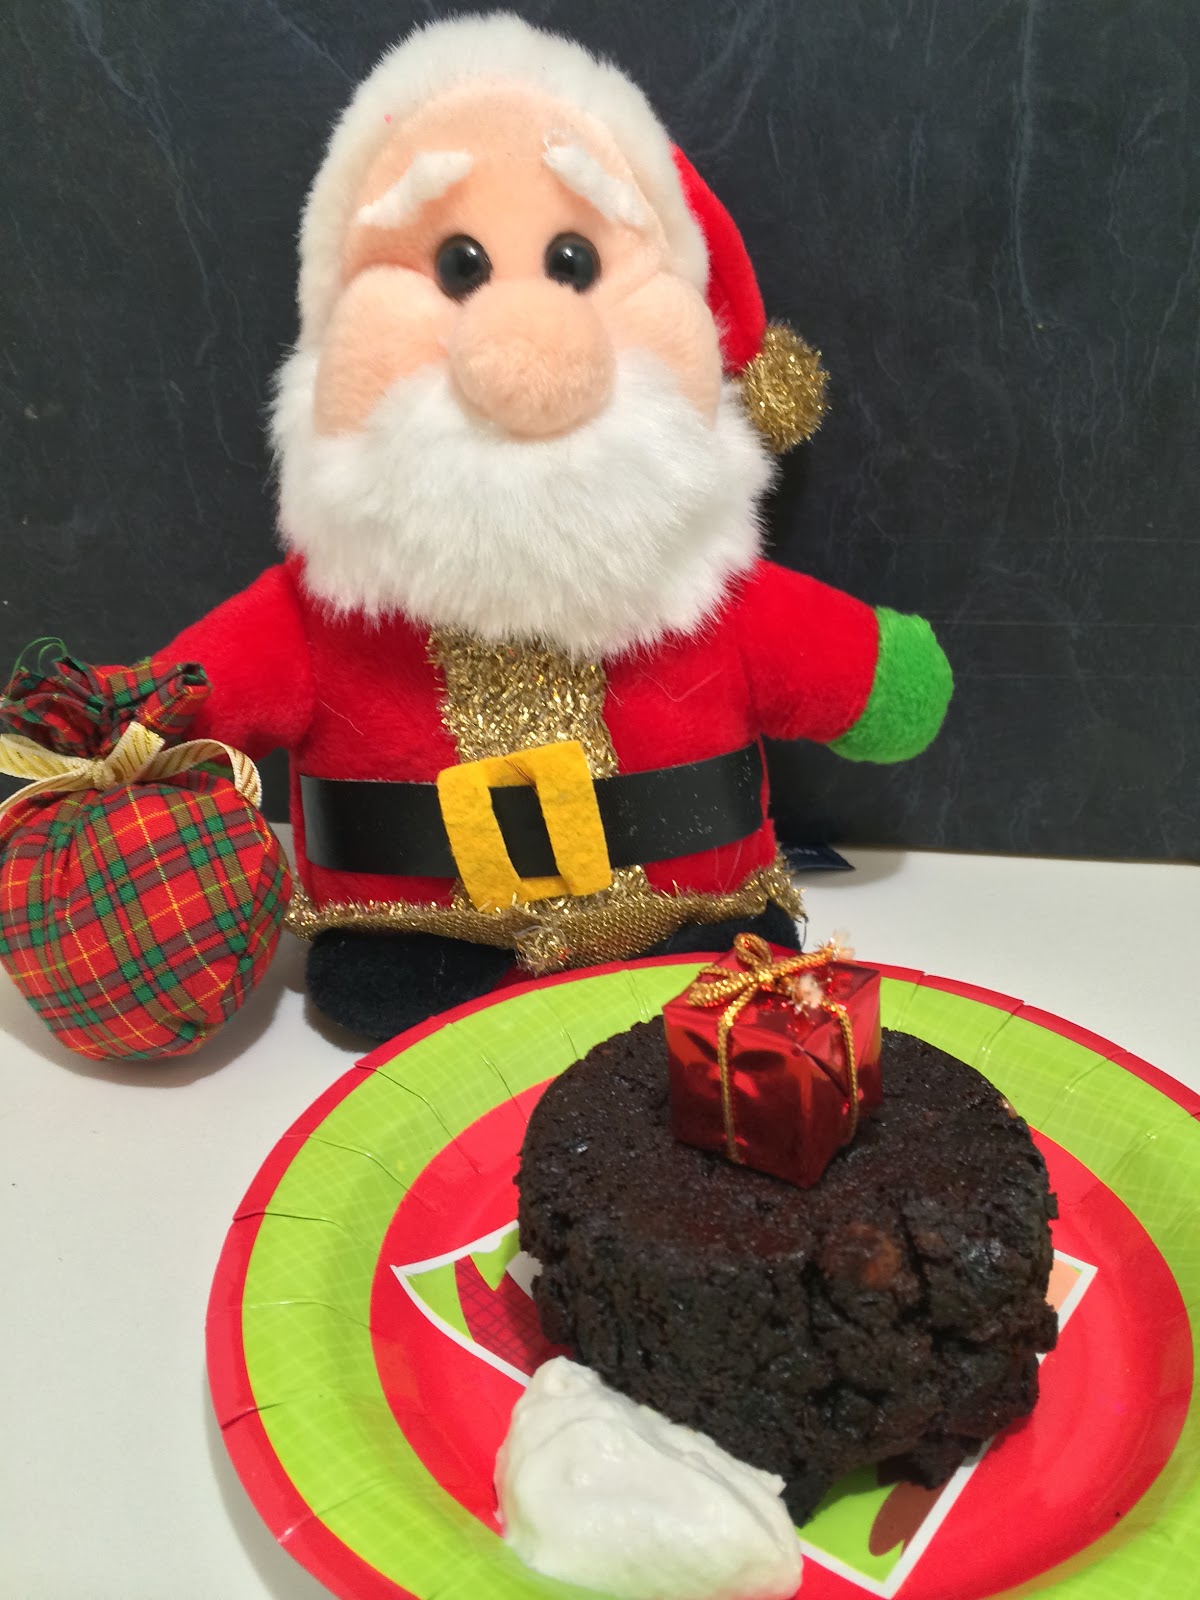
Christmas Pudding

Posted by Lisa at 01:49 0 comments


Merry (belated) Christmas!

This is my final post in the 12 recipes of Christmas Series.
It is my favorite, and the one that I am most proud of!
My family ate this pudding for Christmas lunch and it was just like a 'normal' Christmas pudding. The taste, the smell, the texture; it was all there!
It was also all there when I ate more at dinnertime!

The pudding is such an iconic part of a Christmas meal. It right up there with Turkey and the post dinner nap. For me it wouldn't be Christmas without pudding, despite the fact that our climate here in Australia isn't always conducive to a hot dessert.

Thank you for allowing me to share my Christmas recipes with you.
Christmas cooking is a tradition that has been passed down to me from my Mother and Grandmother. I love to give baked goods to people as gifts during the festive season, and even more so now when they later discover what they actually ate!

I hope you have enjoyed your Christmas and I look forward to creating more Christmas goodness for next year!

CHRISTMAS PUDDING

INGREDIENTS
1 cup Dates
1/2 cup Boiling Water
200 grams Mixed Dried Fruit
1/2 cup Port/Sherry
1/4 cup Golden Syrup
300 grams Dates, chopped
1 cup Boiling Water
1 teaspoon Bicarb Soda
4 eggs, separated
200 grams Chickpeas, canned and drained
2 Tablespoons Coconut Flour
1 Tablespoon Arrowroot
2 cups Almond meal
1 teaspoon Baking Powder
2 teaspoons Mixed Spice
2 teaspoons Ground Ginger
Optional; 2 Tablespoons Brandy/Rum for brushing

INSTRUCTIONS
Place 1 cup of dates in a small bowl and cover with 1/2 cup of boiling water.
Leave to sit for 20 minutes.
Place softened dates in a blender and purée.
In a sealable container place the dried fruit, port, golden syrup and puréed dates.
Stir the contents of the container and place the lid on tightly.
Store in a dark, cool cupboard for at least overnight, but up to 6 weeks.
(NB; I left mine in the cupboard for 1 month, shaking the container every few days)

To make Pudding:
(this can be done on the day of serving or ahead of time. The pudding will keep, covered, for up to 3 days or can be double wrapped and frozen)

Place the dates in a small bowl and add the boiling water and bi-carb. Allow to sit and soften for at least 20 minutes.

Place the egg whites in the bowl of a kitchen stand mixer with a whisk attachment.
Whisk the egg whites on high until medium peaks form.
Add the puréed dates and continue to whisk.
Add the egg yolks and whisk for 1 minute.

Place the chickpeas in a blender (or use a hand blender) and process until they have broken down.
Add the almond meal, coconut flour, arrowroot, baking powder and spices and blend until combined.
Add the dry mixture to the eggs and stir in until combined (alternatively whisk on low)
Add the fruit mixture to the combined mixture and stir in until combined (alternatively whisk on low).

Take a 2 litre (8 cup capacity) pudding bowl and grease the sides of the bowl.
Place a small piece of baking paper on the bottom of the basin and grease it also.
Pour the mixture into the pudding bowl, smoothing the top for a flat surface.
Place another piece of baking paper on the pudding and screw on the lid.

Place the pudding bowl inside a large saucepan, sitting it on top of a trivet or small plate.

Pour water into the saucepan, ensuring it comes 3/4 of the way up the edge of the pudding bowl.
Bring the water to the boil and simmer on medium/low, with lid on, for 5 hours.
Check the water levels regularly to ensure that they are 3/4 of the way up the edge of the pudding bowl.

After 5 hours remove the pudding bowl from the saucepan and allow to sit for 10 minutes.
Remove the lid and run a knife around the edge of the pudding to ensure it can be easily removed.
Invert pudding onto a serving tray.
Brush the pudding with the optional Brandy if desired.

If serving immediately pour the Salted Toffee Sauce (see recipe below) over the top of the pudding, allowing it to drip down the edges of the pudding.

Serve with Brandy Custard (see recipe below) and/or Whipped Coconut Cream.

Pudding can be stored for up to days and then reheated.
Reheat pudding by placing the pudding back into a greased/lined (as above) pudding bowl and simmering in a large saucepan (as above) for 1 hour.
Slices of pudding can be warmed in the microwave.

Pudding can be double wrapped and frozen also.


SALTED TOFFEE SAUCE

INGREDIENTS
1/2 cup Dates
1/4 cup boiling water
Dash Bi-carb Soda
2 Tablespoons Golden Syrup
100 ml coconut cream (the thickened part from the top of a chilled can)
1/2 cup Whipped Coconut Cream (link)
1/2 teaspoon salt flakes

INSTRUCTIONS
Place the dates into a small bowl and cover with boiling water and add the bicarb.
Allow to sit and soften for at least 20 minutes.
Plate the date mixture, golden syrup and coconut cream in a blender and purée.
Pour the purée mixture into a small saucepan and, over a medium heat, stir until bubbling.
Reduce the heat to low and add the whipped coconut cream and cook, stirring occasionally for 7-10 minutes, or until slightly thickened.
Stir in the salt and allow to sit for 5 minutes.
Pour over the top of the pudding.
Alternatively, it can be served individually as a sauce.


BRANDY CUSTARD
(Adapted from the Australian Better Homes and Gardens Magazine)

INGREDIENTS
1/3 cup dates
2 1/2 Tablespoons Boiling Water
Dash of bi-carb
500 ml milk (of choice)
200 ml Coconut cream (the thick part removed from the top of a chilled can)
1 teaspoon vanilla extract
6 egg yolks
3 Tablespoons Arrowroot
1 Tablespoon Brandy

INSTRUCTIONS
Place the dates in a small bowl and cover with the boiling water.
Add the bicarb and allow to sit and soften for at least 20 minutes.
Purée in a blender.

Place the milk, cream and vanilla in a saucepan and bring to a simmer over a medium heat. Remove from the heat.
In a separate bowl whisk together the egg yolks, purée dates and arrowroot until smooth and combined. Pour in 1 cup of the warmed milk mixture and whisk until smooth and combined.
Add the egg yolk mixture to the reaming milk in the saucepan and return to the heat.
Cook over a low heat for 6-8 minutes, or until thickened.
Add the brandy and stir to combine.
Serve immediately or refrigerate for up to 3

Wednesday, 18 December 2013

Chocolate Fruit Mince Puddings

Posted by Lisa at 02:46 0 comments

Christmas comes with it but many perks. Presents, parties, days off work and the often forgotten Christmas Movie. Christmas movies, just like gifts from Nanna, can be a bit of a mixed bag.

It's probably easier to start with some simple rules;

  1. If it 'stars' (and I use that word loosely!) Tim Allen then give it a miss.
  2. Any movie with an old action hero (or ex Governor) isn't worthy of your time.
  3. Just because they made a sequel doesn't mean the original movie deserved it.
  4. Movies with multiple small plot lines are often confusing, but as long as Hugh Grant is in it it doesn't matter if it doesn't make sense.
  5. There will always be at least one nauseating Christmas Carol scene, so make sure to plan your bathroom break around that time.
Christmas movies are cheesy, full of 'insights' and usually have an impossibly happy ending with a PG snog scene. They make you smile and, most importantly, they make you believe in Christmas. It doesn't matter how long the queues at the shop where or that someone stole your last festive mint, when a C-grade celebrity starts to sing 'Santa Claus is coming to town' your worries don't seem as bad any more. It may just be that you realized that your life isn't as bad as the once famous person who now has to wear red tights and sing Yuletide hymns.

If these mini Puddings where a Christmas movie it would star Hugh Grant with his floppy hair, an enchanted reindeer that sings carols and at least one scene with a snow ball fight.
It would be magical!

These Puddings are delicious served with Whipped Coconut Cream, and can be eaten hot or cold. 

MINI CHOCOLATE FRUIT MINCE PUDDINGS
Makes 8 individual serves
Adapted from this recipe

INGREDIENTS
1 cup Dates
1/2 cup boiling water
2 cups Mixed Dried Fruit
1 cup Raisins/Sultanas
1/2 cup Golden Syrup
3/4 cup Water
1/4 cup Apple Sauce (see recipe below)
1 1/2 cup Almond Meal
1/2 cup Coconut Oil, melted
1/2 cup + 2 Tablespoons Cocoa
2 Tablespoons Maple Syrup
1 Tablespoon Vanilla Extract
1/4 cup Coconut Flour
3 teaspoons Mixed Spice
1 teaspoon Bicarb Soda

INSTRUCTIONS
Preheat the oven to 175C/350F
Grease an 8 hole Texas Muffin tray (bigger holes the a normal muffin tin) or 8 small ramekins.

Place the dates in a small bowl and cover with the boiling water. Allow to sit for a minimum of 20 minutes.
Place the Fruit, Raisons, Golden syrup, Apple Sauce and 1/4 cup water in a saucepan and bring to a boil.
Simmer the fruit mixture for 5 minutes, then allow to cool.

Blend dates until puréed.
Add the cooled fruit mixture to the dates and pulse until finely chopped.
Transfer the mixture to a large mixing bowl.

To the mixing bowl, add the melted coconut oil, 1/2 cup water, almond meal and maple syrup and stir until combined.
Sift the cocoa, coconut flour, spices and bicarb over the bowl and gently fold together.
Evenly divide the mixture between the muffin holes/ramekins.
Bake for 40-45 minutes, or until cooked through.
Remove from the tin and serve immediately with Whipped Coconut Cream (link).
Alternatively, they taste great cold too!

You can make these up to 3 days ahead and reheat in the microwave.

APPLE SAUCE
INGREDIENTS
4 apples, peeled and cut into small pieces
3/4 cup water

INSTRUCTIONS
Place apples and water in saucepan. Cover with lid.
Bring to boil, then simmer for 7-10 minutes, or until apple is soft.
Store in fridge.


Sunday, 15 December 2013

Rocky Road Marshmallow

Posted by Lisa at 00:15 0 comments

Last week we took the boys to see Santa. We TRIED to create a lasting family moment. I should have known it wasn't going to happen!

One summer I worked as Santa’s helper taking Santa Claus photos. It was my job to capture the joy and excitement of Christmas and provide families with a lasting treasure...
The reality was a bit less rom-com and a lot more horror movie.

It's unrealistic to except a child, who has been schooled all year in stranger danger, to sit on a fat, strange mans knee and smile. Even if they’re not screaming and kicking poor Santa, the likelihood of getting everyone to smile at the same time - and face the camera - is not great. We had screamers, biters and kickers; we had the ones who wouldn't go anywhere near the old man and the ones who wouldn't leave; we had toddlers in tutus and babies with stinky poo!

But through all the dramas it's Santa who is the real trooper. It would be easy to develop a self-esteem issue when every 2nd person who sees you screams and cries, or 'industrial deafness' from the incessant whining. It is Santa who works so hard to make each child smile and give them a joyous experience. It's not his fault that some kids are just shits!

Santa deserves a reward after he's navigated through the stars and down the blocked chimney. Why not leave him some Rocky Road Marshmallow with his cold beer? (the cold beer might be an Australianism - it can be 40C at Christmas time and the poor obese man isn't in the best shape)

You might call this a deconstructed and reconstructed version of Rocky Road. Feel free to add the options you like, or have handy in the cupboard.

ROCKY ROAD MARSHMALLOW

INGREDIENTS
1 Egg White
3/4 cup Maple Syrup/Honey
200ml water
2 Tablespoons Gelatin
2 Tablespoons Cocoa, unsweetened
3 Tablespoons each Arrowroot and Cocoa

Options;
1-1/2 cups Biscuit pieces
3/4-1 cup Desiccated Coconut

3/4-1 cup dried cranberries/raspberries etc
1/2- 3/4 cup Nuts (macadamias, pecans etc)
1/2 Chocolate Chip Pieces

INSTRUCTIONS
Place the egg white in a clean bowl of a stand mixer with a whisk attached.
Pour 100ml of water into a small bowl/cup and sprinkle gelatin over. Allow to sit and thicken for a minimum of 5 minutes.
Pour the Maple Syrup and 100ml of water into a saucepan and bring to a slow boil.
Once boiling, add the gelatin mixture and whisk to combine.
Bring to the boil again and boil for 30 seconds.

Turn the whisk onto medium and pour the hot mixture down the side of the mixing bowl.
Once added turn to high and whisk for 5 minutes.
Turn off and sift Cocoa over Marshmallow mixture.
Return the whisk to high and whisk for 6-8 minutes, or until the Marshmallow fluffs up and becomes thick.

Add the selected options and fold into Chocolate marshmallow mixture.
Pour mixture into a lined tray/casserole dish (the size/depth of the tin will determine the size of your Marshmallows) and leave at room temperature for a minimum of 4 hours.

Cut the Marshmallow into pieces or cut into shapes using cookie cutters.
Combine additional cocoa and arrowroot, and roll each piece of Marshmallow in it (this prevents it from being too sticky).

Store in an airtight container at room temperature for up to 3 days.
 

Wednesday, 16 October 2013

Choc-Hazelnut Tart (Paleo Rocher Tart)

Posted by Lisa at 03:46 0 comments

This week I found out that someone in Germany made one of my recipes. Germany!

For a girl from a country town in Australia this is super exciting: and it shows how the Internet has completely changed the way we live our lives… including how we find recipes and cook.

I follow many blogs and love getting my regular emails. With many of the bloggers being on the other side of the world, this means I will receive my weekly update in the mornings... so its not unusual in our house to have the oven on by 6:30am and a kitchen full of baked goods by breakfast. I know I could wait until I am out of my pajamas, but they look so tasty and I get so excited by a new recipe.

It’s nice to think that there might be people out there who feel the same way about my blog and my recipes. So, if you try a recipe please leave feedback or suggestions. I am not a chef; just a Mum trying to create healthier options for her family and friends, so I appreciate the experiences of others. If you have a suggestion; something you would like to see ‘healthified' please let me know. I'm always up for a challenge.

I made this tart (pie?) for a friend at work. She loved the Paleo Rochers and I wanted to recreate the flavours for her birthday. I played around with frostings, nuts and cupcakes; until I made this... yummy!

The Chocolate hazelnut crust compliments the paleo rocher mousse by adding some crispness and enhancing the hazelnut flavour. The nutty caramel is just like the center of a paleo rocher - a hidden, gooey surprise!

It is AMAZING!

CHOC-HAZELNUT TART (PALEO ROCHER TART)

Choc-Hazelnut Crust

INGREDIENTS
1/4 cup hazelnut meal
1/2 cup coconut flour (available from health food and specialty stores)
2 tablespoons unsweetened cocoa
1/4 teaspoon salt
1/4 teaspoon baking soda
1/4 cup coconut oil, softened
1/4 cup maple syrup (you could substitute honey etc)
1 egg
1 teaspoon vanilla extract

INSTRUCTIONS
Preheat the oven to 175C (350F).
Grease/Spray a 20cm (8 inch) spring form cake tin or pie dish (a 22cm/9inch can also be used)
Mix the dry ingredients in a blender.
In a separate small bowl, whisk together the wet ingredients.
Pour the wet ingredients into the dry, and blend until combined. A dough ball will form.
Roll the doughnut between 2 sheets of baking paper and trace a plate/tin bigger than tart tin.
Gently place circle in tin. Use excess dough to ensure an even edge.
Alternatively, spread dough evenly in tin and up edges by hand
Bake for 15 minutes. Cool completely.
If using a spring form tin, remove the crust and place on a serving tray. This may be more difficult if using a pie tin and you may choose to construct the pie and serve from the tin.

Nutty Caramel

INGREDIENTS
1 can Coconut Cream (organic or low/free preservatives), opened and in fridge overnight or at least 2hours. Take the thick cream off the top, discarding the watery part. This should measure 1 1/2 cups.
1/2 Cup Maple Syrup
Dash of salt
2 teaspoons vanilla extract
6-10 roasted hazelnuts, chopped

INSTRUCTIONS
Place coconut cream, maple syrup and salt in a saucepan over medium/high heat.
Bring mixture to boil, then reduce to medium heat.
Allow the mixture to boil until quite thick and dark golden in colour. Stir regularly to prevent burning.
This will take approximately 20 minutes (may take longer)
Add vanilla and continue to cook on medium heat for another 5 minutes.
The caramel will be dark golden in colour and delicious.
Allow to cool, but still runny.
Pour into cooled pie crust and sprinkle the chopped nuts evenly.
Allow to set in fridge.

Choc-Hazelnut Mousse

INGREDIENTS
150 grams Nutella (See recipe below)
3 -4 tablespoons Cocoa
1 tablespoons coconut oil
3 tablespoons maple syrup
2 tablespoons whipped coconut cream
1 small, ripe avocado
Extra, 2 tablespoons whipped coconut cream

INSTRUCTIONS
In a saucepan add the nutella, cocoa, coconut oil, maple syrup and coconut cream.
Stir over low heat until mixed thoroughly.
Leave to cool and thicken slightly (this can be done by placing saucepan in the fridge).
Meanwhile, place the avocado in a blender and blend until broken down.
Add the mixture from the saucepan and place in the bender with the avocado.
Blend until smooth.
Place the blended mix into the bowl of a kitchen stand with a whisk attachment.
Add the whipped coconut cream and whip until a smooth consistency.
Pour and spread over the set caramel.
Refrigerate until set.
Keep refrigerated.

Nutella
(adapted from Chocolate Covered Katie)

INGREDIENTS
2 cups raw hazelnuts (240g)
1 1/2 tablespoon pure vanilla extract
1/4 cup cocoa powder
1/4 cup plus 3 tablespoon maple syrup
1/4 teaspoon salt
1/2 cup milk (almond, coconut)

INSTRUCTIONS
Roast hazelnuts for 8-10 minutes at 200C/ 400 F. Rub them together in a paper towel to get the skins off. (It’s OK if a few stubborn skins won’t come off.)
In a food processor, blend the nuts until they’ve turned to butter.
Add all other ingredients and blend a long time until smooth.
Keep refrigerated.

Sunday, 13 October 2013

Caramel Tarts

Posted by Lisa at 02:51 0 comments

Sometimes I try to do nice things for my husband. This is one of them.

Whilst I am not an ogre, I don't allow certain foods or drinks in the house. Its too confusing for the kids if other people are allowed to have things that they are not (eg. soft drinks). Instead, I attempt to create healthier substitutes so no one feels that they are missing out. 

Instead of soft drinks we make fruit flavored soda streams.
Instead of lollies we eat raspberries and blueberries. 

Dessert is still an important part of our day (especially when you have it for breakfast!) and whilst there are few desserts that you could call 'healthy' I like to think we can create a 'healthier version' of the original. Like everything, It's about moderation and balance (that doesn't mean eating cake on 1 leg!).


These Caramel Tarts are an old favourite of my husband... and I will allow him to eat these ones!

In order to ensure the shape I have kept the muffin tray in place through out the process, but it can be done by removing the cups once they are cooled. 

INGREDIENTS
1 serve caramel
100 grams chocolate

INSTRUCTIONS

Preheat oven to 175C/350F
Grease a muffin tray and place a biscuit on top of each hole
When oven is at temperature, place tray in the oven for 2-3 minutes.
Remove the muffin tray.
The biscuits will have softened.
Gently mold each softened biscuit into the muffin hole, forming a cup.
Allow to cool.

When biscuit cups are cool, loosen them in the muffin moulds to ensue that they can be removed easily. It is easier to assemble the tarts if the cups remain in the muffin tray.
Spoon runny caramel (the caramel may need to be gently warmed to loosen it) into each cup.
Refrigerate for 30 minutes.

Melt chocolate in a heat proof bowl over a saucepan of simmering water (double boiler technique).
Once melted, remove from heat and allow to thicken and cool slightly. The chocolate should still be runny but not hot.
Spoon chocolate on top of the caramel, smoothing and spreading if required.
Refrigerate for At least 30 minutes.

Remove caramel tarts from muffin tray and serve.
Keep refrigerated. 

Wednesday, 9 October 2013

Banana Cream Pie

Posted by Lisa at 03:54 0 comments

This week we reached a new milestone in our house. Yesterday I found S, my 20 month old son, on the trampoline. That sounds like fun doesn't it? ...except he climbed up all by himself.

Later that night I heard S yelling for me from his room. I thought he wanted to play hide and seek... but no. He had climbed onto his change table and wanted me to get him down. I guess I should be glad that he didn't try to get down himself.

Today... today my cheeky little boy decided to try and use the kitchen drawer handles to climb onto the kitchen bench. 

Our new milestone this week (the 'I have no fear climbing phase') means that next time I can't find my little climbing monkey I should perhaps check the top of the lemon tree. 

Just like the hairy monkeys from the zoo, my little monkey loves bananas too; but what can you do with a bowl full of way too ripe bananas (when you don't want another loaf of banana bread)?

This Banana Cream Pie is based on this recipe from Life is Great. The banana cream is a smooth, soft custard pie filling that would be just as well suited to a bowl and a giant spoon as it is to the chocolate pie crust. 

Oh... did I mention it's gluten, dairy and sugar free?!?!


BANANA CREAM PIE
Adapted from Life is Great
Serves 16; approximately 163 calories per slice

INGREDIENTS

CHOCOLATE PIE CRUST
(adapted from Against all Grain)
1/4 cup almond flour
1/2 cup coconut flour (available from health food and specialty stores)
2 tablespoons unsweetened cocoa
1/4 teaspoon salt
1/4 teaspoon baking soda
1/4 cup coconut oil, softened
1/4 cup maple syrup (you could substitute honey etc)
1 egg
1 teaspoon vanilla

BANANA CREAM
2 very very ripe bananas
1/3 cup coconut cream (taken from the top of a can that's been in the fridge overnight)
1/4 cup milk (almond, coconut etc)
1/3 cup maple syrup
2 Tablespoons arrowroot
1/2 teaspoon salt
3 egg yolks
2 1/2 teaspoons gelatin
3 tablespoons coconut oil, melted
3/4 cup whipped coconut cream- measure after whipping (see recipe below)
1 ripe banana, sliced

INSTRUCTIONS

CHOCOLATE PIE CRUST

Preheat the oven to 175C (350F).
Grease/Spray an 20cm (8 inch) springform cake tin or pie dish.
Mix the dry ingredients in a mixer.
In a separate small bowl, whisk together the wet ingredients.
Pour the wet ingredients into the dry, and blend until combined.
Form a ball with the mixture, wrap it in plastic and place in the fridge for 20 minutes.
Place the mixture ball between 2 sheets of plastic/baking paper and roll until thin.
Using the base of a larger cake tin, cut out a circle and place in greased springform tin.
Trim the edges of the tart to make a nice clean edge.
Place the tin in the fridge for 10 minutes before baking for 13-15 minutes.
Remove from the oven and allow to cool completely.

BANANA CREAM

Combine the very, very ripe bananas, coconut cream and milk in a blender and puree until totally smooth.
Add in the maple syrup, arrowroot, salt and egg yolks. Blend until no banana lumps remain.
Pour the mixture into a medium saucepan.
Before heating the banana mixture, evenly sprinkle the gelatin over 1/4 cup cold water. Allow it set for 4 minutes
Whisk the banana mixture in the saucepan over medium-low heat.
Continue to whisk and stir as the mixture will thicken and has a tendency to stick to the bottom of the pan.
Bring to a boil and continue to whisk vigorously for 3-4 minutes.
The mixture will be quite thick.
Pour the thickened banana mixture in a blender (make sure you have cleaned it from earlier use) and add the gelatin mixture and melted coconut oil.
Blend until smooth.
Transfer the mixture to a heatproof container and leave in the fridge for at least 1 hour.

CONSTRUCTION
Remove the banana cream from the fridge and place in a bowl of a stand mixer with a whisk attachment.
Add the whipped coconut cream and whisk on low until combined, and no cream streaks remain.
Pour 1/2 the mixture in the cooled pie crust then place the sliced banana evenly around the pie.
Cover with rest of the mixture.
Optional, drizzle Chocolate over the top of the pie.
Allow pie to set in the fridge overnight.
Keep refrigerated.

COCONUT WHIPPED CREAM
INGREDIENTS

3/4 cup Coconut cream (see above notes on types of coconut creams), opened and in fridge for min 5 hours
1 teaspoons maple syrup
1 teaspoons vanilla extract

INSTRUCTIONS
Scoop the thickened cream from the tin, discarding the watery liquid at the bottom.
Place cream in mixing bowl and beat using whisk attachment.
Add maple syrup and vanilla to taste and continue whisking until thick.
Keep refrigerated.


Monday, 7 October 2013

Choc-Caramel Bites

Posted by Lisa at 02:42 0 comments

When I was little we would spend our holidays visiting my Grandparents. This meant Grandmas sponges for afternoon tea, playing 'crocodile' in the front yard with the neighboring kids and going to church on a Sunday.
Church with the grandparents was where I taught my younger cousins to poke out their tounges and developed knowledge of bribery. If we were well behaved Grandad would stop off at the shops on the way home and get us a chocolate frog or caremello koala. This was well worth the badly sung hymns!

Whilst not snapped Iike a koala, these Choc-caramel bites do taste like them. A Crisp Chocolate shell with a gooey caramel centre... so decadent! There's no reason you couldnt do these in shaped chocolate or Easter egg moulds; the process would simply be different.

CHOC-CARAMEL BITES

INGREDIENTS
Caramel 
1 can coconut cream
1/2 cup Maple Syrup 
dash of salt
2 teaspoons Vanilla Extract

Chocolate
1/4 Cup Coconut Oil
1/4 Cup Cocoa
1 Tablespoon Maple Syrup

INSTRUCTIONS
Caramel 
Pour coconut cream into a heavy based saucepan. Add maple syrup and salt.
Bring mixture to the boil over a medium/high heat.
When bubbling, reduce to a medium heat and simmer for approximatly 25 minutes.
Whisk very regularly.
Add the vanilla and whisk in.
The caramel will turn a dark golden.
Place caramel in fridge over night (or freezer for a shorter duration) to allow it to thicken (not required when using shaped chocolate moulds)

Chocolate
Place Coconut oil in a heavy based saucepan and melt over a very low heat.
Add the maple syrup and whisk til combined,
Add the cocoa and whisk til combined.
Pour into a lined tray/container and freeze until set (at least 1 hour).

CONSTRUCTION
Bites
Melt Chocolate in a heat proof bowl over a pot of simmering water (double boiler technique).
Allow Chcoclate to cool slightly (but not set).
Take 1-2 teaspoons of thickened,cold caramel and roll into a small ball.
Drop ball into melted chocolate and stir to coat.
Place ball on baking paper and set in freezer.
(if you like thick chocolate around your caramel then dip again once first layer is set).
Keep cold until serving.

Shapes 
Using chocolate moulds, silicone shapes etc coat the moulds with melted chocolate (using double boile technique) and freeze til set. Fill set mould with runny (but not hot) caramel (the caramel nay need to be plad over a low heat to thinnit out) and freeze again. Once caramel has set either coat the caramel with Chcoclate or join 2 moulds together using melted chocolate to create a 3D shape (eg Easter egg).

Wednesday, 2 October 2013

Honey, Orange and Pistachio Cake

Posted by Lisa at 04:07 0 comments

I think I might start the Chickpea Appreciation Society.  There are groups that honor all types of odd things; orchids, shitzus, Spock. So why not Chickpeas?

I have been a bit obsessed about the humble legume of late. They are full of fibre, low in calories and cheap; and I LOVE weirding people out by using them in the most unusual of ways. But beware, when you have a diet high in chickpeas and Brussels sprouts it's a recipe for a very stinky household!

This is a cake I made for the lovely Judy. Judy is like a mother hen; she's always looking out for people, taking care of them and making sure they know they're special. It was Judys birthday, so I wanted to make her a cake to let her know we all think she's pretty special too.

This is a moist, tasty cake that would be ideal for an afternoon tea with a cuppa and a big bowl of coconut whipped cream... and no will ever know that it came from the Chickpea Appreciation Society. 

HONEY, ORANGE AND PISTACHIO CAKE

INGREDIENTS
110grams chickpeas; canned, drainedm rinsed and patted dried
1/2 cup Coconut Flour
3/4 cup Almond meal
3 teaspoons baking powder
3 eggs, seperated
1/2 cup Honey
1/2 cup Orange Juice, freshly squeezed
Zest of 1 Orange
1 cup milk (almond, coconut etc)
1/3 Cup pistachios, chopped
Extra honey for drizzling.

INSTRUCTIONS
Preheat oven to 175C/350F.
Line and grease a 20cm/8inch cake tin.
Combine chickpeas, coconut flour, almond meal and baking powder in a blender and blend until fine (the chickpeas will be broken down).
In a mixing bowl of a stand mixer with a whisk attachment fitted, whisk the egg whites on medium/high until peaks form.
Turn mixer off and add honey and zest and whisk on high again.
With mixer on high, add egg yolks 1 at a time. 
Add dry ingredients and remaining wet (milk and orange juice) alternatively in 3 lots with mixer on low. 
Beat on high for 30 seconds.
Pout cake mixture in prepared cake tin.
Sprinkle the top evenly with pistachios.
Bake for 40 min, or until cooked through.
Rest in tin before removing.
Can be served warm or cold and with whipped coconut cream.
Drizzle cake with honey before serving.


Wednesday, 25 September 2013

Chocolate Cupcakes with Peanut Butter Cookie Dough Frosting

Posted by Lisa at 02:46 0 comments


When I was 8 years old my best friend was a girl named Andrea. We made up our own language and would eat egg shells because we thought it would make us smarter (she is a lawyer, or magistrate now so I guess it worked!). I remember crying my eyes out when she moved to Sydney, and even watched the sky to try and see her plane fly by.

When I was 11 years old my best friend was Annaliese. I would spend ages crimping my hair before going to her house for a swim... which would render my efforts flat! Her brother built a spy trap to put on his door so we couldn't sneak in.

Nearly 4 year old H recently told me that he was my best friend. It was a beautiful mothering moment... until he told me that his best friends were Harrison, Henry and Archer; not me! Thankfully I'll always have coconut whipped cream.

I like to think peanut butter and chocolate are best friends. Sometimes they get together over a slice of bread, other times they get stuck in(to) a muffin. They simply belong together. 

What happens when best friends chocolate and peanut butter meet chickpeas? It would be like the cool kids at high school coming across a nerdy foureyed geek. At first sight they are complete opposites but, in classic coming-of-age-teen-movie style, the geek turns out to be the pretty girl/basketball hero/awesome break dancer. 

Chickpeas can be friends with choclate and peanut butter! 

I came accross this recipe from Texanerin via Facebook. I was skeptical but thought it was worth a go. The results... AMAZING! My kids love these cookies. The chickpeas blend up into a creamy cookie base reminiscent of creamed butter and sugar. The recipe is dairy, gluten and sugar free; so it's a healthy cookie then?

Once I discovered the versatile Chickpea my mind went into overdrive, with the genius moment happening last night in a sleep deprived state. I was determined to be able to make a peanut butter frosting that had the same consistency as the one I used to make that contained cream cheese, butter AND icing sugar (is anyone else thinking diabetic coma?!) and tasted fluffy and delisious. The results; peanut butter cookie dough frosting! My finest kitchen moment EVER!

This recipe contains a lot of chickpeas but don't be scared because you can't tell! Chickpeas are cheap, low in calories and I am finding no end to their uses! They really are the magical bean that Jack once had. 

CHOCOLATE CUPCAKES WITH PEANUT BUTTER COOKIE DOUGH FROSTING
Makes 6 frosted cupcakes

Chocolate Cupcakes
INGREDIENTS
100ml boiling water
1/3 cup Cocoa
25 grams (packed tablespoon) of dates
15ml (3 teaspoons) boiling water
2 eggs, seperated
1/4 cup Maple Syrup
1 teaspoon Vanilla Extract
65 grams canned chickpeas (drained, rinsed)
1/4 cup (32 grams) Coconut Flour
2 teaspoons baking powder

INSTRUCTIONS
Preheat oven to 175C/350F
Combine Cocoa and boiling water in a bowl. Stir and allow to rest.
Combine Dates and boiling water in a bowl. Allow to soften.
Once softened (10-20 minutes) place date/water mixture into blender and blend until dates have been broken down (alternatively use a fork).
Place egg whites into a bowl of a stand mixer with a whisk attachment.
Whisk egg whites on high until medium peaks form.
Add maple syrup 1 spoonful at a time whilst still on high.
Add vanilla essence and puree dates whilst still whisking.
Add egg yolks one at a time and mix on medium/high until combined.
Meanwhile, combine chickpeas, coconut flour and baking powder in a blender and blend until the chickpeas have broken down and are mixed with the coconut flour.
Fold dry ingredients into the egg mixture. Add cocoa mixture, and continue to fold gently until combined.
Divide mixture into 6 greased cupcake liners.
Bake for 20-22 minutes, or until inserted skewer is clean.
Remove from oven and allow to cool completely before frosting.

Peanut Butter Cookie Dough Frosting
INGREDIENTS
2/3 cup Chickpeas
1/3 cup Peanut Butter
40ml Maple Syrup
1 teaspoon Vanilla Extract
1 Tablespoon Coconut Whipped Cream (or just plain Coconut Cream)

INSTRUCTIONS
Place the chickpeas, peanut butter, maple syrup and vanilla extract in a blender and blend for 1-2minutes, or until the chickpeas have broken down and the mixture combined. 
Transfer the mixture to the bowl of a kitchen stand fitted with a whisk attachment. Add whipped coconut cream and whisk until fluffy.
If your frosting mixture is too thick to pipe with, add another 1/2-1 tablespoon of coconut cream until the right consistency is reached.
Pipe/spread onto cupcakes...or simply consume by the spoonful!.


Mummy Made It Copyright © 2010 Designed by Ipietoon Blogger Template Sponsored by Emocutez