This week my little big boy, H, started Kindergarten.
I know he is ready; his excited, enthusiastic and has been driving me up the wall these holidays, but that doesn’t stop me feeling like someone has ripped out a piece of my heart.
For the past 4 and bit years I have been his primary source of care, knowledge and love. My days have been consumed by caring for, playing with and nurturing H and 2 year old S. Now some of that has been taken away from me; and I feel like I have lost a part of myself. I have cried myself to sleep, eaten a lot of Chocolate Mousse with Whipped Coconut Cream and even wore my sexiest skirt to cheer myself up today; but still I miss my little boy, even though he’s sleeping in the next room.
It’s the beginning of the ends; the end of free time playing at home, of lunch time chats about his imaginary friends Anker and Ridgey Didge (I’m not lying; he made up those names!), of watching S following H around the house mimicking his every move and sound, and of incessant questions about life (although I’m sure he’ll store them up for when he gets home!). It’s the end to the time of his life when he thinks that I am the “most best mummy ever”, and when my relevance starts to change in his ever growing world.
I know it’s also the beginning; of new friends, of wild adventures and excursions, of growing character and independence, and of new memories. It’s the start of his next journey when he grows into a clever and cheeky, imaginative little man.
I will miss him dearly.
It’s also the beginning of a new period for 2 year old S and I. We have been a threesome in our daily outings and home life since he was born and now it will be just he and I. If his latest escapades are anything to go by the next 2 years before he leaves me for Kindergarten may be handful; but they will also be a wonderful opportunity to explore his love of music, his sudden interest in drawing on the carpet and to nurture his personality away from his big brother.
Even though I feel like less of a mother because H is growing up and moving on deep down I know (hope) that he (and S) will always need me. Whilst it may no longer be to change their nappies or feed them their lunches, it will be in the form of unconditional love and support; not to mention the taxi service to different school and sporting activities, play dates and parties.
Regardless of whether you are with your child for 24 hours or 1 hour a day; you are still, and will always be, their mother. And no one loves their child like a mother does.
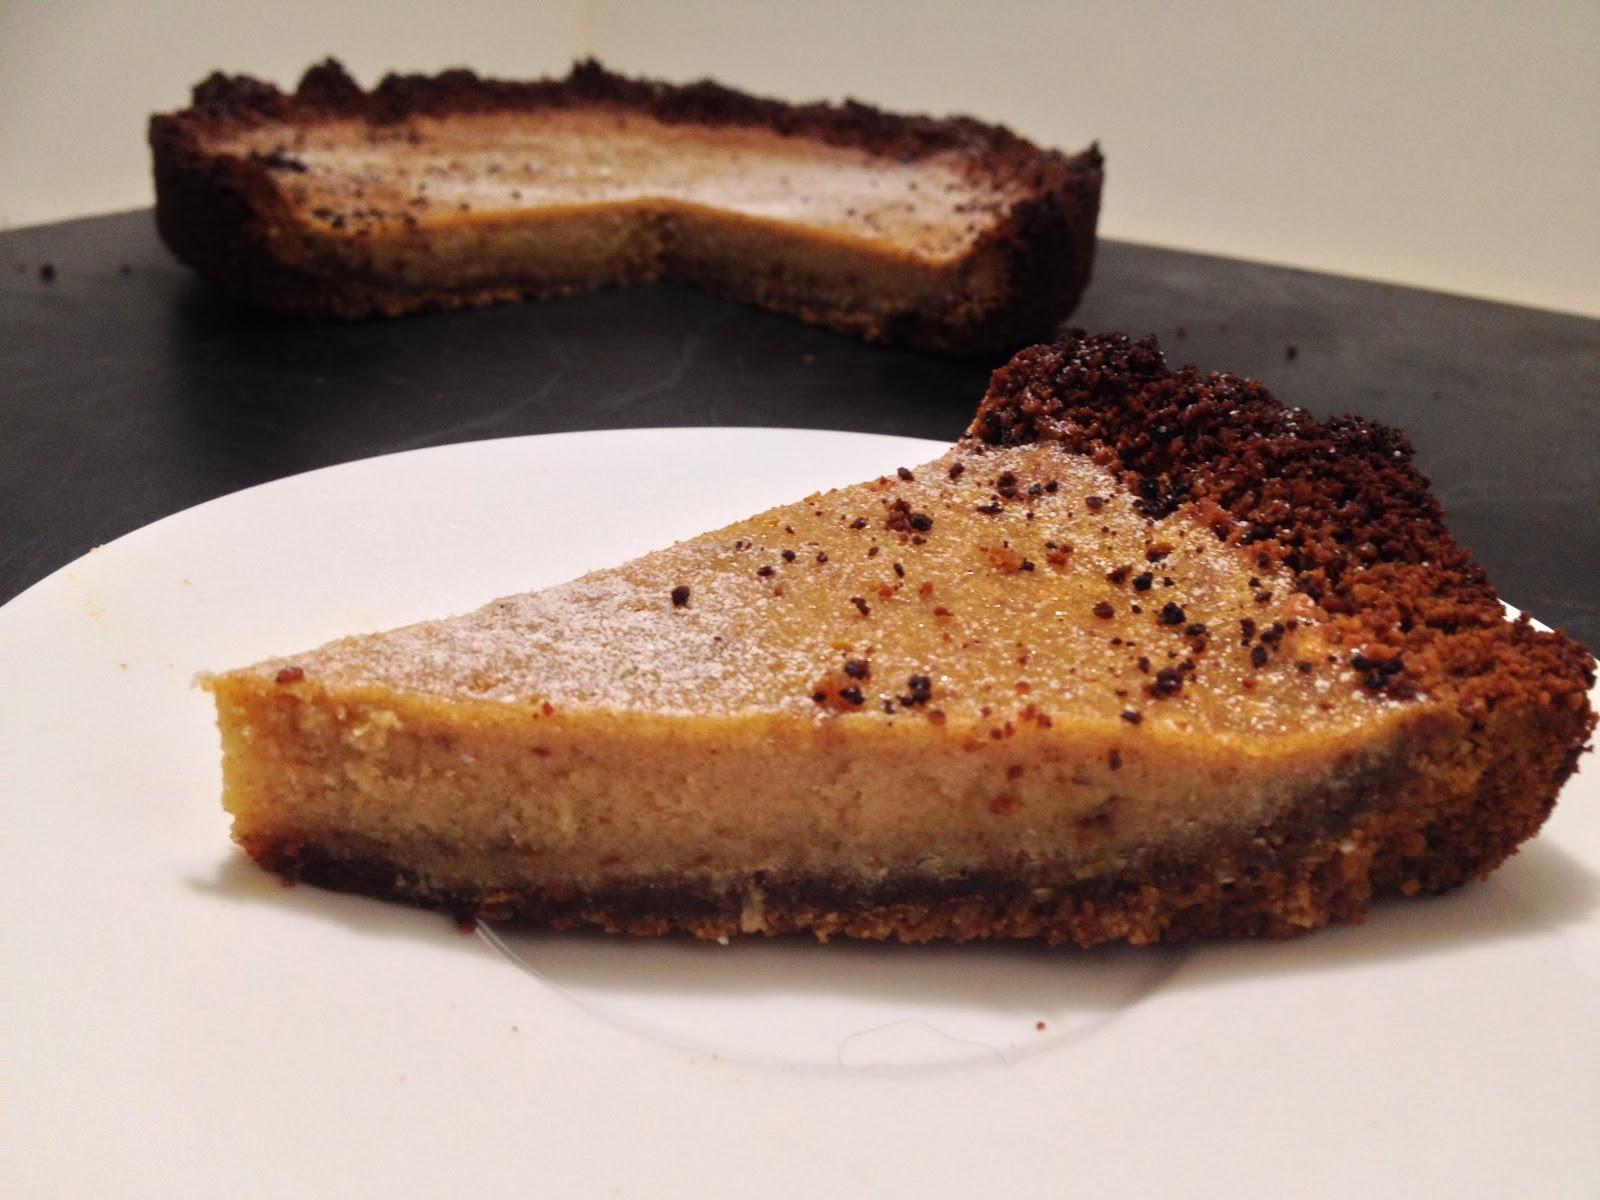
This Pie probably would have helped me out this week. Mumofukos Crack Pie is infamous; however I’ve never tried it. There’s the distance factor (NYC to regional Australia is a bit far for pie) as well as the gluten/sugar issues. This version, however, is one that can mend a dietary restricted broken heart. As I haven’t tasted the original I cannot vouch for its authenticity, however I can vouch for its awesomeness. So can my husband, who ate a considerable about of Crack pie.
Word of warning; following the recipe closely. Especially for the pie filling and cooking the pie. Ensure it is frozen for the recommended time period and serve cold. Don’t even let it sit on the bench for 10 minutes before eating; it changes the texture. Eat it straight out of the fridge; quite literally stand at the door with a spoon in the pie dish and eat it. It’s THAT GOOD!
CRACK PIE (Gluten, Dairy, Processed Sugar Free)
(Inspired and adapted from Momofuko)
Makes 16 pieces of pie
BUTTERNUT SNAP PIE CRUST
Makes 1 base for a 20cm/8inch tin
INGREDIENTS
2 tablespoons coconut oil
1/2 cup Maple Syrup
1 egg
1/2 teaspoon vanilla extract
2 tablespoons golden syrup
Pinch of salt
1/2 teaspoon cream of tartar
1 teaspoon bicarb soda
1 1/2 cups Almond Meal
1 cup desiccated, unsweetened coconut
3 tablespoons arrowroot (tapioca) flour
1 tablespoon milk (Coconut, almond etc)
1/4 cup melted Coconut Oil
INSTRUCTIONS
Preheat oven to 175C/350F.
Line and grease a large baking tray.
Combine all the wet ingredients (except the milk) in a blender and mix until combined.
Add the dry ingredients and blend until combined. Add the milk and pulse in.
Spread the cookie dough evenly in the tray.
Bake in oven for 15 minutes
Take the tray out of the oven and break up the biscuits using a fork (it will be more cakey than biscuity at this stage).
Place the tray back in the oven for 5 minutes, or until the biscuit mixture is cooked through.
Cool on the tray.
When biscuits have cooled place them in a blender.
Process them until the biscuits are just broken. You will only need ¾ of the crumbs for this crust, so put the rest aside (and eat them !)
Add the coconut oil and process again until fine crumbs are formed and the oil has ‘binded’ the biscuits.
Press crumbs into a lined and greased 20cm/8inch spring form cake tin (a pie dish can also be used).
The biscuit base will need to extend up the walls of the tin but only for a small height.
Use base immediately or refrigerate if not using til later.(the base will need to be at room temperature when filled)
CRACK PIE FILLING
INGREDIENTS
½ cup Maple Syrup
1/3 cup + 1 Tablespoon Dates
40ml boiling water
4 teaspoons Coconut Milk Powder
4 teaspoons Arrowroot
Dash Salt
3 Tablespoons Coconut Oil, melted
1/3 + 1 Tablespoon Coconut Cream (the thick cream spooned form an opened can of Coconut Cream left in the fridge overnight)
1 teaspoon vanilla extract
4 Egg Yolks
INSTRUCTIONS
Place the dates in a small bowl and cover with the boiling water.
Allow to sit and soften for at least 20 minutes.
Add the dates and maple syrup to a blender and process until pureed.
In a separate bowl sift the coconut milk, arrowroot and salt.
Transfer the pureed mixture to the bowl of a kitchen stand mixer with a paddle attachment. Add the sifted dry ingredients and mix on low speed until evenly blended.
Add the melted coconut oil and beat on low for 2 to 3 minutes until all the dry ingredients are moist.
Add the Coconut Cream and vanilla extract and continue mixing on low for 2 to 3 minutes until any white streaks from the cream have completely disap¬peared into the mixture. Scrape down the sides of the bowl with a spatula.
Add the egg yolks, paddling them into the mixture on low until just combined; be careful not to aerate the mixture, but be certain the mixture is glossy and well blended. Mix on low speed until it is.
Use the filling immediately or if not using the filling straight away store it in an airtight container in the fridge.
CONSTRUCTION
(This is the exact process used by Momofukos- no need to mess with perfection!)
Preheat the oven to 175C/350°f. (it should already be at this temperature if making all the elements at the onetime)
Pour the Crack Pie Filling into the Butternut Snap Pie Crust; the filling should fill 3/4 of the way up the side of the crust.
Bake for 15 minutes only. The pies should be golden brown on top but will still be very jiggly.
Open the oven door and reduce the oven temperature to 160C/325°f.
Depending on your oven, it may take 5 minutes or longer for the oven to cool to the new temperature. keep the pies in the oven during this process. When the oven reaches 165C/325°f, close the door and bake the pies for 5 minutes longer. The pies should still be jiggly in center but not around the outer edges. If the filling is still too jiggly, leave the pies in the oven for an additional 5 minutes or so (check after 3 minutes then recheck at 5 minutes)
Take the Pie out of the oven and transfer to a rack to cool to room temperature.
Once cooled, freeze your pies for at least 3 hours, or overnight, to condense the filling for a dense final product. THIS IS ESSENTIAL!
If not serving the pies right away, cover in plastic wrap and keep in the fridge,
Transfer the pie from the freezer to the refrigerator to defrost a minimum of1 hour before serving.
The pies need to be served from the fridge NOT at room temperature.
Serve the Crack Pie cold. Sift Coconut flour over the top for decoration.
This is quite a sweet, dense pie. Serve with Whipped Coconut Cream if required.


1 comments :
Wow - I am so impressed you have Paleofied this recipe! My husband I fell in love with it NYC but following a Paleo lifestyle, meant that like our holiday, it was just a blue moon treat! Thanks for adapting it and I can't wait to make it.
Kat
Post a Comment
All Comments are reviewed by a Moderator before publishing.